

Introduction: Batman Cowl From Craft Foam


Who doesn't want to be the Dark Knight for Halloween?! This craft foam project is an easy way to create a flexible and wearable cowl for next to nothing.
You can either download the files to laser cut or print, trace and cut your own cardboard or other ~1/4'' material.
Materials needed:
- PDF file linked above. 18" x24" (use acrobat to print it to multiple sheets if you are using a smaller printer)
- Two 18" x 24" craft foam sheets (if using the files linked above)
- hot glue
- Scissors or a xacto knife
- Safty Glasses- ALWAYS with any cutting tools
- Gloves to keep it neat
Finishing materials
- Black roofing silicone
- Black Plasti-Dip spray

Step 1: Begin Gluing the Pieces of the Head


Work slowly, glue, cool, glue cool. Press the prongs of the head pieces togther and glue along the back (inside) of the cowl.
By glueing from the base of the prongs and working towards the ends, gluing an inch or two at a time, you will avoid seeping hot glue though to the top. Craft foam is not very forgiving if you need to re-heat and remove glue.
If you're unsure about how a part fits together, trace and cut a practice part first and assemble with tape so that you understand exactly how the part bends and fits together.
Step 2: Attach the Front and Back of the Head


Once you have glued the front and back prongs, attach these two pieces to form the primary shape of the dome/ top of the head.
Be sure to line the parts up precisely as you hold them together while they cool.
Step 3: Attach the Sides and Chin

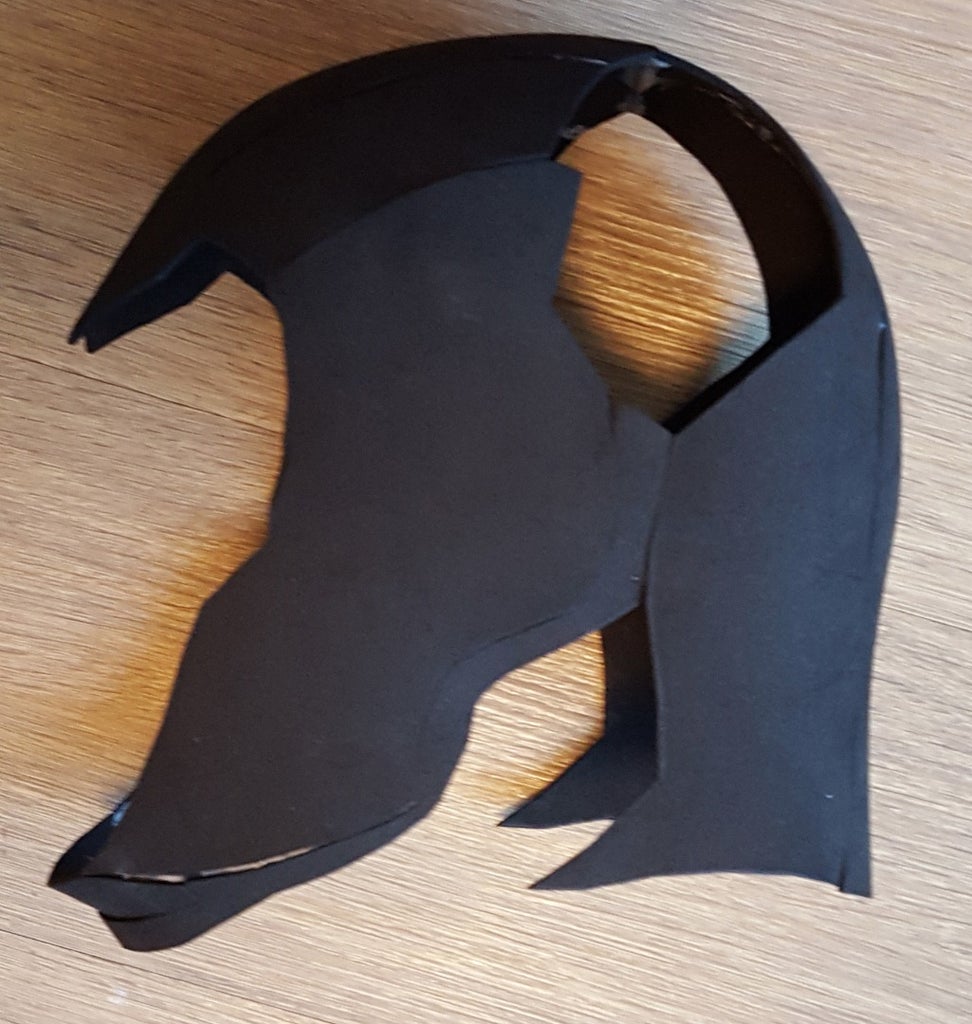
Find the seams that match the sides with the top of the head. Look closely at the image and the parts themselves, as the pieces should fit pretty exactly here. Glue one side to the helmet and then work around to the other. In the first image you can see that I originally experimented with separate side/ chin, but later decided to create one continuous piece. Much easier to glue.
Close up the slits between the chin and sides creating a little undercut curve as you do. Attach the missing chin piece and glue it from behind/ inside. Make sure you use the one that fits exactly. There is a similarly shaped piece (but longer and pointy on the ends) that is used for the neck, so don't glue the wrong part.
I noticed a bit of natural curl in the laser cut parts, so I sorted the sides of the cowl so that they curve inward. If this does not occur naturally, curl the foam around a baseball bat or broomstick for a few minutes to help with the shape.
You can also use heat with craft foam and it will retain any shape you mold it into as it cools. You shouldn't need to do that here, though, and use heat sparingly.
Step 4: Build the Ears


Glue the three triangular pieces into a pyramid as shown in the first image (a bit blurry, but you can see what's going on here)
Then attach the ears to the head, again gluing inside the helmet. I left a few gaps when I assembled this one, and I plan to fill them with black silicone just before painting in the finishing stage. This allows a little less time spent precision gluing and a faster overall build.
Step 5: Glue the Neck and Lower Cowl


Glue the three triangular pieces of the neck. I overlapped these pieces just slightly to give a bit of dimension to the cowl, but I'll lose some length in the neck/ fit. Again, trace and tape up paper or cardboard templates if you want to see how these will fit together before ruining your nicely cut craft foam.
Glue the prongs of the lower cowl as seen in the pictures. (Notice that I've included top and bottom photos for many of these so that you can see what the finished seams should look like if you keep all of the glue on the inside.
Fold the cowl as shown in the final image around the trapezius muscles so that it os shaped and ready to fit up with the head.
Step 6: Glue the Eyes and Nose


Ok, last part, and by far the most difficult. But after this, you're done!
Remember the techniques you've practiced so far: Go slow, glue inside, trace and tape templates to practice, and look closely at the pictures.
The nose goes together pretty clearly. Don't fold and glue it at a 90 degree angle, rather create a bit wider, obtuse angle.
Create a similar angle when gluing the outer edge of the eye sockets together. The inside of the eyes (closest to the nose) are meant to be scrunched up a bit and create a furrowed, mysterious, abandonment issues expression.
Pinch the slits in the brow to really drive home this look and glue it to the top of the eye sockets. I worked from right to left as I like to start with the obviously matching sides/ angles, but next time I might try starting in the middle as this was the most difficult to get right.
Step 7: Glue the Eyes Into the Cowl and You're Done!


Sweet! Try it on, and tell someone "I'M BATMAN!"
To finish the cowl, I plan to add a bit of black silicone into the seams and then spray the cowl with black plasti-dip. However, this MUST be done at the same time. If you wait for the silicone to dry, nothing will stick to it, so you must spray paint immediately while the silicone is still drying.
If you purchased one of my Etsy kits, i'd love to get your feedback on the kit, part design and this instructable. I'm constantly revising, so let me know what you think.

Participated in the
Halloween Costume Contest 2015


