

Introduction: Bride of Frankenstein Emerging From Grave


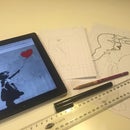

I've been a huge fan of Christine McConnell for a while now and when I saw this contest advertised on Facebook I couldn't wait to get started.
I knew right away that I wanted to try making a 3D cake (another first!) and after doing a bit of 'Halloween' research, had my heart set on making a 3D Bride of Frankenstein emerging from the grave, and to make sure it was extra challenging I decided to give her an eyeball hanging out of the socket.
After lots of research on Google and Youtube on structure, method, and best types of cakes for 3D, I settled on an altered packet mix for the cake, PVC pipe for the dowels, fondant for the skin and facial features and buttercream for the hair.
There are a lot of steps in this project but if you have the time it's really very easy and extremely rewarding at the end!!!
Step 1: Cake Board and Dowels


Because this is quite a high 3D cake, on an angle, I wanted to make sure it would be structurally sound when stacked. After doing some research I decided to make my own cake board and dowel structure. I found all of the below tools from my local hardware store and there are some great instructional videos on Youtube.
TOOLS
- 400 x 400mm MDF board (make sure you choose a size that will fit in your fridge/freezer)
- 600mm length of PVC pipe
- 1 x plastic elbow
- 1 x flange
- 4 x screws
- Silicone gap filler
- Baking (parchment) paper
- Masking tape
- Hacksaw
- Electric drill
- Scissors
METHOD
- Wash PVC pipe, plastic elbow, and flange in hot soapy water rinse and leave to dry completely.
- Use hacksaw to cut PVC pipe in half so that you have 2 x 300mm lengths.
- Secure flange to the center of MDF board with 2 x screws (my flange came with 2 x screws that fit).
- Place 1 piece of PVC pipe into the center of the flange and use silicone to fill the gap between pipe and flange.
- Drill 1 screw into each side of the pipe at a downwards angle so that the screw goes through the pipe and into the MDF board.
- Cut two 600mm lengths of baking paper and cut a small round hole in the center of each.
- Place the first piece of baking paper over the PVC pipe until flat against board, secure the overhang to the underside of the board using masking tape so that it covers each side of the board.
- Place the second piece of baking paper over the PVC pipe until flat against board, secure the overhand to the underside of the board using masking tape so that it covers the top and bottom sides of the board.
- Keep the second piece of PVC pipe and the elbow to one side, you will trim to your required size and attach this when you start stacking the cakes.
Step 2: Red Velvet Cakes

After doing LOTS of research on-line about the best type of cake to use for 3D sculpting, I settled on this recipe from CakeCentral.com. Please note that the quantities listed below make one cake, increase the quantities to make as many cakes as you need for your project, I used six round 20cm cakes for this project.
INGREDIENTS
- 1 x Duncan Hines Red Velvet cake mix
- 4 egg whites
- 1/2 cup water
- 1/3 cup vegetable oil
- 1 x small pack instant vanilla pudding mix
- 1 cup sour cream
TOOLS
- Stand mixer
- Round cake pans (for this project I needed 6 cakes and used 6 x 20cm round tins)
- Cake cooling rack
- Plastic wrap
METHOD
- Preheat oven to 175C.
- Incorporate all ingredients together one by one in the stand mixer on low speed, making sure each ingredient combined before adding next.
- Once all ingredients are incorporated, increase speed of mixer to medium and mix for approximately 2 minutes.
- Bake for 30 - 35 minutes.
- Allow cakes to cool in pan for 10 minutes then transfer to cake cooling rack to cool completely.
- Wrap cakes well and refrigerate or freeze until needed.
Step 3: Swiss Meringue Buttercream Crumb Coat & Hair

INGREDIENTS
- 2 1/2 cups castor sugar
- 10 large egg whites
- 900g unsalted butter cut into pieces at room temperature
- Black food colouring
TOOLS
- Stand mixer
- Large heat proof glass bowl
- Whisk
- Medium saucepan
NOTE
- You will split this batch of swiss meringue buttercream in two. You will use one-half of the buttercream between the cake layers and crumb coat and then colour one-half to use for the hair.
METHOD
- Place sugar and egg whites into a large heatproof glass bowl.
- Sit the glass bowl over the saucepan of gently simmering water.
- Whisk until sugar has dissolved and egg whites are quite hot to touch.
- Transfer mixture into the bowl (large) of a stand mixer and use the whisk attachment, beat on high until mixture has cooled completely and formed stiff glossy peaks (up to 10 mins).
- Add the butter, one piece at a time and beat until incorporated before adding next piece. If the buttercream should separate, keep beating and it will eventually come back together.
- Split the mixture in half.
- Use one-half of the mixture between the cake layers and crumb coat.
- Working with the second half of the mixture, place a small amount of buttercream into a bowl, mix a very small amount of black into this amount of buttercream to make it grey.
- You will need to use a large amount of the black food colouring to colour the remainder of buttercream as dark as you can make it.
Step 4: Stacking Cakes and Carving Basic Shape

INGREDIENTS
- Prepared red velvet cakes
- Prepared swiss meringue buttercream frosting
TOOLS
- Prepared cake board and dowels and elbow
- Small sharp knife
- Large serrated knife
- Medium serrated knife
- Plastic wrap
- Melon baller
METHOD - DAY 1
- Insert first cake onto the dowel and gently lower onto the cake board.
- Spread a 1.5cm layer of swiss meringue buttercream frosting on the top of the first cake.
- Repeat with remaining cakes until you reach the point of joining the elbow to the dowel.
- Attach plastic elbow to the top of the first dowel and position according to the required tilt of the head.
- Attach the second piece of dowel to the elbow and adjust to the required tilt of the head and hair.
- Continue layering cakes and frosting until all cakes added to the dowel.
- Wrap entire cake well and place in the fridge overnight.
METHOD - DAY 2
- Remove cakes from the fridge and set down on a steady surface with enough room to move easily around the cakes
- Starting at the top of the cake, use the large serrated knife to remove small slices of the cake at a time. Carve the required shape for the hair.
- Continue carving, removing small slices from the cakes to form the basic shape of the face including the brow, nose, eye sockets and mouth.
- Use the melon baller to remove cake to form the eye sockets and cavity of the mouth.
- Roll a sausage shape with fondant long enough to fit the diameter of the mouth and gently press the length of fondant around the cavity of the mouth. Shape to form the lips. This will be covered by the 'skin' in the next step.
- Continue carving to form the shape of the neck and shoulders.
- Using the swiss meringue buttercream frosting, crumb coat the entire cake and return to the fridge for at least 30 minutes.
Step 5: Fondant Face & Buttercream Hair


INGREDIENTS
- White fondant
- Food colouring (I used ivory, red, blue and purple)
- Vodka
- Edible glue
TOOLS
- Modelling tools
- Small sharp knife
- Paint brushes
- Small plates to mix colours
- Glass with water to rinse brushes
- Florist wire
METHOD
Remove cakes from the refrigerator and place on a steady surface with room to move around the cake.
Food colouring 'paint'
Prepare food colouring 'paint' by adding a small amount of vodka to a ceramic dish and then add the required food colour, continue adding a little food colour at a time until you achieve the required intensity.
Skin
Roll out a large piece of fondant (approx 3mm thick) and apply to the front of the face. Gently press fondant to fit into eyeball sockets and over the nose and lips/mouth. Roll out additional pieces of fondant to cover sides of face and shoulders. The pieces of 'skin' fondant don't have to be joined perfectly because they will act as the areas that Frankensteins Bride has been pieced together. Paint each of the joins with a deep red food colouring and use black food colouring to add 'stitches'. Once the 'skin' has been applied, paint all over with ivory food colouring.
Eye (in socket)
Roll a ball of fondant (approximately the size of a ping-pong ball) to fit in the eye socket. Gently press the 'eyeball' to form an oval shape, using a small paint brush apply a small amount of edible glue and attach the eye pressing gently to ensure it sticks. Using a small paint brush, paint the iris and pupil and paint small 'veins' to make the eye look like it's bloodshot.
Eye hanging from socket
Roll a ball of fondant (approximately the size of a ping-pong ball). Make a small hook shape at one end of the florist wire and gently insert into the ball of fondant. Roll out a long piece of fondant and wrap around approximately 8cm of the florist wire (this will be the 'optic nerve') leaving an additional 8cm uncovered (this will be inserted into the eye socket). Using food colouring, paint the 'optic nerve' with red and purple, use red to paint the 'bloodshot' eyes and your choice of colour for the iris and pupil.
Upper Eyelids
Press a small amount of fondant into the shape of a capital D. Attach the straight side to the eye and shape around the eye until happy with the shape. Once the 'eyelids' have been applied paint with ivory food colouring.
Lower Eyelids
Roll a small piece of fondant into a sausage shape long enough to run the length of the lower eye. Gently press to flatten and join to the lower eye area making the lower 'eyelid' sag. Paint the inner lower 'eyelid' red and the lower 'eyelids' ivory.
Nose
Using the ball modelling tool, gently press under nose to create nostrils.
Lips
Gently press the fondant over the lip area, when happy with the shape and size, paint with red food colouring.
Teeth
Roll a small ball of fondant and press into the shape of a tooth. Using a ball modelling tool, make a small indent in the top of the mouth under the lip area and apply a small amount of edible glue using a small clean paint brush. Gently press each tooth into an indent and paint with ivory food colouring to make the teeth look like they are rotting (dead people don't have pearly whites!).
Swiss Meringue Buttercream Hair
Once the fondant face is completed, apply the dark buttercream all over the top of the cakes and use a fork to create 'waves' in the hair.
Use the lighter buttercream to create a light grey stripe on each side of the head.
Step 6: Chocolate Soil

INGREDIENTS
- 140g cooking chocolate
- 200g caster sugar
- 4 TBS water
TOOLS
- Medium saucepan
- Metal whisk
- Baking tray
METHOD
- Chop chocolate into small pieces
- Add the water and sugar into saucepan and heat until the sugar has dissolved and the mixture starts to change colour to a light golden brown.
- Take mixture off the heat, add chocolate bits and stir vigorously with the whisk.
- Make sure the sugar mixture coats all of the chocolate and continue to stir until desired consistency reached.
- Empty the mixture onto baking tray and allow to cool.
- Fill the saucepan with water and return to the heat with the whisk submerged in the saucepan, bring water to the boil and then allow to simmer for a few minutes...this will allow you to clean the pan without spending hours scrubbing!
- Once cool, place the chocolate soil around the base of the cakes.
Step 7: Skeleton Hands


INGREDIENTS
- White fondant
- Edible glue
TOOLS
- Fondant modelling tools
- Florist wire
- Sharp knife
METHOD
- Roll out two pieces of fondant to form long sausages, making the end of each one thicker. These pieces will be the two forearm bones and wrist.
- Gently insert five pieces of florist wire into the 'arm/wrist' bones (3 pieces in one 'bone' with the remaining two in the second 'bone')
- Shape a piece of fondant into a rough triangle shape and create indents between the 'bones' using a sharp modelling tool so that it looks like there are three separate pieces of bone. This forms the palm of the hand.
- Gently insert the 'bones' of the palm and hand through the florist wire, leaving enough length to support the bones of each finger.
- Individually create the bone of each finger by rolling a small piece of fondant into a little sausage, use your finger to roll the sausage in the middle which will make the middle of the 'bone' thinner that the ends.
- Gently insert each bone onto the florist wire.
- Continue this process until each 'hand' is complete.
- Allow fondant skeleton hands to dry for 24 hours.
- Once dry, position skeleton hands on the chocolate soil so that it looks like they are emerging out of the ground.
Note - I searched google for 'skeleton hand' images and used these as a reference point when creating the skeleton hands.

Participated in the
Halloween Food Contest 2016


