

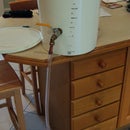
Introduction: Build Your Own Brewery for Under £100 ! - STEP 1 - Mash Tun


Like Beer? Like cooking? Like traditional crafts? Tried homebrewing? If the answer to any of the above is yes, then read on my friend...
Hi, my name is Rich but my friends call me Chard,
After making Elderflower Champagne about 2 years ago and then building a cider press and making homegrown cider i got into brewing my own beer as that is the drink i drink the most!
This started by making up various homebrew kits which come with malt extract and yeast to which you just add water! Simple enough but you're limited to what the producers of the kits make and it can be kind of expensive (about £20 for 40 pints...still cheaper than the pub).
The next step is 'All Grain Brewing'. Here you take crushed malted barley, hops, water and yeast and craft yourself a beer that YOU like and for a lot less than by using kits.
This is the first in a series of 4 Instructables which will document my journey into the world of 'all grain' brewing and how you can build your very own low cost brewery from scratch! Starting with ... the Mash Tun.
Step 1: What the Hell Is a Mash Tun?
There are lots of names and words for things in homebrewing but you soon get the hang of it. Basically the Mash tun is a vessel in which you soak your crushed grain. Its like a MASSIVE porridge bowl! The idea is you need to soak your grains in a certain ammount of water at a high temperature (about 66oC) for approx 90 mins before draining off the liquid. This liquid is basically beer in its most raw state!
But enough of that you'll learn about that in my last step in the series - making beer!
The criteria of the mash tun, or MT for short, is to keep a steady temperature for 90mins before draining off the liquid. It has to withstand temperatures around the 80oC mark, be food safe and have a good way to drain of the liquid and leaving all the grain behind.
Buying the most basic prefabricated homebrew mash tun would cost over £65.... my design will be about half that.... so what will you need?
Step 2: Tools, Materials and Disclaimers

There are loads of different designs for this vessel. Some people modify coolboxes some have fancy stainless steel affairs but my 2 main aims for this build is it has to be A) cheap and B) effective.
This is by no means a new idea, similar things have been done before by other inventive homebrewers but no ones published it.
For the design I used you will need:
Materials
- 2 x food grade plastic bins with a capacity of 25L each (£8.46 each)
- 1 x ball valve tap (£3.98)
- 1m long piece of 15mm copper pipe (£2 ish)
- 1 x brass tank connector (£0.99)
- 1 x 15mm -15mm compression elbow (£0.68)
- Insulation of some sort (mine was Aluminium Thermal Foil at £9.98 for 60cm x 7.5m)
- Silver waterproof tape (£1.10)
- 1/2" food grade tubing (not essential but useful) (£0.99/m)
- I used an extra female to 15mm compression elbow but its not necessary. (£1.28)
- I also used a bit of PTFE tape but its not essential ( I had some kicking about but this stuff is crazy cheap)
Total cost = £35.65 (£37.92 with extras)... but you'll use leftovers in the rest of the brewery build!
Tools
- Pen or pencil.
- Drill/rotary tool with a 2mm bit and a routing bit.
- 2 adjustable wrenches.
- Scissors.
- A pipe cutter or hack saw or some way of cutting copper pipe.
This instructable requires sharp things, spinney things and cutty things. Please be careful at all times. The 'golden rule' of homebrew - "always drink a homebrew when doing anything to do with homebrew" - should not be observed if you are going to use any of the above mentioned spinney/sharp/cutty things.
This mash tun will only make non alcoholic malt extract so I'm fairly sure anyone can make it but adding yeast to ferment this would make alcohol. This is legal here in the UK but if you're not sure, check your local laws. I take no responsibilities for any fingers, limbs, lives, marbles, virginities, sights, sanities or freedoms lost. Or anything else for that matter!
Step 3: Holey Moley!


Ok lets get started. Take one of your 25L buckets and turn it upside down on the floor. This is going to be placed inside the other bucket and will basically act like a big ol' sieve to hold the grain. You want the water to drain through the bottom of this bucket, so job one is to drill lots of little holes in the bottom. Big enough to let a decent flow of water through but small enough to stop the grain. I went for a 2mm drill bit in a rotary tool but polypropelyne isn't a tough material so any power drill, electric screwdriver or similar would work.
Me being a bit of a perfectionist I wanted the holes fairly evenly spaced so I drew out lots of lines at 10 degree intervals then divided them up like you can see in the pics. then i drew the dots on in permanent marker so i could see them easily. The less anal way of doing this would just to grab your drill and attack that bucket like a drunken dentist! I guess either way is good.
I did this in my bedroom on a carpeted floor... 30 mins later, when I was ankle deep in little plastic shavings, I realised this was not the best idea of the day.
Step 4: Tap That!


Holes drilled? Lots of mess on the floor? Dont vacuum just yet, theres a little bit more mess to make.
Take your perforated polypropelene bucket and put it into your, up till now, unmolested bucket. Then get a torch (flashlight), turn it on and point it onto the bottom of the bucket. This iluminates the bottom area inbetween buckets.
Now you want to drill a hole for the thread of your tank connector to go through. A 15mm tank connector like mine has a thread diameter of about 1/2" (20mm)*.
If you have a fancy holesaw then well done you. I had to settle for a router bit on my cheapo dremel substitute (see pic 3). This is the more mess i promised you!
Once you have the hole cut , tidy it up and cut off any chaff with a craft knife or similar then thread the main body of the tank connector through the hole youve made from the outside**.
Screw that tank connector back together with the washer on the outside of the bucket making a nice watertight seal. (see pic 4)
------------------------------------------------------------------------------------------------------------------------------------
*For those confused, I'm not intentionally mixing metric and imperial thats just england trying to be modern whilst preserving tradition... doesnt really work but i kinda like it!
**depending on where you get the tank connector, most have some sort of collar inside that stop a 15mm pipe going straight through. I took a small round file and got rid of this fairly easily. if you have a dremel or similar rotary tool you could use this aswell.
Step 5: Bubble Wrap Time!


All going well so far so before we put any more external piping on, its time to wrap it up.
Heres something to think about though... This is the order I built mine in but realised later that if there were any leaks it would be harder to identify them what with all the bubblewrap about. On the flipside, if you put all the other pipework in it will be harder to wrap the final product in bubblewrap.
I'm not going to insult your inteligence and tell you how to wrap up a bucket. Plus it could be different depending on what insulation you choose and what bucket you have. I'd stay away from the rockwool type insulation cos if it gets wet or worse, gets the sticky pre-beer all over it, it's gonna start smelling funky.
The insulation I chose has shiney foil on one side. Its best to have the foil facing inside to reflect heat back toward the inside but the shiney side looks better and will be easily cleaned. So I did 3 layers, 2 with the foil pointing in, the last with the foil pointing out. I did the outer bucket completely, a little collar around the top of the inner bucket and also got the lid and bottom covered.
I used the double sided sticky tabs that came with the insulation to keep it in place but I havent taped up the edges all neatly yet encase I find leaks later on (....I did).
N.B. Theres loads of this insulation left over still. I'll use it later in the brewery build series when I make my boiler!
Step 6: Pipe Up.


Time to put on your red dungarees, grow a thick black moustache and invite your mate Lou round to jump on mushrooms...i.e. it's plumbing time.
We already have the tank connector in place so loosely put the compression fitting end back on it (dont forget the little copper ring, or olive as its called).
Then start feeding the copper pipe though it. the idea is to get it to reach across the diameter of the bucket and touch as low down on the far side as possible so that when we drain it we can get a syphon effect going to drain as much of the yummy, sweet pre-beer as possible. I could have gone straight down but this will provide a little support for the bottom of the inner bucket!
Pop a compression elbow on the end there so it points down to the bottom of the bucket (pic 3). Make a mark on the pipe about an inch from the bucket with a marker pen or the like (pic 4?). Then cut along this line. Pipe cutters are cheap, easy to use and give a nice straight cut unlike a hacksaw.
Now screw together the tap and, if you chose to bother with it, the other elbow and fit this onto the pipe too. Now comes the fun part, tighten all the compression joints good and tight! Remember these need to be watertight and PTFE tape wont really help you here. Also, you'll need to use spanners unless you have the finger strength of a westside story gang member....*click* *click* *click*
How much faith do you have in your handywork? Time to fill that sucker with water and look for leaks.
As you can see in pic 5, I had to peel back the insulation a bit to check but this all taped up neatly afterwards.
Step 7: Finishing Tape


You're nearly done now!
Just get your waterproof tape and go to town on all the edges of the insulation. You can be as neat or as messy as you like but remember you might want to sponge clean this when you've used your mash tun.
As a finishing touch I also added some food grade clear tubing to the end of the tap by heating up one end in boiling water then pushing a tiny offcut of copper pipe in the end. this bit of copper can then be attached to the compression fitting on the end of the tap. this is so when you drain the MT it wont splash everywhere reducing mess (and stopping something called hot side aeration...i woudlt worry about this though). I was going to use a hose clamp (see pic 4) but it didnt fit and the tube was tight enough once cooled.
CONGRATULATIONS you've just built a mash tun and the first part of your very own all grain brewery!
Admire your work Sir/Madam but dont get complacent.... On to phase two....The boiler!
(boiler stage coming soon)
Thanks to all those over at www.jimsbeerkit.co.uk that helped me and gave me ideas, screwfix and trade depot for cheap plumbing materials and finally thanks to www.barleybottom.co.uk for equipment, hops and grain at rock bottom prices!


