

Introduction: Celtic Knot Rolling Pin


On St Patrick's Day in Ireland 2020 we experienced a total shut down as part of the Coronavirus lock down, parades were cancelled, businesses closed and social distancing was in full effect.
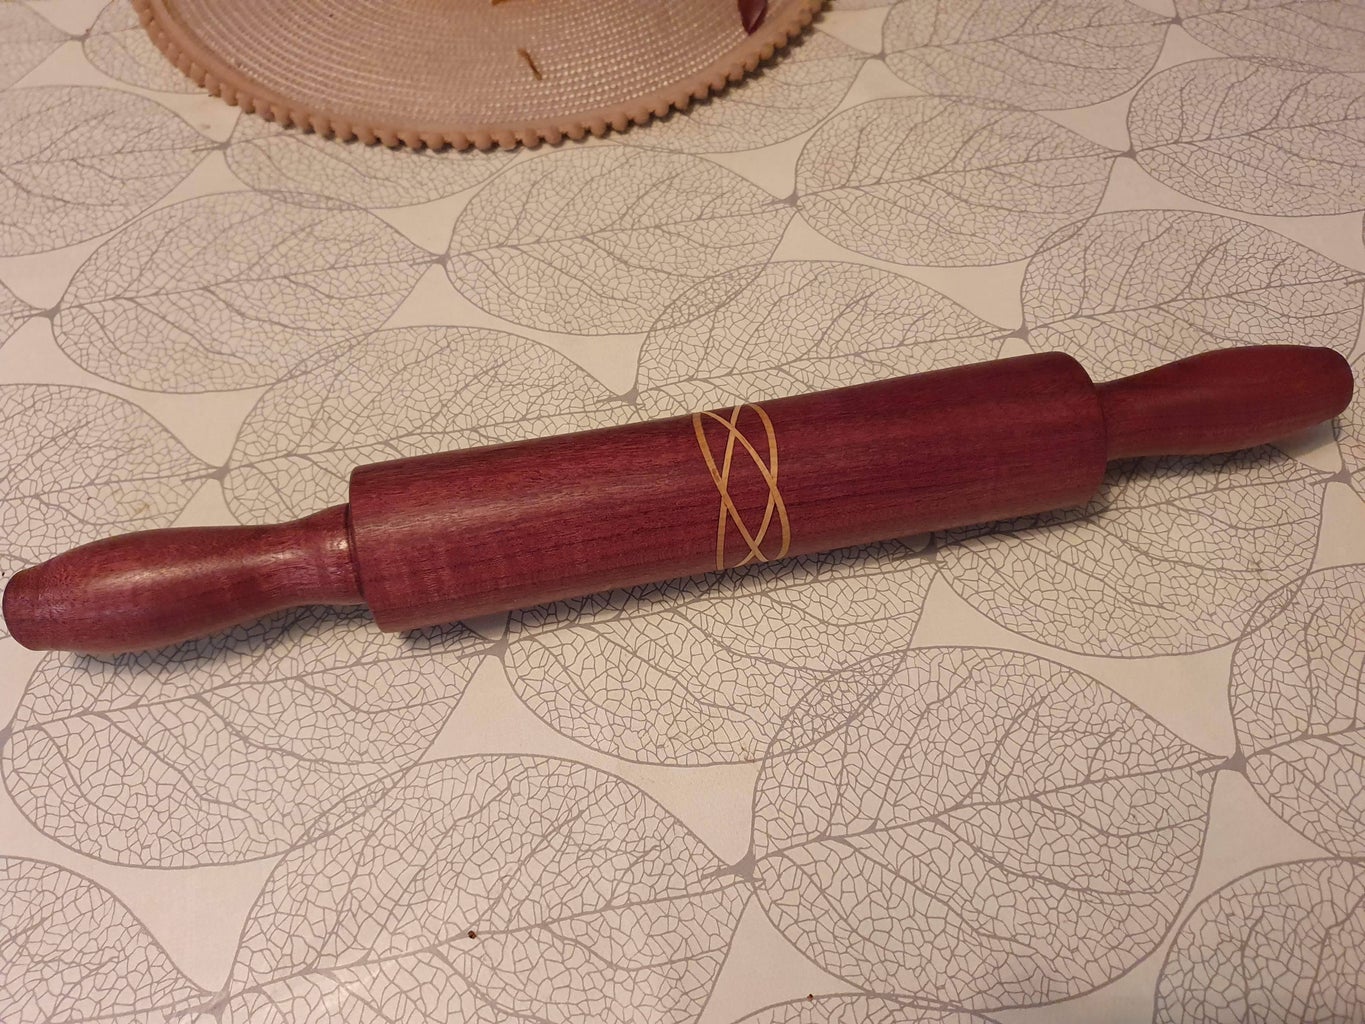
Being Irish, I decided to make something to mark the day, so I went for a Celtic Knot design, I like to make kitchen utensils so I went for a rolling pin.
This one is purpleheart as it is beautiful and tough and sycamore as is has good contrast and this particular piece came from my local area.
Step 1: Get the Setup Correct


The first task is to create the material for the inlay. It is vital that this piece be the same thickness as the saw kerf, otherwise the alignment will be off as you make subsequent cuts.
Bear in mind that the piece can be thicker but then you will have to remove an equal amount of material so multiple cuts, a dado stack or a router cut would be required.
In my case my saw blade, including the set on the teeth (the kick left and right of alternate teeth) was approx 2.63mm.
I don't have a thin strip jig for my table saw so I cut a narrow strip on the bandsaw and then crept up on the measurement with my thickness planer. I had to use a sled to get to this small measurement without risking the blades of the machine.
It is also really important for this design that the master blank be completely square, this rule applies if you want to make an octagon (8 sided) knot but a hexagon (6 sides) would not come from square stock as to get all of the faces the same length the ratio would be 1:1.154. Just worth noting if you want to make this a little fancier.
I used my thickness planer to square the stock.
Step 2: Making the Cuts


Identify the centre of your stock both end to end and side to side.
For convenience, I also numbered the sides, the reason for this will become apparent.
I added a stop to my mitre saw to ensure all of the cuts were centred on the same point. You will see later that I made a mistake by not hitting the stop and left a cut that had to be repaired (2nd last image).
I set my angle to 22.5deg and cut through.
I liberally applied glue, I use Titebond 3 because it is very strong, waterproof and approved for indirect food contact. There are others but look for these properties.
Insert the inlay material and clamp up, I clamped to a straight board with some tape applied to stop the glue sticking, there are better jigs online for this and I recommend using one of then as this was difficult to align.
Allow the glue to fully dry and repeat on each of the faces, following the numbers makes it easier to follow what face should be cut next.
When complete, you should have a "X" on all 4 faces.
Step 3: Start Turning


After allowing time for the glue to fully cure as per the manufacturers instructions (you don't want to start this turning if it's not set as you will have a huge accident). Mount the piece between centres in the lathe.
I used a roughing gouge to get the piece to a cylinder and did my best to get a consistent diameter.
Step 4: Handles


I used the size of my own hand to set the length of the handle, I turned one, stopping regularly to see if I was happy with the shape, fit and comfort of the handle.
This was turned using a spindle gouge.
Once I had one handle done, I used a calipers to transfer the vital measurements to the other side, first the length, then using the parting tool I turned the diameter of the major change points and shaped to match. In the end they weren't perfectly symmetrical but they were close.
I also trued up the surface to flat using sandpaper on a large flat sanding block as an uneven rolling pin is not very much use.
I sanded 120, 240, 320 and 400 grit.
Step 5: Fixing the Booboo


As I said earlier, I made a miscut on the cuts for the inlay. Most of this was removed in the turning but there was a scar so this needed to be fixed.
During the sanding, I placed a sheet of paper under the spindle to catch the sawdust.
I then mixed the dust with some of the same wood glue I used earlier, this doesn't some out a perfect colour match but it is close.
I buttered the mix into the crack and scraped off the excess. Once dry I sanded back to the same surface as the piece and to the same grit.
Step 6: Finish

I like to finish all of my pieces with a food safe finish, in this case I used mineral oil.
The purpleheart with continue to return to the purple colour as it is exposed over the coming days.

Participated in the
Woodworking Contest


