

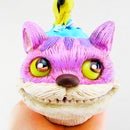
Introduction: Cheshire Cat Tumble Dye Graphic Shirt


When I was at the craft shop, I came across these fabric dyes which is unique because they are sprayed on the fabric. I thought this would be neat to spray on stencils and experiment with the dyes.
I love wearing graphic shirts so I thought of transforming my white shirt using Tumble Dyes and 3D fabric paints with a Cheshire Cat design. I think it turned out pretty cool.
This is a great project for kids to encourage creativity and a makes a special personalised gift.
Step 1: Materials

- Tumble Dye - Magenta, Lavender, Glitter
- 3D Fabric paints - Pink, Black, White and Yellow
- White Shirt
- Clear Book Cover (To make your own stencils or store bought ones)
- Exacto Knife
- Cutting Mat
- Pencil
- Masking Tape
- Gloves
Step 2: Stencil


First I cut out a piece of adhesive book cover that approximately covers the front of the shirt and attached it paper side up with a masking tape. Then, I made a sketch of Cheshire Cat on the back of the book cover with a pencil. I cut the stencil carefully with a knife on a cutting mat and set the cut out piece aside. I removed the plastic cover from one side of the stencil and attached it carefully to the shirt.
Step 3: Cheshire Cat


I shook the bottle well then sprayed lightly on the design with the Magenta dye. (1st image)
I cut out the mouth part of the cat from the cut out that I set aside and sticked that to the shirt. This will enable me to spray again with magenta on the stencil to make the top of the head a darker color. This is evident once you remove the main head stencil. (4th image)
Step 4: Stripes


I then removed the main stencil to uncover the rest of the shirt. This time, I attached the other half of the head to the cat. We need the Cheshire's head covered this time to protect it whilst we're making the stripes for the rest of the shirt.
To make the stripes, I made horizontal pleats on the shirt and sprayed with the lavender dye. Then pleated the white parts of the shirt and sprayed magenta dye. You can cover as much of the white parts as you like. When you're satisfied with the stripes, spray the whole shirt with the glitter.
Remove the stencil and let the shirt air dry.
Step 5: Heat Set & Paint


To heat set, I ironed the shirt on cotton setting. You can also heat set in a dryer for 20 minutes.
I cut out the eyes, nose and mouth parts and lightly traced it on the head with the pencil to guide me for painting.
I first painted on the paints with a brush, but the paints was too transparent so I used the 3D paints straight from the nozzle. Now the design really stood out. Then let the paints dry based on the manufacturer's directions. For my 3D paints, it needs to dry on a flat surface for 24 hours and can be machine washed after 72 hours.
Just for precaution, I would advise that you hand wash it for the first time to check if there's any bleeding of the colors before you wash it with your other clothes. ^_^

Third Prize in the
Dyeing for Color Contest

Participated in the
Homemade Gifts Contest 2015


