

Introduction: DIY Remote Control Airplane (23 Cc Gas Powered)


Hello Guys,
Just being highly fancitated about Airplanes and how they fly ,i just end up getting infected by the scale aeromodeling bug :) , in my early child hood .I have been scratch building remote contrrol airplanes fofr almost 3-4 years sice now,but eversince i have deam of scratch building a gas powered R/C Airplane. So, just in the start of this year , an aeromodeling competition named "Propellair" was launched.on that moment ,i have just decided that its the high time to make this dream a reality.So i gathered a team consisting of four members to work on this project.
IF YOU LIKE MY PROJECT THEN PLEASE DONT FORGET TO VOTE ME FOT "Things That fly" and "Move it" CONTESTS.
The basic goal of this project is to scratch built a remote controlled airplane that is powered by a petrol(Gas engine).
A great deal of effors was made to use the construction material that is avaliable from local hardware store in order to minimize the overall project cost as well as sorcing out quality equipents at a fair price.
Being in a part of the world where the electric stuff is expensive for this size of airplane and nitro engines are not reliable enough do to the low quality of the fuel avaliable so the prefrence was given to petrol powered two stroke engine.
Enough of the introduction ,just let the construction process started.
Attachments

Step 1: Initiating the Built


This project is completed within 25 days so we have got a very limited time.There was no time for us to spen on plans so we adopted a simple and direct approch .We have decided some of the very basic specifications,airfoil design and the design concept after gathering the avaliable equipents.
The major construction was based on locally avaliable Simbol ply wood sheets (3 mm) and the beading sticks .
BASIC DESIGN SPECIFICATIONS:
- Type: High wing.
- Engine: Zenoah G-23 Air Engine (23cc petrol engine).
- Landing gear type: Tail dragger.
- Main wing airfoil type: Modified flat bottom ( Clark-Y )
- Total weight: 6kg
- Fuselage length: 72 inches
- Wing span: : 102 inches
- Wing area: 16 sq foot
- Wing chord: 18 inches
- Wing loading: 16 oz/sq ft.
- Width of Horizontal stablizer : 34 inches
- Width of vertical stablizer : 20 inches bottom and 14 inches top
LIST OF THE MATERIALS USED:
- Simbol plywood sheets (3mm and 4mm and ½ inch).
- Aluminum Pipe (20 mm diameter).
- Beadings of different sizes.
- Aluminum plate.
- Rear stand support sticks.
- SS cut screws (1 , 2 and 2.5 inches)
- Hobbyking covering flims (white and transparent purple)
LIST OF THE ADHESIVES USED:
- Two parts epoxy.
- Elfy.
- Magic clear epox.
- Fiber tape.
LIST OF THE TOOLS USED:
- hand saw.
- Drill machine.
- Drill bits (various sizes).
- Metal Grinder.
- Electric hand held jig saw.
- Heating iron.
- Screw drivers.
- Allen keys.
LIST OF THE EQUIPMENT USED:
- Futaba 9C Super (upgraded to 2.4 GHz using Frsky upgrade and 8 channel reciever)
Zenoah G-23 Air Engine (23cc petrol engine).
Hitec HS-645MG servo (Throttle).
Hextronik HXT12K servos (Rudder and Elevator).
Hitec HS-635HB Servos (one for each aleiron).
- 110 mm wheels
Step 2: Building Fuselage and Tail.


FUSELAGE:
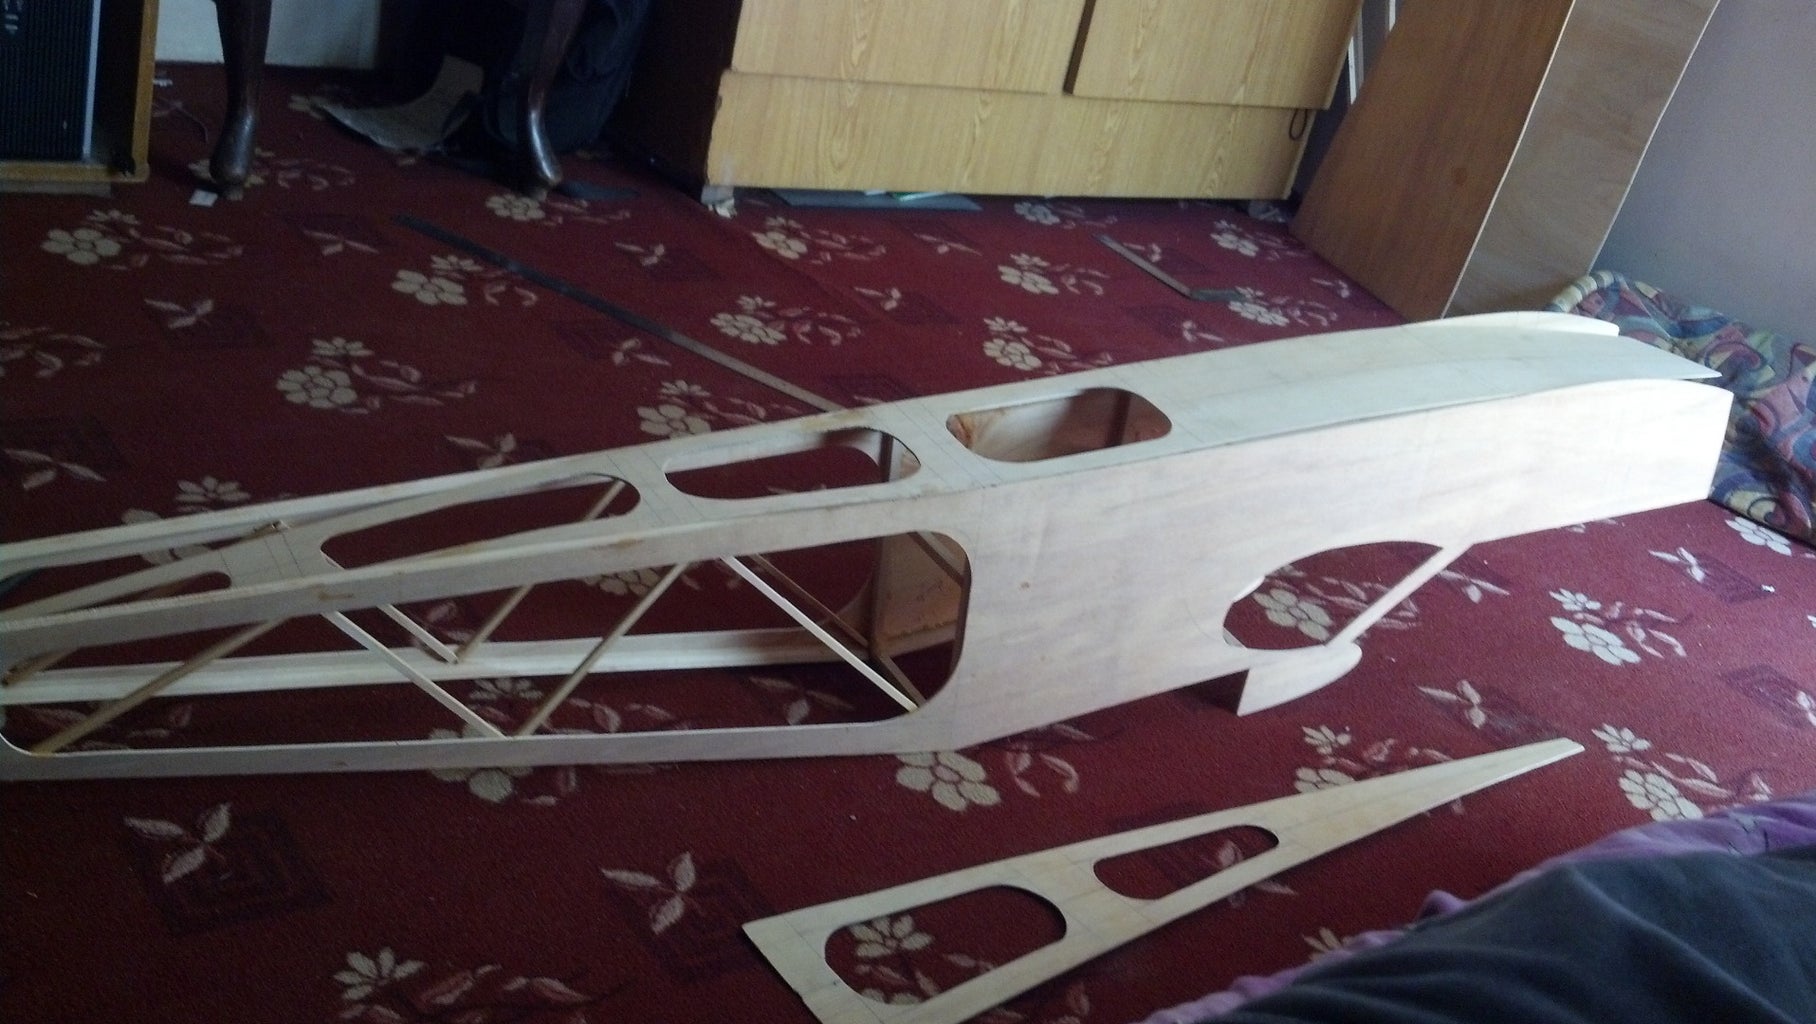
The first step is to built the fuselage and the horizontal and vertical tail.So we draw a 1:1 ssketch of the side panel of the fuselage on the 3 mm ply wood sheet and couple it with another sheet so that both side panels must exactly be of the same size. Now both the panels were cut down using an elecrtic jig saw.After that a central structure is made using hard wood stick so that this box along with the side panels will form the base of the fuselage.Following this process the bottom and the top plates are made and then i have glued the wooden sticks on the four corners of the rear end of the side panelsso that the required strength may be achieved from at the rear end of the fuselage . Later on the bottom and the top plates are glued and the fire wall is made using a 1/2 inch thich compound plywood.the fuselage is strengthned at the middle and the front portion using wood sticks and the additional layers of plywood sheet.
I have used CA glue to temporarily hold the fuselage in place and then to strengthen the structure, two part epoxy have been used.The curved surface of the front of fuselage and cowling have been covered using various layers of card sheet one by one to give it a good strength.
TAIL:
The tail have been made using simple wooden sticks and glue .This proved to be a quick and easy method to built the tail.Rudder and elevator flaps are malso made using the same technique.Later on i have made hatches in the rear side of the fuselage to mount the tails and after making all the adjustments i have mounted a tray mage of plywood sheet to mount the throttle,rudder and elevator servos as well as all the battery and the radio equipments.
Step 3: Covering the Tail


For covering i have used hobbyking covering flim and i have used white and transparent colour scheme which provided great results in the end.The covering process was started from covering the tail and the steps are shown in the pics as well.The covering flim is heat activated shrink flim ,it means that first i have stick the flim at the corners of the tail by using a home iron and heating the flim while pressing it against the surface of the wood stick ,later on using a heat gun i have removed all the wrinkles from the sheet.
Step 4: Fuselage Covering and Engine Mounting.


To me ,covering the fuselage was a tricky and time taken part as the colour scheme was a bit tricky.First of all the bottom and the rear top panels of the fuselage have been covered using the white flim and then hollow sides of the fuselage was covered using transparent flim and then i have covered the front part.Latter the wing section of the fuselage was covered and then the side panels are covered using various pieces of the white sheet to minimize the wastage of the covering flim.After covering and triming both fuselage and the tail, the tail is glued to the fuselage and the rear end of the fuselage was sealed.
Step 5: Wing Construction and Covering


WING CONSTRUCTION
The wing design was based on ribs that are made of plywood sheets and an aluminium pipe was used to act as a central beam in the wing ,moreover the front of end of the wing is taped using a curved wood stick.The wing is base on 18 rib. I cut the ribs by the help of jigsaw.Then i join all the ribs together to sand and equal the ribs.Then I cut the two triangular shape form the ribs , one from front side and second from the back side to save the weight of wing.I made the cavity on the upper side of ribs by the help of jigsaw to hold the wooden sticks.Then i arranged all the ribs on aluminium pipe at the same distance.There are three wooden sticks are used to support ribs on upper side .And then i made the cavity on bottom side of the ribs to support ribs.then I cut tringular shaped plywood pieces to support the end of the ribs.Then i cut two pieces of plywood to support the central part of wing and wing mounting and then i cut the the 3' inch hole to save weight.Then i cut the wooden sticks to make servo mounting in the central part of wing .Then i cut two 18 inches by 3 inches triangular piece to make the edges of wing.
WING COVERING
The covering of wing was very tricky.I use two different types of covering sheet ,one is transparent purple covering sheet and second is white covering sheet.First of all i decieded cover the hollow part of wing with purple covering sheet in the central portion of the wing .Then i cut the central purple piece for upper and bottom side and then i cover it.Then i cut white covering sheet to cover the fornt part of air foil and the bottom of the wing and then i cover the edges and the central part of wing with white covering sheet.
AILERONS
Then i use 2.5 feet and 1 cm wooden stick and glue it on the end of the ribs to make the foundation of ailerons ,where the ailerons mount and moves.Then i cut two sheet of plywood to make aileron or control surfaces of wing.The aileron are 1.5 inches and 2.5 feet long.Then i use 0.5 cm wooden stick and glue it on ailerons plywood sheet.
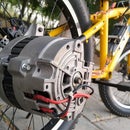
Step 6: Engine Mounting


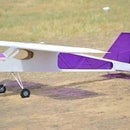
Step 7: Completion of Project.


Step 8:

Participated in the
Things That Fly Challenge

Participated in the
Move It

![Tim's Mechanical Spider Leg [LU9685-20CU]](https://content.instructables.com/FFB/5R4I/LVKZ6G6R/FFB5R4ILVKZ6G6R.png?auto=webp&crop=1.2%3A1&frame=1&width=306)


