

Introduction: ESP8266 NODEMCU BLYNK IOT Tutorial | Esp8266 IOT Using Blunk and Arduino IDE | Controlling LEDs Over the Internet


Hi Guys in this instructables we will learn how to use IOT with our ESP8266 or Nodemcu. We will use blynk app for that.
So we will use our esp8266/nodemcu to control the LEDs over the internet.
So Blynk app will be connected to our esp8266 or Nodemcu via internet and we will send commands from Blynk app to turn on or turn off our LEDs.
Step 1: Things Your Need


For this project you will need following things :
1x Nodemcu
LEDs (i used 4 you can use any no. of LEDs)
Breadboard
Jumper wires
USB CABLE for Programming
Software : Arduino IDE
Step 2: Circuit


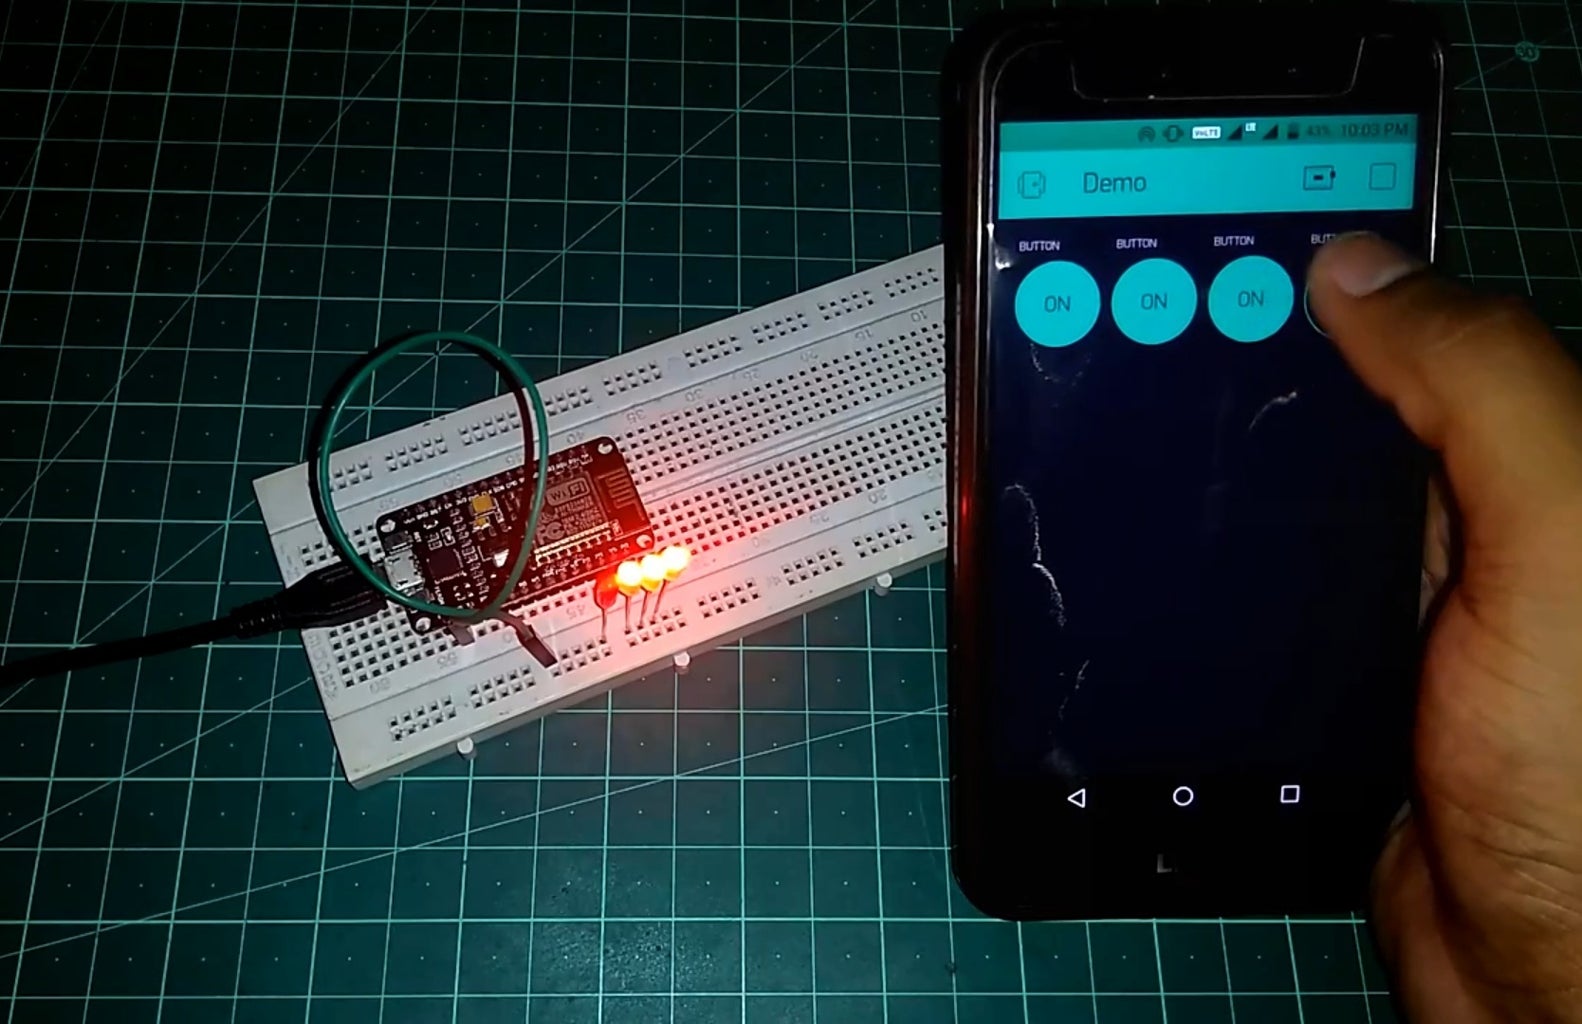
The circuit part is very simple. I am connecting 4 LEDs to nodemcu. So the positive leg of the LED will connected to digital pin to the nodemcu & the Gnd pin of LED will be connected to Gnd of Nodemcu.
So 4 LEDs are connected to D0,D1,D2 & D3 pin of Nodemcu.
Step 3: Installing Blynk LIBRARY in Arduino IDE

Before we proceed further you need to go to library manager and search for blynk and install the library in your Arduino IDE.
Step 4: BLYNK APP


In your smartphone please download Blynk app and login/register on the app then click on new project.
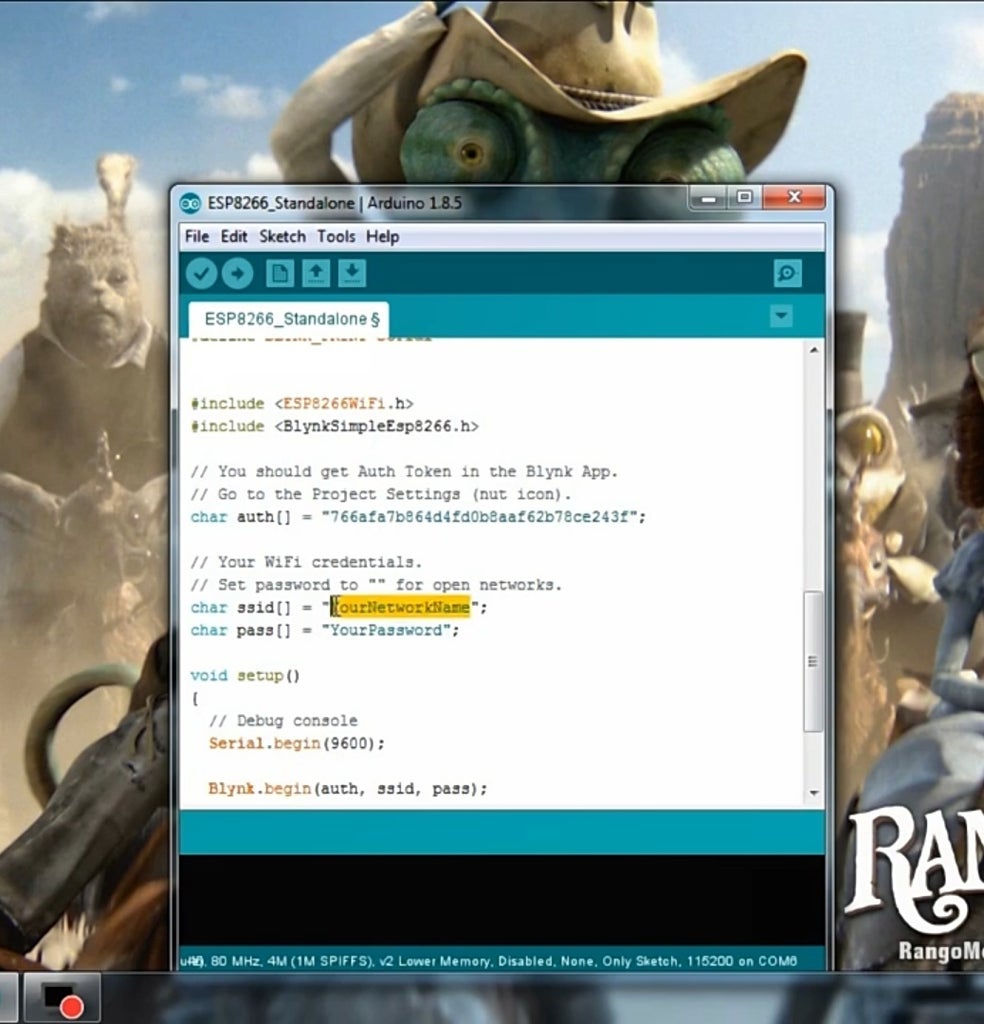
Name the Project & select your board as Nodemcu/esp8266 and click create to create the Project and it will send a auth token to your email id which we can use later in the code.
Then in the code go to widget section and select button widget as i selected 4 buttons to control 4 pins/LEDs of nodemcu.
And after selecting a button widget click on that widget and select the pin for particular button as i selected D0,D1,D2,D3 pins for all 4 buttons which means they will be used to control these 4 pins on nodemcu.
Step 5: Code


After installing the library go to Examples > Blynk > Boards wifi > Esp8266 standalone
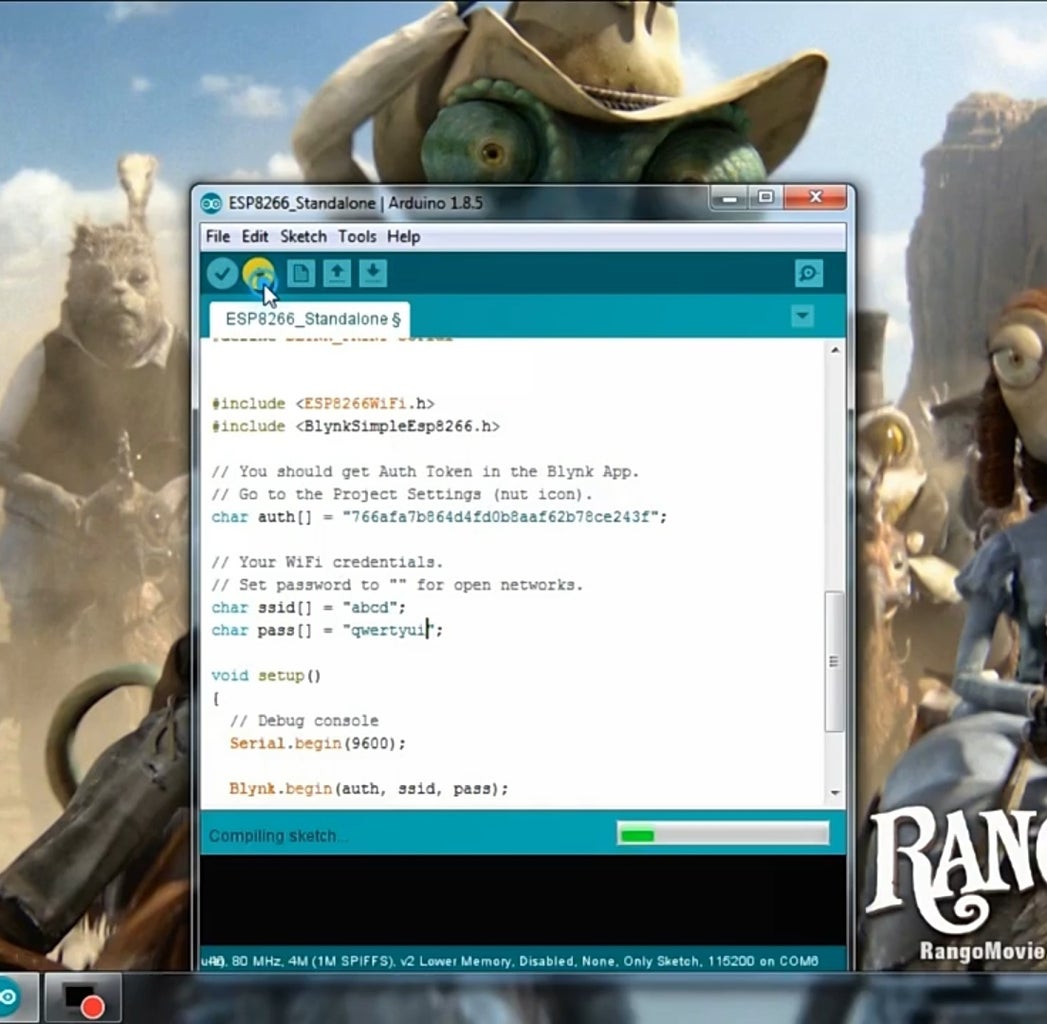
Open the code Then in the code section put your auth code and put your wifi credentials (make sure your wifi has internet access) as i doing in my images and then upload the code to your esp8266.
Step 6: Time for Action


So finally everything is done.
Now we need to test it.
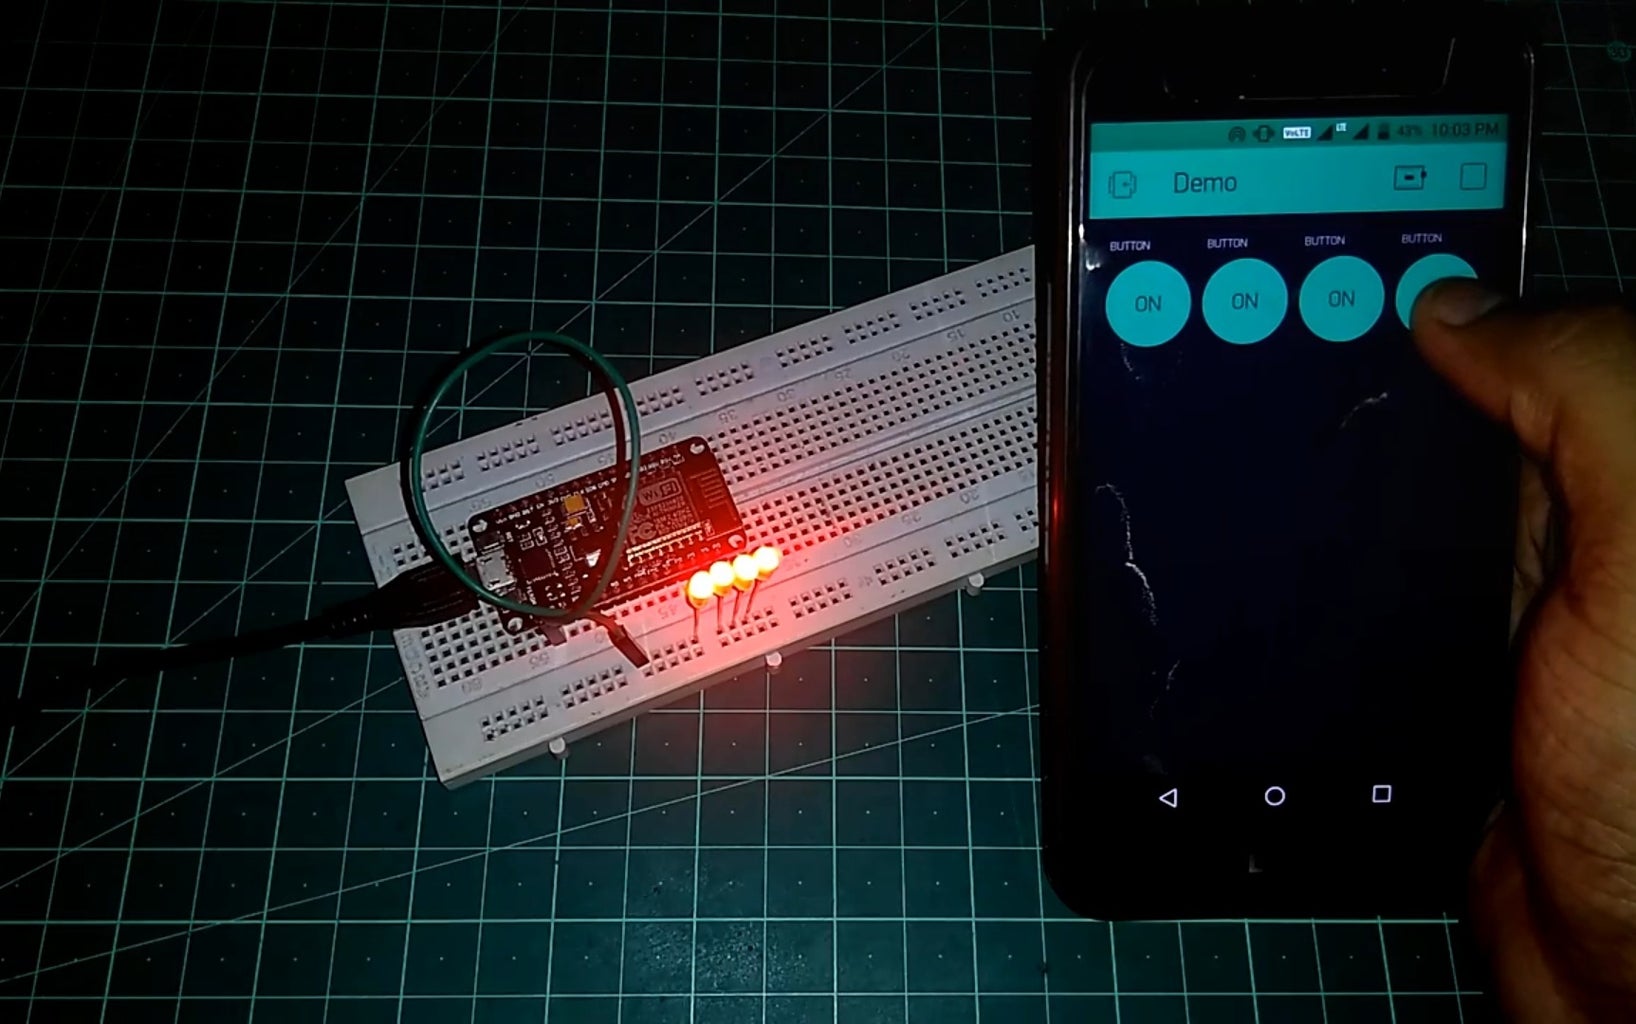
So just plug the power to your Nodemcu and click on the small play button on the Blynk app and then if you click on any of the button LED will be turned on for that particular button as my LEDs are ON for shown particular buttons.
So have fun doing IOT projects and let me know how its working for you in the comments section.

![Tim's Mechanical Spider Leg [LU9685-20CU]](https://content.instructables.com/FFB/5R4I/LVKZ6G6R/FFB5R4ILVKZ6G6R.png?auto=webp&crop=1.2%3A1&frame=1&width=306)


