

Introduction: Fixed Blade Chopper {how To}


This is how I made a big knife for my best friend using the tools in my shop!
This was a learning experience for me, so when I make changes to the design, keep in mind that I'm new to knife making.
Please make sure to vote for this Instructable to win.
I put A LOT of work into this, but it was fun!
This knife will be a gift for my best friend Chris.
when my life came to a crashing halt in 2003, he helped me come back by teaching me how to work with metal. I've been working along side him over these 13 yrs as he's taught me to weld, and fabricate, and all the many details it involves.
now I've finally began working for myself out of a small shop, but I would never have had the confidence to do it without his support and most of all his patience in teaching me everything I know about metal.
I was finally able to afford the mini mill I used in this build, and I kept it a secret so that I could surprise him with this knife as a way of saying thank you!
Step 1: Whats You Need


Here's the list of tools and materials I used:
- A scrap piece of 3/16 carbon steel scrap
- marker
- straight edge
- center punch & hammer
- digital calipers
- misc drill bits & end mills
- counter sink bit
- files
- burr whip
- angle grinder with scotch bright pads
- mini mill
- belt sander
- portaband (band saw)
- canola oil
- glass jar big enough to quench the blade into
- a standard oven
- propane torch
- clamps
- paracord ( 2 colors )
- protection - glasses, gloves
Step 2: Design


I came up with this design using several different images of knives I liked online.
I used a sharpie, a straight edge, and a circle stencil to put it together on the 3/16 plate of carbon steel
Step 3: Drilling


Next I used a center punch to make a dimple in the center of each hole.
Then I clamped it down to the table of my mini mill.
I chucked up the drill chuck.
Then I drilled out the 1/8" holes in the blade, the 3/32" holes in the handle, then 1/4" holes for all the rest.
I left the 4 holes on the spine of the knife to be drilled out using a 3/16" end mill, because they're so close to the edge.
The other big holes which have 1/4" center drilled out will be opened to there final sizes using center cutting end mills in steps because its easier then using drill bits.
The 3/32 holes are for the pins that will attach the aluminum handle.
* This is where I made the first mistake.
I had forgotten that I wanted to use multi colored paracord to wrap the handle, so these 3/32 holes are unnecessary.
later I make a slot in the handle... you'll see!
I made an extra hole so that I would be able to turn around 90° with the band saw when I cut out the knife, but its not necessary.
Step 4: Deburr and Cut Part 1


I used a counter sink bit to take the burr off of the smaller holes, and a burr whip for all the other edges and bigger holes.
Then I redrew the cut lines so I could easily see them when cutting out the knife with my band saw. [ it's a portaband in a chop saw vice]
Step 5: Milling the Bevels Step 1


For the 2 blade bevels, I used my mini mill.
* disclaimer: I only bought this Sieg X2 mini mill at Christmas, so everything I know, I learned online or taught myself over the last 3 wks*
So I needed a way to mount things like knives at an angle, so I made this mini pallet.
it a 3/8" thick plate of aluminum that I drilled and tapped M6 holes into and 2 open slots for T-slot mounts to hold it to the table.
*I built the mini pallet weeks ago, and it's not really part of this Instructable
With bolts on 4 corners, and one in middle, I can easily change the angle of the surface, and still securely mount the knife to it.
I made 2 Finger Clamps that screw into the holes to hold things down, which you'll see in another step.
I put a test dial gauge into the drill chuck, and make the top corners match, then the bottom corners, by traversing the table and tightening or loosening the nuts and bolts.
Step 6: Squaring the Blades


I used my harbor freight belt sander that I got for 40$, to get the blade edges as flat as I can.
I used a straight edge to look along the blade until its fairly straight.
This is so that the bevels come out straight when I mill them.
I could have straitened these edges with the mill, but the belt sander was faster
Step 7: Marking


I forgot to mark the edges with a center line, before I mounted the knife to the table, so do this now.
I colored the blade edges with blue marker, then checked the exact thickness with digital calipers.
I divided that number by 2, and set the calipers to that number and locked them.
I ran the calipers down the edge by hooking one side over the edge and scratching a center line into the blue marker.
do this from top and from bottom on each blade edge. this should give you 2 lines in the center.
Dead center is between these scratch lines.
Step 8: Mounting


Since the mini pallet was mounted square to the table, I just need to square the blade to the mini pallet.
Now you can see the Finger Clamps in use.
The single hole in the finger is tapped, and the slot obviously is not.
this acts as a fulcrum.
I carefully placed 5/8" square tubes as risers to support the knife at 3 points.
2 under each Finger, and one under the area being milled.
once square, I tighten down the fingers with a wrench
Step 9: Milling My Way { Bevels }


If you know how to mill, I'm not here to teach it, because I'm really new to it.
If you just got a mini mill like me, this is an excellent way to get into it.
Here's what I do:
I bring the 5/8", 4 flute carbide end mill down almost to the knife.
I lock in the Fine Feed on the Z axis [ up and down]
I bring it to center and just over one edge of the surface where I'm going to cut the blade bevel.
I turn on the mill and set the RPMs to about 550 in low gear.
I bring the mill head down until I hear it touch.
I can now set the Z axis dial to 0.0
I back up the X axis [ left and right] so the bit is not over the knife.
then I reverse and move the table into the bit and run it down the blade, making sure to stop before I reach the "Beard" of the blade which does not get beveled. ( or I should say "you should. I forgot at first!")
I look down the length of the cut to see if it's the same width all the way down.
It needed to come up on one side, so I just raise that corner of the mini pallet.
I drop down 2 thousandths and run this cut again until it looks even.
Now I'm ready to do some damage!
I continue running back and forth and dropping down about 10 or 15 thousandths each pass until I reach the center of the blade.
this is where the center marking helps
Step 10: Next Bevel


Before I flip the knife over I file off any burr on the edge, then square it up and mount like before, and cut this side down till I reach the center, or close to it.
*Notice how the riser blocks fully support the flat surface of the knife.
this helps keep it flat to the mini pallet as the clamps can flex the knife unevenly if not supported.
The same process for the other blade bevels.
You can see that I got really close to matching everything up, however the size of each bevel is not the same. I need to work out why for future knives.
Step 11: Clean Up and Polish


Next I cut the rest of the handle out with the band saw, and used the belt sander again with 40 grit belt on it to finish shaping the knife.
I also carefully sanded the blade bevels to remove most of the swirl marks, and also to bring the blades to a complete point at the edge.
* I'll do the actual sharpening later with a stone
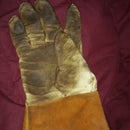
I used an angle grinder with a scotch bright backing pad along with a heavy grit, then a fine grit pad to polish the knife.
I clamped it down with a leather glove to protect the finish as I polished both sides.
* This is where I suddenly realized that I originally wanted to try a multi color paracord wrap for the handle.
So instead of the 2 small 3/32 holes for an aluminum handle, I needed a slot and two 3/16 holes added.
These would work together with the large Jimping along the spine to give a place for the paracord to lace.
Step 12: Back Up! We Need More Holes!


Ok, so now I mounted the knife into a vice.
because of the irregular shape, I used a small block of aluminum to fit the gap, as well as parallels underneath to keep it square to the table.
I used a 7/32" end mill to drill the lower hole in the handle, and then traverse the table right on the X axis and made another hole where the slot would stop.
I then change out the end mill to a 3/16 - 4 flute.
I made the end holes bigger than the bit I used to make the slot so that I would have room to "turn around", and so that I wouldn't have to plunge at each end.
* when you plunge down into an irregular sized hole its tough on the machine, and the vibration can break the bit or even break teeth on the motors gears.
since these holes are bigger then the 3/16 end mill we have plenty of room.
Step 13: Making a Slot


basically to make this slot I will move the table and drop the head in a rectangular downward spiral counter clockwise, so that the bit is always cutting against the movement of the part coming at it. Not cutting as it moves along the material.
The bit cuts in a Clockwise square pattern as the bit also spins clockwise. ( this is called a Conventional Cut and is better for smaller mills cutting steel)
I drop the 3/16 end mill into the center of the top hole then raise it up above the knife a tiny bit, and set the Y axis (forward and backward) dial to 0.
I lock the Y axis, and traverse the X axis slightly towards the right side of the hole until its over the edge of the hole.
I lock in the fine feed on the Z axis and lower the bit until it just touches.
I back up to the center of the top hole, and move the Y axis back towards me .010 ( ten thousandths) and lock it down. The dial shows .048, or + .010
*I'm now in position at the far left of the rectangle, and on the side of the slot farthest away from me, and the bit is just going to skim the metal.
I travel along the X axis until the bit is visibly at the bottom edge of the bottom hole, and set my X axis Dial to 0.
Now I move the Y axis away from me past 0 to -10 and lock it down.
this will make the slot .020 wider than the 3/16 bit.
.010 on each side.
* I'm now in starting position at the far right end of the slot, and against the side closest to me, or the bottom right corner of the rectangle.
Now I drop the mill head (Z axis) down .010 or .015 thousandths, put oil along the path where the bit will cut, and move the table right along the X axis, bit moves towards the top hole.
I'm now cutting metal
when I get close to the end of the slot, I slow down and let the bit just barely touch the left end of the hole.
I make note of where the X axis dial reads (.030)
Now I unlock the Y axis and move the table towards me .020 ( which reads .048 on the dial because my dial rotates .062 each full turn)
now I'm at the top left corner of the rectangle.
I lock the Y axis so the table is more stable, and move the X axis toward the left which cuts the side of the slot away from me.
* now I know where my 4 corners are. Top left is Y= .048 X= .030
Top right is X = .000
bottom right is Y = -.010
and bottom left is X= .030
So when I see that I'm close to one of the corners, I just look at the dial on the wheel that I'm moving and turn it to the correct number.
This way I don't go under or over and mess up the slot since it's hard to tell visually when your at the edge.
Step 14: 2 More Holes

I decided to use the 3/16 bit to open the 3/32 hole at the bottom for the paracord to lace, as well as added one between the two finger holes.
you'll see later why!
This is the burr whip I used to clean up all the edges.
Step 15: Hardening and Tempering


I found a glass jar that I could use to quench the blade with, and I filled it with canola oil.
Then I used a bottle of propane with a torch attachment to heat the blade to orange\red.
I clamped a leather glove with vice grips to the handle of the knife to hold it while heating.
once I got it orange\red, I dipped and held it into the jar of canola oil for a minute.
{this was hard to take pictures of, so I hope your able to imagine me sitting in my very cold shop in my PJ's and safety glasses torching a knife wrapped in glove!}
then I cleaned off the oil, and preheated my oven to 375
Once it was hot, I put the knife in by itself (no glove) for an hour.
then I shut of the oven and let the knife cool down with the oven closed.
These techniques I learned from different videos or blogs online, so I hope I did this right
Step 16: Final Polish and Sharpening


To take the color off of the blade I used my angle grinder with Fine grit scotch bright.
Then I used 2 sharpening stones to get the blades sharp.
starting with the roughest grit and working to the finest I push the blade into the stone at a sharp angle, then flip and do the same to the other side.
each time I increase the angle.
so you'll be bringing the back of the knife up a little each time.
I feel the edge of the blade for a burr. if there's still a burr, I sharpen some more once or twice and check until its gone.
This blade got very sharp!
Step 17: Paracord Wrap


Now for the handle wrap.
I tried to take pictures of every step, and they should be in order.
I started by melting a point into one end.
Then I cut the black to a length about 3 times the length of the handle.
Then I gutted out about the length of the handle and melted that point.
I start with the gutted end down the small hole up the top of the slot, and laid down the length of the handle to get covered.
Follow the pictures for the easiest instructions.
I took the long end and wrap it thru the big hole 3 times and set into the jimping in the spine, and ending up in the top of the slot.
I wrapped around leaving a single space between each wrap for the second color.
at the bottom I go thru the hole around and up under the wraps.
Now I go thru and tighten everything up and pull up the slack.
Now thru the big hole and cut where you see the color seem will hide.
I connected the 2 colors together by gutting a little from the red, and melting a point into the guts of the black.
I pushed the white into the red and carefully melted the colors together.
Now I lace it under the black to hide the seem, and into the top of the slot.
Now I wrap the red into the open spaces so that it criss crosses the black.
At the end I lace under the black, into the slot, out the back, flip the knife, then squeezed it up under the black and red to the top.
I cut it and melted the end and tucked it back under the black.
Finally I clipped the end of the black gutted end I started with, melted it, and left it.
Step 18: Done!


I really like how this knife came out!
I made it over 2 full days straight thru.
Now to give it to my best friend as a late Christmas gift!
Thank you for reading, and I hope you will vote for me to win the knife making or the home made gifts contest. (or both)
I put a lot of time and effort to documenting and make this the best Instructable in the contest.. whew!

Runner Up in the
Knives and Blades Challenge

Participated in the
Homemade Gifts Contest 2016


