

Introduction: Gonzo Soap Box Derby Car


This project was completed for a soap box derby race held in St. Louis, MO. There are two frames to the design, one that supports all the aesthetics of the car and one that supports all the mechanics of the car. The car was built on two frames so that both aspects could be worked on in parallel and then joined together to form one piece of finely tuned mechanical artistry. This instructable will mainly cover the process of building the aesthetics of the car. The whole project from conception, to funding, to building, took one month for a team of five persons to complete. Break neck pace... pressure builds diamonds.
The three photos included in this step depict the final product on race day as well as a concept sketch of the design before anything was built.
Step 1: Sourcing Parts and Framing


Sometimes the best place to find cheap materials for a build is in a dumpster (see photo 1)!
Outside of dumpster diving, rectangular steel tubing was acquired from a metal supplier and welded to provide the frame for the mechanical portion of the car. An assortment of 1" x 1", 1" x 2" and 2" x 4" lumber was purchased from Home Depot to build the frame for the aesthetic portion of the car. The aesthetic frame was built around the mechanical frame and bolt holes were drilled to lock the frames together when so desired (see photo 2).
Once the frames were complete, work on the muscle man (Hanz) began by building quick and dirty mock-ups attached to the aesthetic frame (see photos 3 & 4). These mock-ups were built using PVC tube, Duct Tape, pink insulation foam core (see photo 5) and card board. All of these parts can be purchased at Home Depot or found in the trash. The goal with the foam core and PVC was to create ribbing that a lighter weight skin material could be stretched around to develop the general shape of Hanz's body.
Please note that a full parts list with quantities is not included as this project and any similar ones are so custom that there is not much value in including one. Instead, the parts used are discussed but not the actual quantities.
The parts used for the aesthetic portion of this build include:
1" x 1", 1" x 2" and 2" x 4" Wood Lumber
PVC Tubing and connectors
Foam Core
FoamSealR
Duct Tape
HandiFoam
Cardboard
Tools used include:
Power Sander
Circular Saw
Power Drill
Sand Paper
Utility Knife
Step 2: Skinning Ribs, Adding Foam, Sanding and Carving


Once the PVC and foam core ribbing structure was complete, Duct Tape and Owens Corning FoamSealR (see photo 1) was used to stretch over the ribs to form a skin. The FoamSealR is available at Home Depot. See photos 2 - 4 for pictures of Hanz with skin.
The next step was applying foam to the skin. Originally, Great Stuff was used (see photo 5). However, it quickly became apparent that it would cost a fortune and take forever to completely cover Hanz in Great Stuff. Thus, HandiFoam (see photo 6) was acquired from Grainger and quickly did the trick. However, it still cost a fortune. HandiFoam was sprayed all over Hanz, producing a firm exoskeleton that allowed for sanding and carving once the foam set. See photos 7 - 13 for the application of HandiFoam, sanding and carving. The firm exoskeleton provided by the HandiFoam also allowed for partial removal of the PVC and foam core structure, making room for the driver.
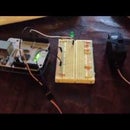
Photo 14, (a bit of a team photo but the only one available with the full mechanical frame) depicts the mechanical frame with driver's seat, wheels, steering column, steering linkages, and breaks attached. In the background rests Hanz on the aesthetic frame waiting to be carved, sanded and painted.
Note: If a similar project is undertaken in the future, using a hot knife to shape the foam and a sealant on the foam prior to painting would be advisable. A great resource for more information on this can be found at the Replica Prop Forum.
Step 3: Painting


Once fully sculpted, Hanz was taken to a body shop (oh so fitting in Hanz's case) where he was painted. Not much else to describe here, paint job followed by a clear coat. Originally it was thought that the foam would need to be coated in Bondo before painting but this added too much weight and rigidity to the overall car design. Thus, the paint was applied directly to the foam.
Step 4: Finished Product


After painting, Hanz and the aesthetic frame were bolted to the mechanical frame to yield the final product. Figures 1 - 5 show the finished car on display and on the ramp in action.

Runner Up in the
EXTREME! Challenge


