

Introduction: Handmade LED Airplane


I built this plane as a gift for the one who I love <3
You can follow the video as well :) Don't forget to subscribe my channel on youtube
It is amazing in the night. Do you want to built one ?
Materials needed:
- 9 White LEDs 3V (transparent shell & circular shape)
- 21 Red LEDs 3V (red shell & not circular shape)
- 6 Blue LEDs 3V (blue shell & not circular shape)
- A4 size forex material 3 or 5 mm thick
- A3 size Plexiglass 3mm thick
- 1 x 33 ohm resistor or 10x 330 ohm resistor
- 5 smallets zip ties
- 1 x Battery backpack for 2 AA batteries
- 1 x Toggle switch
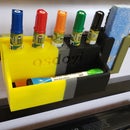
See the picture for our materials
Tools needed:
- Soldering Machine
- Hot Glue Gun
- Utility knife
- Simple drill
- Metal Ruler
- Multimeter
Let's START :)
Step 1: Preparing Main Body


Put 9 of our white LEDs in the order separate the legs and don't forget to keep + legs into one side and - legs in the other side. Use hot glue gun to connect each LEDs into each other. Drop very little glue.
Then take zip tie and cut it in the length of our 9 connected LEDs. Glue LEDs on top of zip tie. See the pictures.
Then start soldering the same legs. Before soldering them look at the pictures above. We will shorten some legs and the rest will stay longer for wing connections.
Try your connected main body by giving 3Volts. All the LEDs must be shining. And in the last picture you can see which legs must be stay longer.
Step 2: Preparing Wings


Take 6 red LEDs per wing and glue them on top of your zip tie. See the pictures above.
Don't forget to keep the orientation of LED's same. Positive legs must look upwards and negative legs must look downwards. Do this for right and left wings. After you prepare 2 wings use a rigid single line wire to connect all the + legs together per wing and connect all the negative legs per wing.
Be careful against shortcuts ! Do not let + and - touch each other.
After you finish soldering shorten the zip tie as you see in the picture.
Your wings are ready.
Step 3: Connect Wings and Main Body


Cut a small piece of zip tie and glue it under the body as you see in the first picture of this step.
Later glue the wings into the body and into that small piece that we glued a moment ago.
Take a small wire and connect the positive legs of each wing into each other with a half circular jump. See the pictures. We are doing this jump to not touch negative legs of the main body. At the end of this jump we have connection with + terminal of the other wing, not the main body. Don't connect + terminal of the red LEDs with white LEDs. We will power up red LEDs later.
We are doing the same thing from the bottom of the plane for the negative terminals. But this time you should connect - terminal of the red LEDs into negative terminal of the white LEDs on the main body.
To sum up:
- We are connecting + terminal of the red LEDs on the wings into each other but not with the white LEDs
- We are connecting - terminal of the white LEDs on main body and red LEDs on wings into each other
by avoiding any shortcuts
Step 4: Attach Cockpit


Take 2 blue LEDs and glue them on top of main body as you see in the picture. It is very basic. Just keep the + legs aligned with the positive side of the main body and solder them.
Step 5: Tail Wings


Prepare tail wings by using 3 red LED's per wing as you see in the first picture.
Elevate the + legs of the red LEDs and keep the - legs down. With hot glue gun connect tail wings into body.
After that take two cables red (+) and black(-) Connect them into + and - terminals of the main body as you see in the picture.
Then connect + terminals of the red LEDs on tail wings (left & right) with another wire and do the same thing for the negative terminals of the LED's on tail wings. Connect the - terminal of the red LED's with the common - terminal of our plane. But don't connect the positive terminal of the red LEDs to main body.
Give 3V to the + and - terminals to see is it working ? (red LED's will not light up. Don't worry)
Step 6: Adding Motors

It is time to add motors.
Simply glue blue LED's under the wings and connect their + terminals with the common + terminal and connect their - terminals with the common - terminal.
Step 7: Adding Horizontal Stabilizer


Glue last 3 red LEDs on top of each other and connect their + and - terminals into each other by keeping the orientation same. After that take their - terminal and connect it with the common - terminal of the whole plane.
NOW it is time to connect positive terminal of all red LEDs to each other. In the pictures above you will see blue cable going over the plane, it is the + terminal of red LEDs. Via this wire you should connect + terminal of wings, tail wings and our horizontal stabilizer. Then take yellow cable and solder it for powering up + terminal of red LEDs.
Why I did this ? Because if we power up all LED's at the same time red ones are killing the other LEDs. Due to this fact we will add resistor before we power up red LEDs.
Step 8: Connect Your Plane Into Plate


Now use forex material to create cool plane holder. See the pictures above. With utility knife cut a curly leg to glue your LED plane on top of it. Also cut 14 cm x 14cm square out of forex material as a bottom plate. Then glue them into each other. See the final picture.
Step 9: Attach Battery Backpack, Resistors and Switch


Glue the battery backpack on the bottom of our plate then drill 3 cable holes to our bottom plate. Mark them to avoid confusion.
Then follow the connection diagram and place the parts. After that create 1.5 cm height cover around our plate as you see in the last picture.
Your plane is almost ready :)
Step 10: Protection Cage


Prepare protection cage out of plexiglass. It is a cube with side length of 14 cm. Glue it on top of your plane and your gift is ready for your significant one :)
Let me know, if you have any questions.

Participated in the
Make It Glow! Contest

Participated in the
Homemade Gifts Contest 2015


