

Introduction: How to Create a Bunch of Grapes


The following information is a single lesson in a larger Tinkercad project. Check out this and more projects on Tinkercad.
Here is a reference photo of a bunch of grapes.
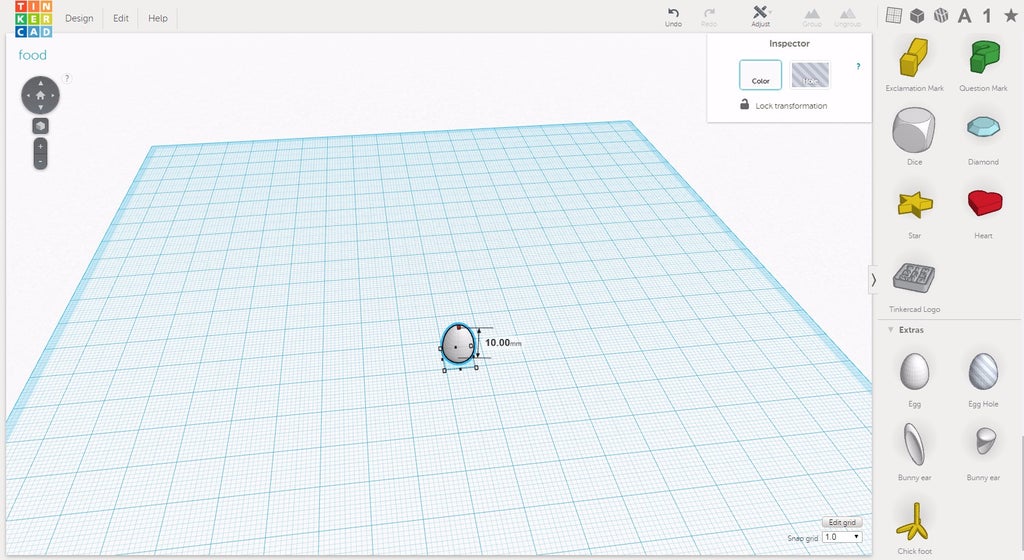
- Place an egg on the workplane.

- Holding Shift, scale it down to 10mm.
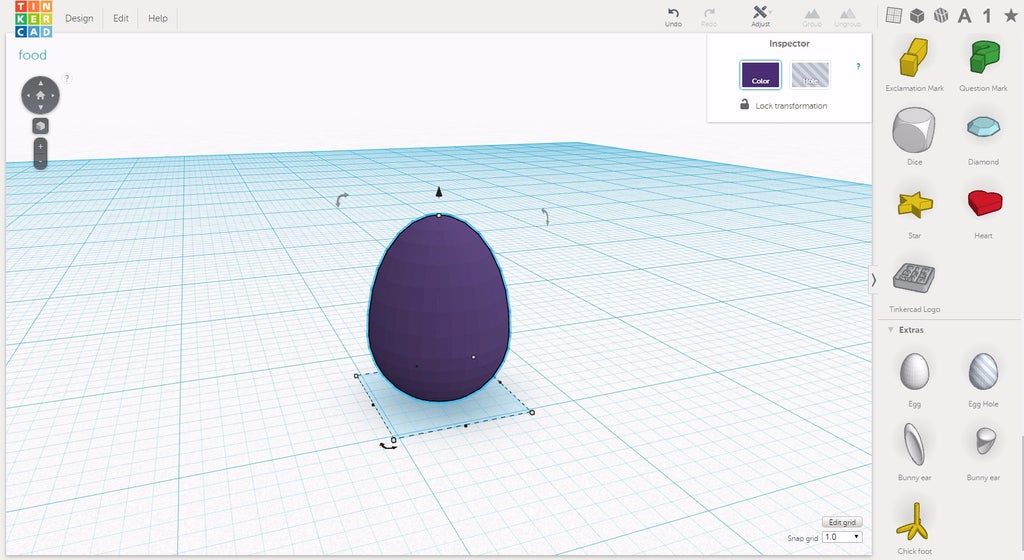
- Change its color to purple.
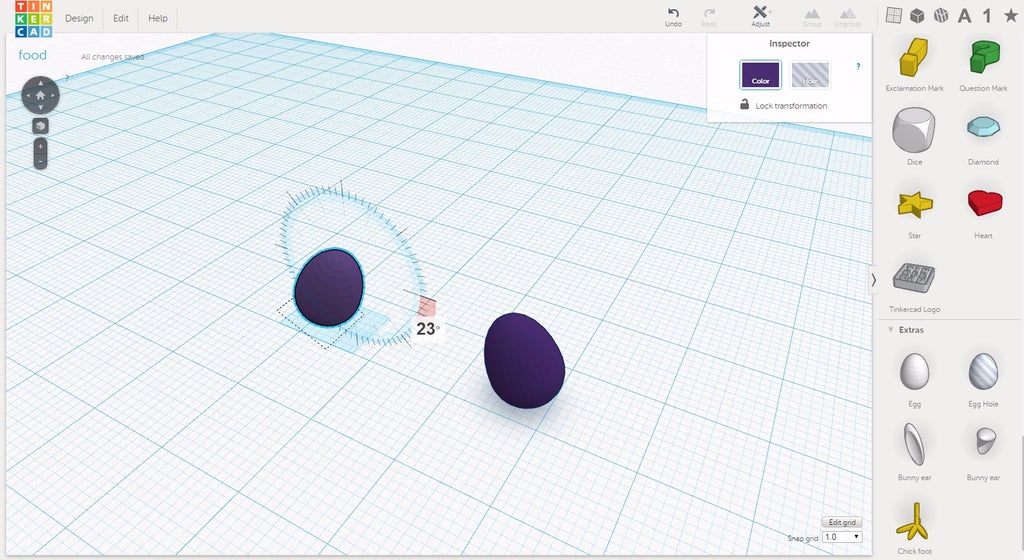
- Under the Edit menu, choose duplicate. Holding Shift, move the duplicate about 20mm on the Y axis.
- Rotate both grapes 23 degrees so their tops point toward each other
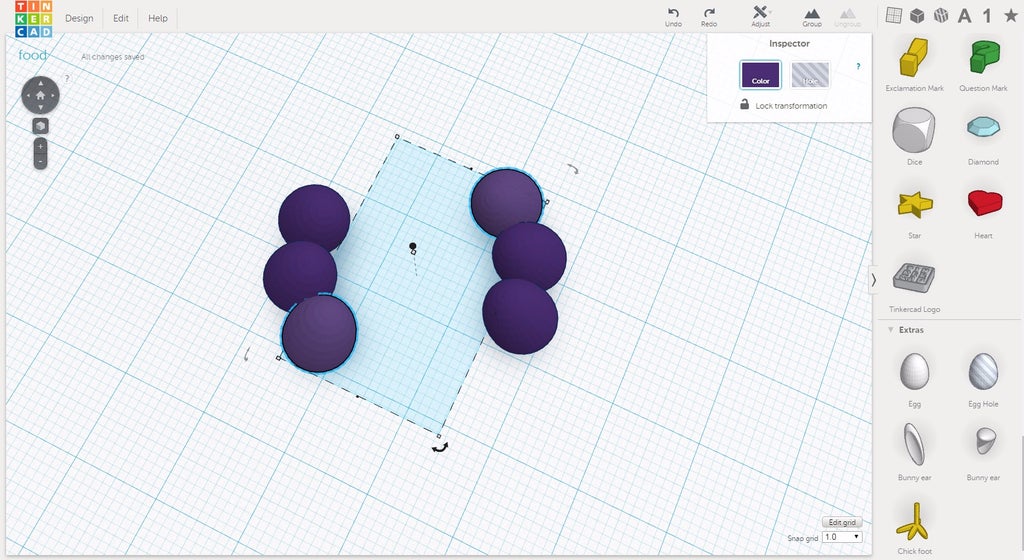
- Select both grapes and make duplicates of them. Keeping the two new grapes selected, rotate them 31 degrees so they touch the edge of the original grapes. Keep the grapes selected.
- Choose duplicate from the edit menu again. Duplicate will apply the same rotation to the new grapes.
- Choose duplicate one more time to have a total of eight grapes.
- Select four grapes on one side of the gape and move them to meet the other side.
- This will be the first ring. Select all the grapes in the ring.
- Duplicate the ring and move it up about 7mm. Keep your current ring selected.
- Rotate the new ring 25 degrees. Keep the current ring selected.
- Choose duplicate from the Edit menu.
- Keep choosing duplicate, making sure not to deselect the ring. Duplicate rings until there is a total of five rings.


Step 1: Create a Bigger Ring of Grapes


The following information is a single lesson in a larger Tinkercad project. Check out this and more projects on Tinkercad.
- Select the top ring of grapes and change the color to white. This will help keep things organized.
- Position the camera to look down on at the top. Move the grapes in the top ring away from the center as shown in the image.
- Create a duplicate of one grape, and use it to fill in the gaps (blue grapes)
- Make sure to rotate the blue grapes so the tops are leaning towards the center.
- With all four blue grapes selected, move them up 3mm.
- Select all of the white and blue grapes. Make a duplicate of the larger ring and move it up about 5mm. Keep the current ring selected.
- Rotate the duplicate ring 45 degrees and keep the ring selected.
- Choose duplicate from the edit menu two more times to have a total of four large rings.


Step 2: Add the Last Bunch, Leaves, and Stem


The following information is a single lesson in a larger Tinkercad project. Check out this and more projects on Tinkercad.
- Make a new duplicate of a single grape.
- Make another copy from the single grape and move it 14mm, while holding shift.
- Select both new grapes. Holding Alt, rotate the pair until their edges touch with the original pair.
- Repeat step to fill in the gap.
- Select the six new grapes and move them to cover the whole on the top of the bunch.
- Place an egg on the workplane and scale it down to 10mm. Change the color to purple. Make a duplicate. Rotate it 45 degrees and move the duplicate up so it rests on the original as shown in the image.
- Make a duplicate of the top grape. Under the Adjust menu, choose mirror and move the duplicate to the other side.
- Duplicate the two top grapes and rotate them 90 degrees on the Z axis.
- Select the grapes of this new cluster and move them to fill the bottom of the grape bunch.
- Place a cone on the workplane and scale it so it is thin and tall for the stem.
- Position the stem at the top of the bunch.
- Find the Custom Shapes section on the right hand menu. Go to page 11 to find the Cute Heart shape and place one on the workplane.
- Scale the heart so it is thin like a leaf and color it green.
- Attach the leaf to the stem.
- Continue to the next step.


Step 3: Congratulations!
AND.....you're done. Great work!


