

Introduction: How to Make a Card Game on a Raspberry Pi


The purpose of this is create a game on the raspberry pi using music,buttons,lights and a buzzer! the game is called Aces and the goal is to get as close as possible to 21 without going over
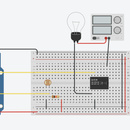
Step 1:Preparing The Raspberry Pi
Get the raspberry pi and plug in a keyboard,mouse,ethernet cable and monitor
Now plug in the power cable
Now attach the ribbon cable and the breadboard
Supplies
Materials
1 red LED 1 yellow LED 1 green LED 1 Buzzer 1 raspberry pi Monitor Mouse Keyboard Speaker 6 male/male wires
Step 1: Step 2:Preparing the Buttons

Take the 3 buttons and align at the very end of your breadboard
Then attach a resistor each of the buttons and make the resistor go to ground Then attach a wire to each button(The cables need to be connected to GPIO pins)
Step 2: Step 3:Preparing the LED’s

You set up the LEDs in a row
Make sure that the leds are red,yellow,green to make it look more visually appealing
Attach a resistor into each circuit
Attach wires into gpio pins and then into the resistor/Led (if necessary grounding pins)
Step 3: Step 4:Preparing the Buzzer/music

Look at the bottom of the buzzer and determine the positive and negative cable
Attach the positive cable into a gpio and the negative into a ground pin
If needed add in extra male/female cables
(Optional)
-Attach a Bluetooth device to the raspberry pi in the Bluetooth section to hear music
Step 4: Step 5:Preparing the Code

Import the libraries needed shown below in the image
Assign you LEDS, buttons and buzzer a gpio pin value
Prepare the images you want to use by saving them in the same location you saved your python code
Add the image into the code by using pygame.image.load and assign it to a variable
Step 5: Step 6:Creating the Welcome Screen

Copy the code shown in the and read the comments on what each line does
Adjust the coordinates in the surface.blit command to wherever you want to place your images. (ideally similar coordinates would work best)
Step 6: Step 7:Creating While True Statements


While true statements are required to always check if a button is pressed
The while true statement below shows run2 which creates a hitbox for the welcome screen which allows users to continue into the card game
Ignore the start() for now we will need that later
Once the digital button has been pressed we move onto the main while true statement
Below is the main while true statement code you need to copy which interacts with buttons and functions
Step 7: Step 8:Creating Functions


You need to create numerous functions which include start, process_bz, process_symbol, lost_bz, win_bz, Dealcard, Compcard and end
These functions are in the images below and come with comments
Copy the code and place it above the loading welcome screen code but below the variable codes
-Copy ALL of the functions above as they all play a vital part in the game.
-Each function comes with comments to explain what the code does
Step 8: Step 10:Run!!

Run the game and enjoy it


