

Introduction: How to Upload Codes to Lilypad Arduino Without FTDI With Using Arduino Uno [Revised 05.10.2016]
![How to Upload Codes to Lilypad Arduino Without FTDI With Using Arduino Uno [Revised 05.10.2016]](https://content.instructables.com/FZR/D05N/IHLVNDEY/FZRD05NIHLVNDEY.jpg?auto=webp&fit=bounds&frame=1auto=webp&frame=1&height=300)


Today, I am going to show you how to upload codes from Arduino IDE from your computer to Arduino Lilypad ATmega328. I used to had a problem with my FTDI module while I am trying to upload any - on Arduino IDE designed - codes from my computer to Lilypad Arduino Atmega328 board.
Actually, you must use your FTDI modules as usual as coding perfectly, easily and directly, but, we buy cheap modules even these are not original, and these may face a major problem for us sometimes and for further... That is not because of original modules produced by FTDI, all about other fake module producers sell as programmer for your MCU that you can see opened topics with full of this problem on some forums such as: this, this, and that.
Today, I am here to show you the only one easy solution that I am using now to program my Lilypad Arduino boards.
The Need List:
- Arduino Uno
- USB type A-B cable (long enough)
- Your Computer Runs Arduino IDE
- Lilypad Arduino (Atmega328 embedded)
- Male-Female cables
- Tiny breadboard for tiny cable connections
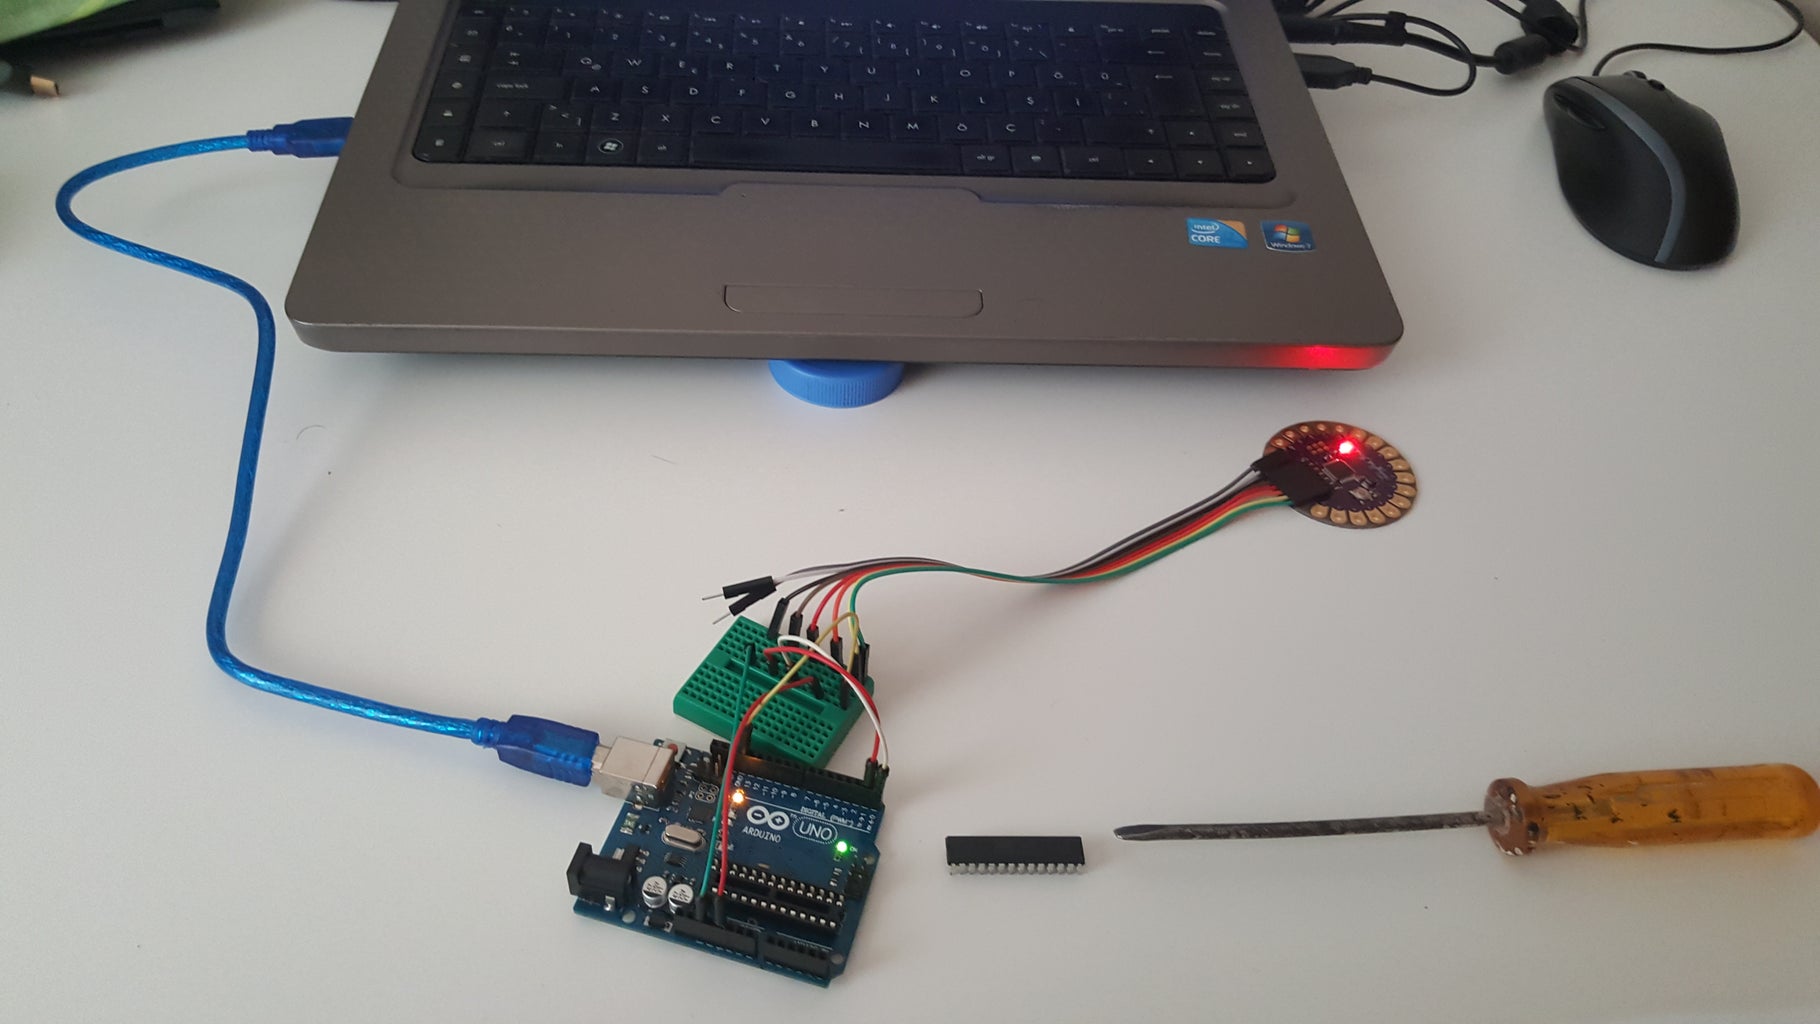
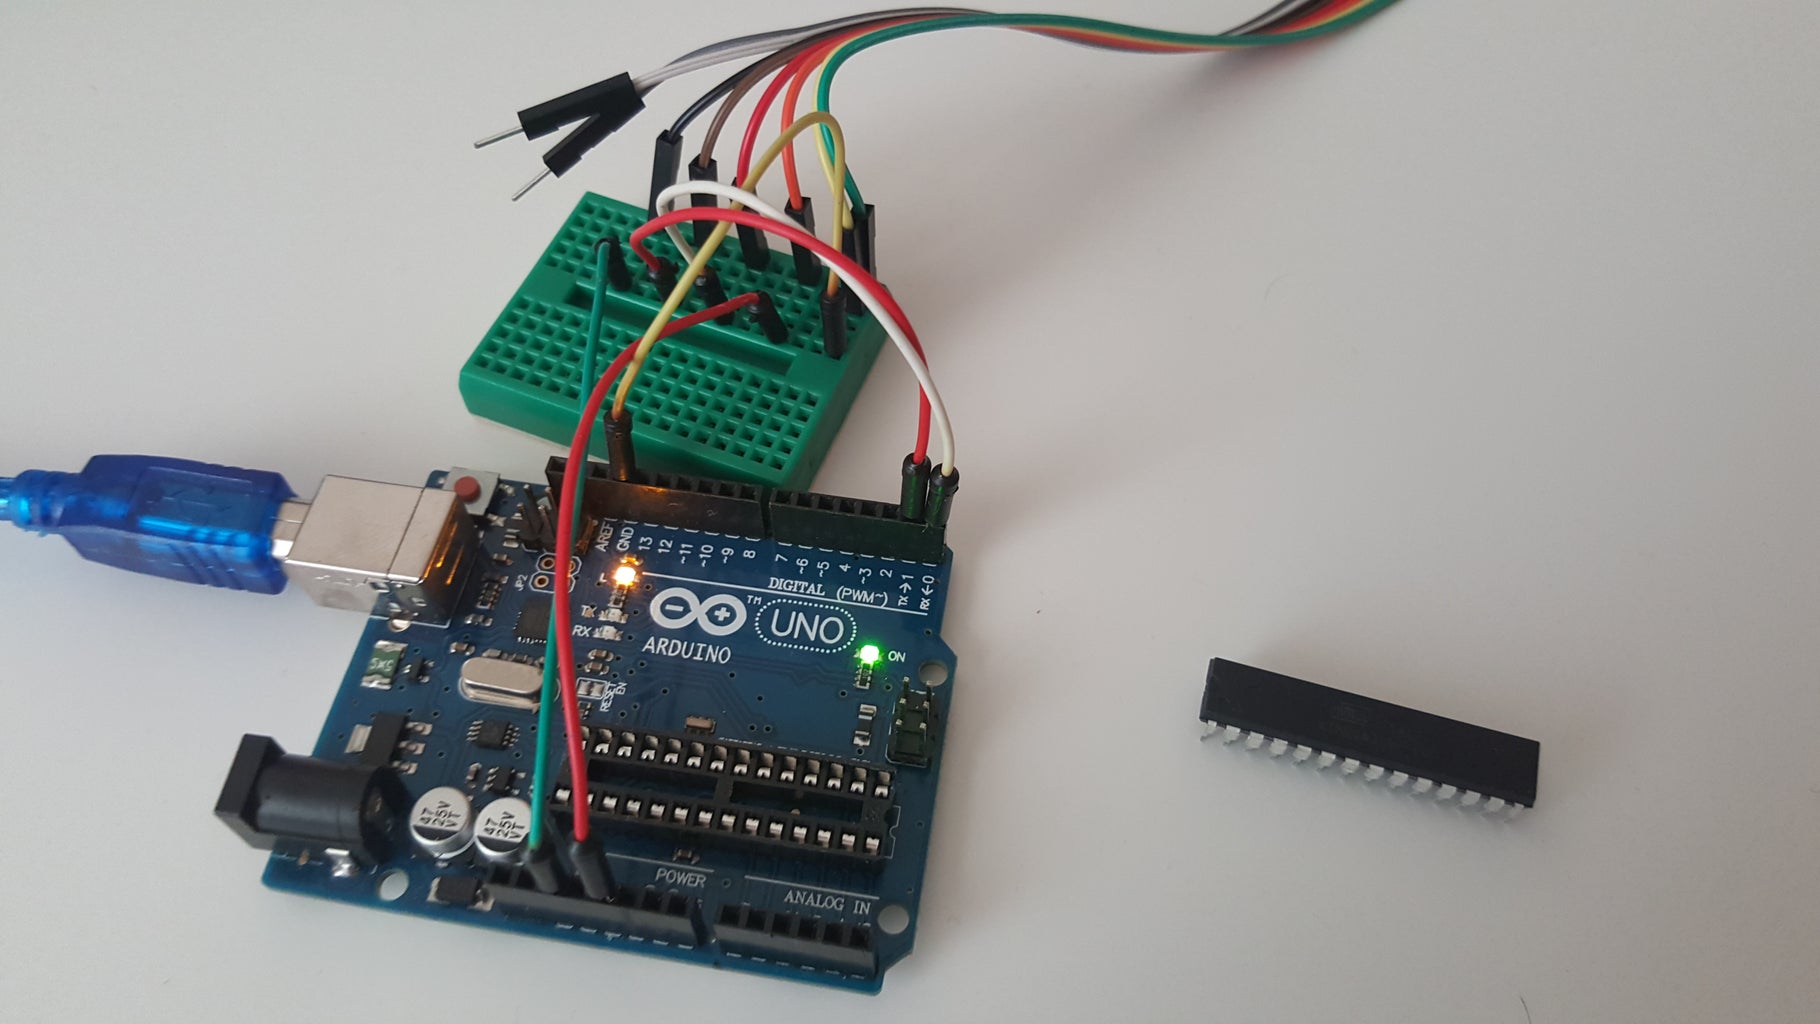
Step 1: Remove Atmega 328P From Arduino UNO
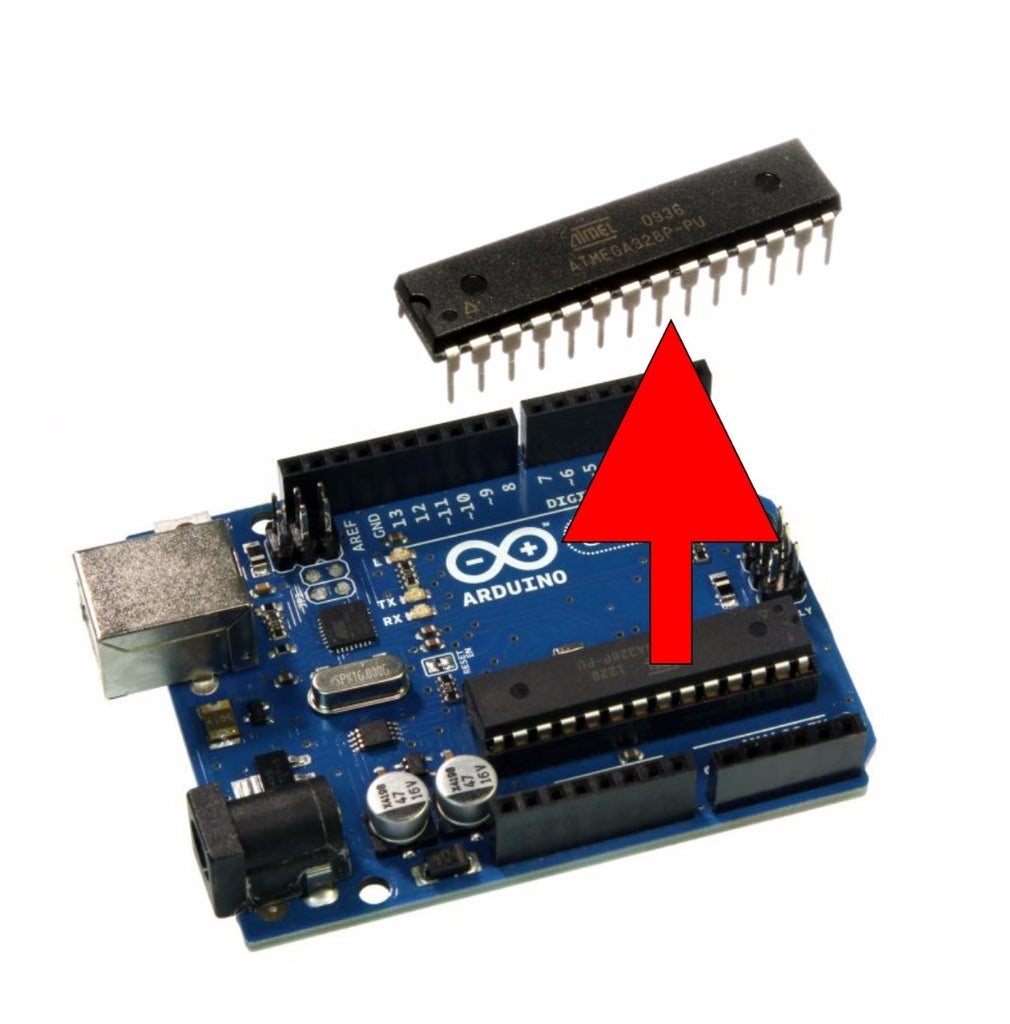
First of all, plug out your Atmega 328P from your Arduino Uno board with its pins. But, do this in safe! Careful with Atmega 328P's pins. You may use flat nosed screwdriver to use kindly to remove. Don't bend the pins of your chip!
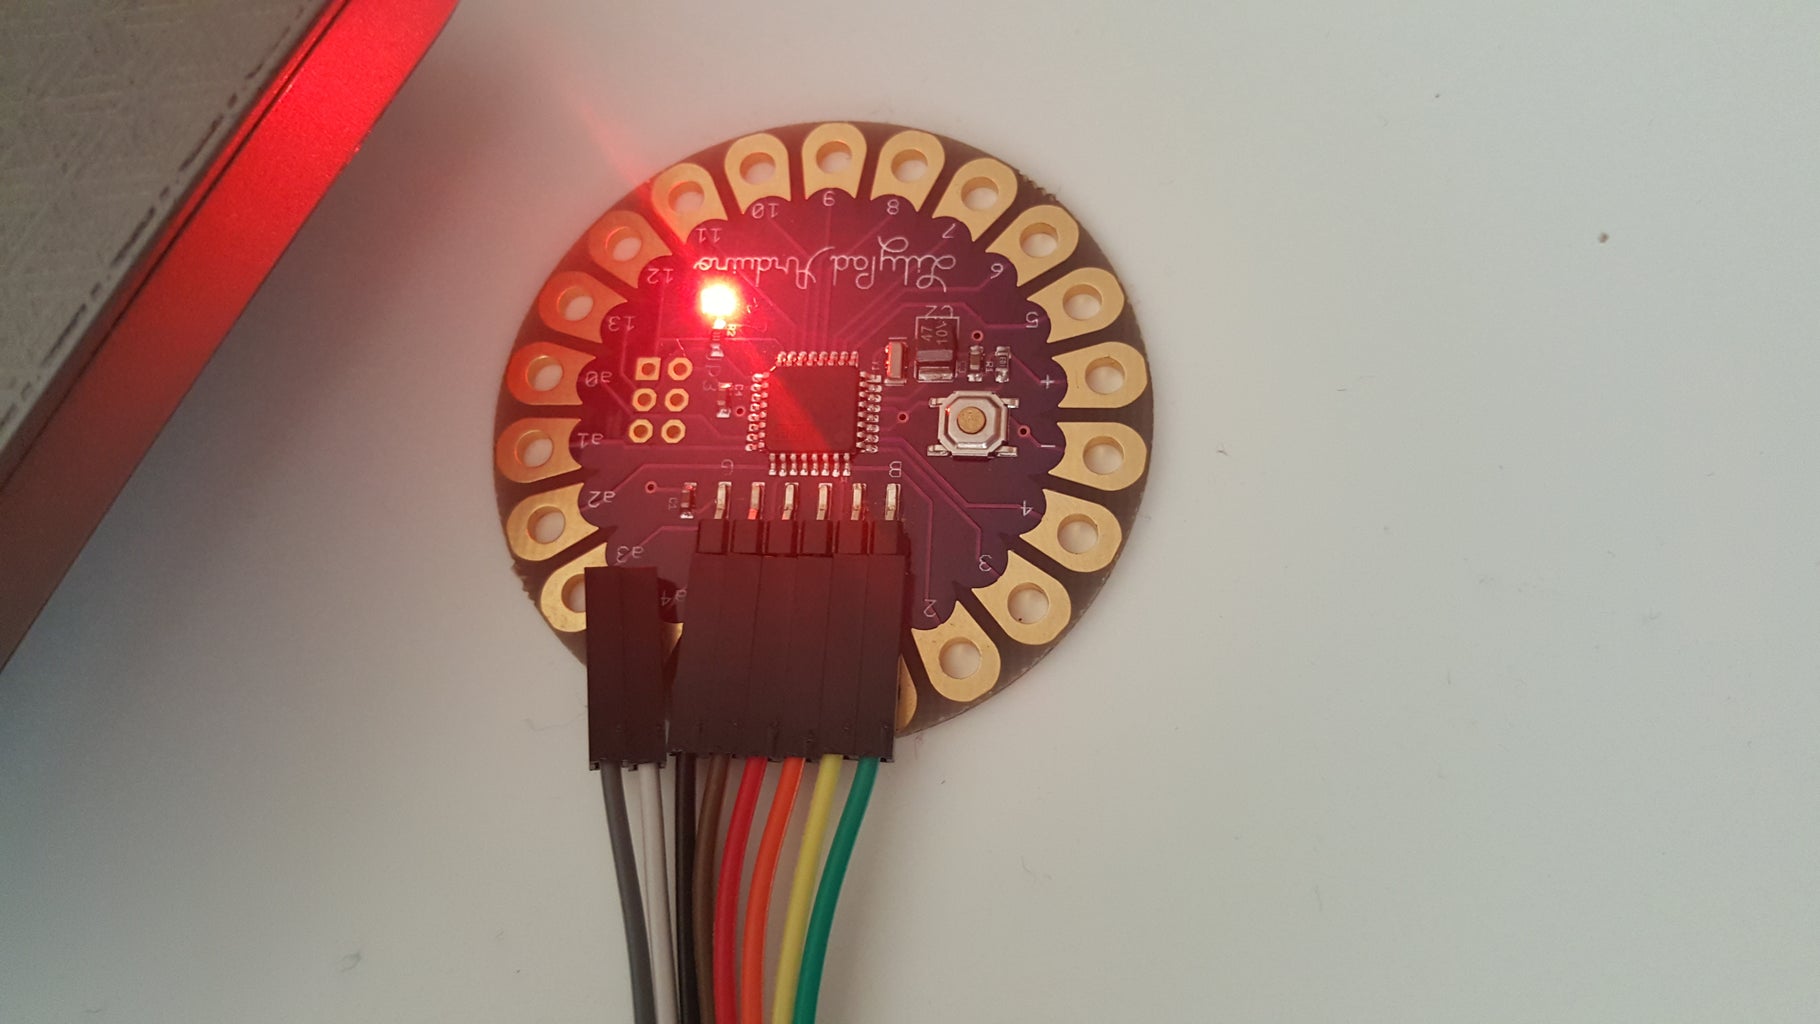
Step 2: Wiring to Lilypad Arduino
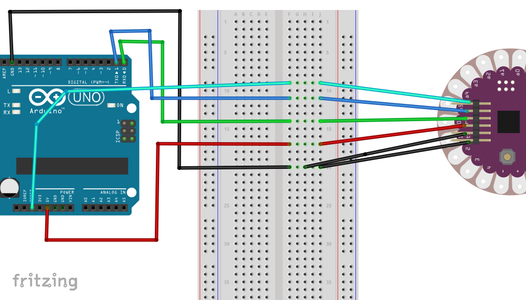

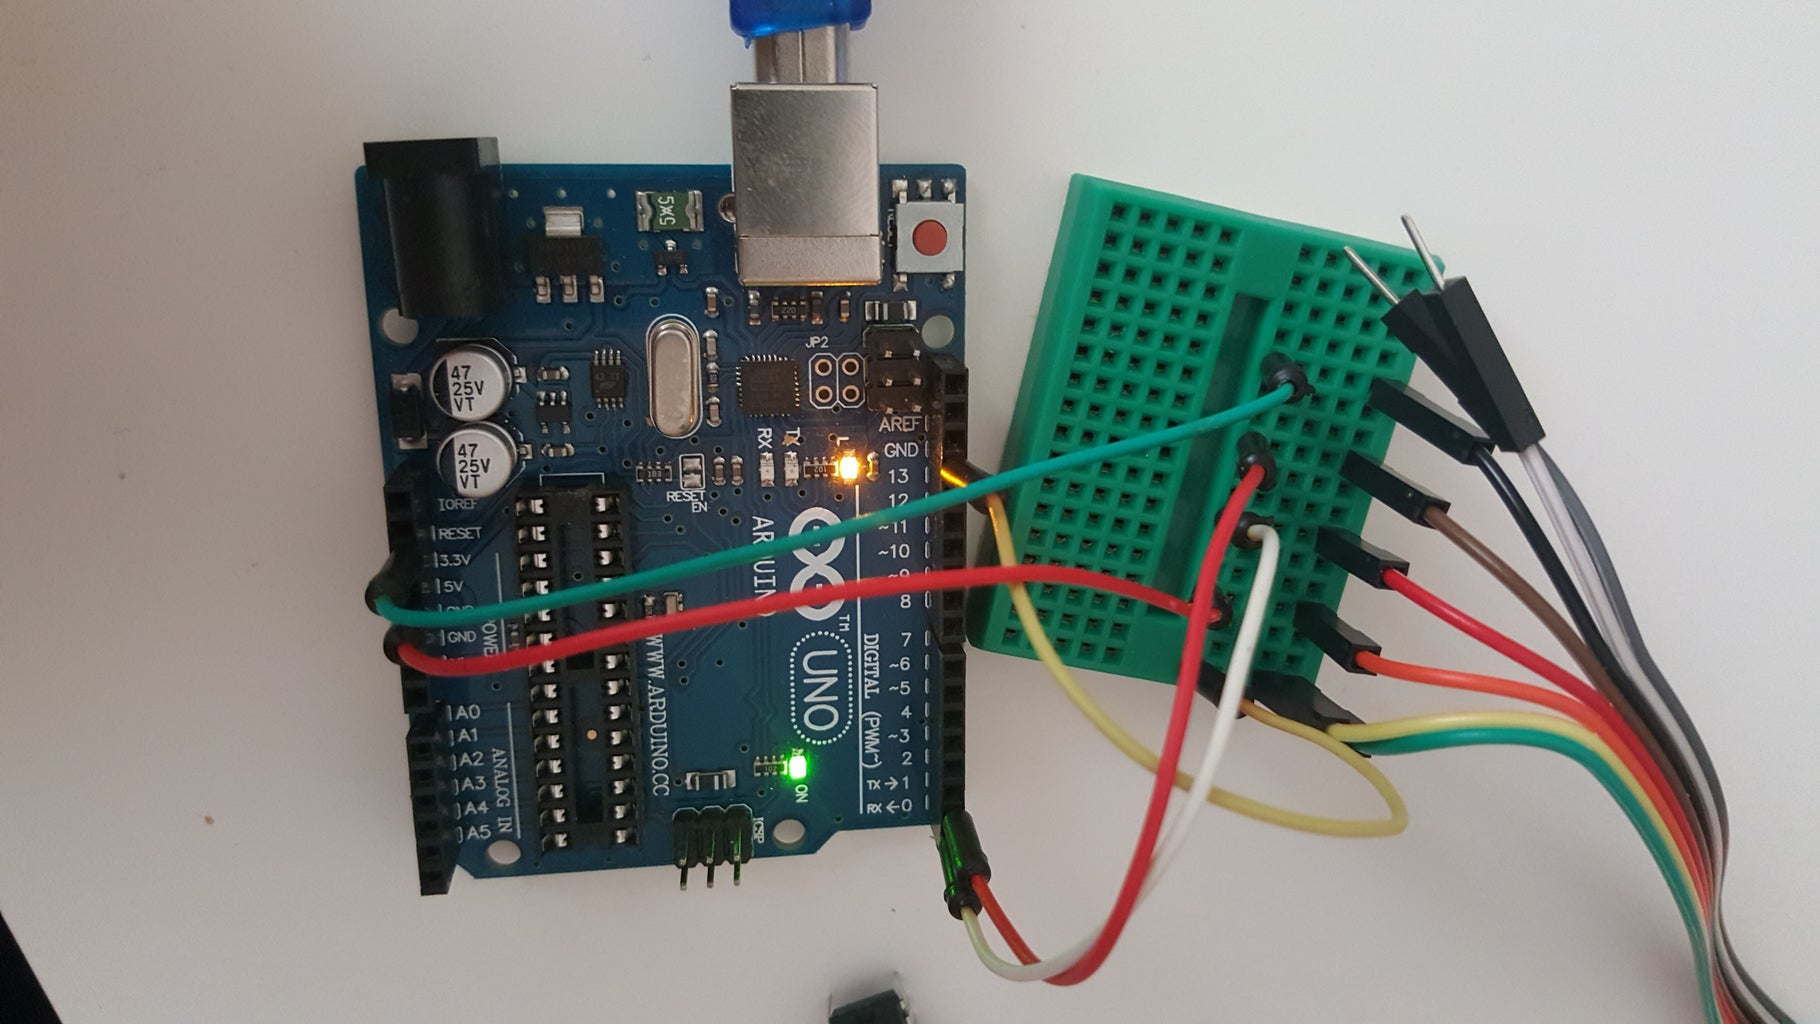

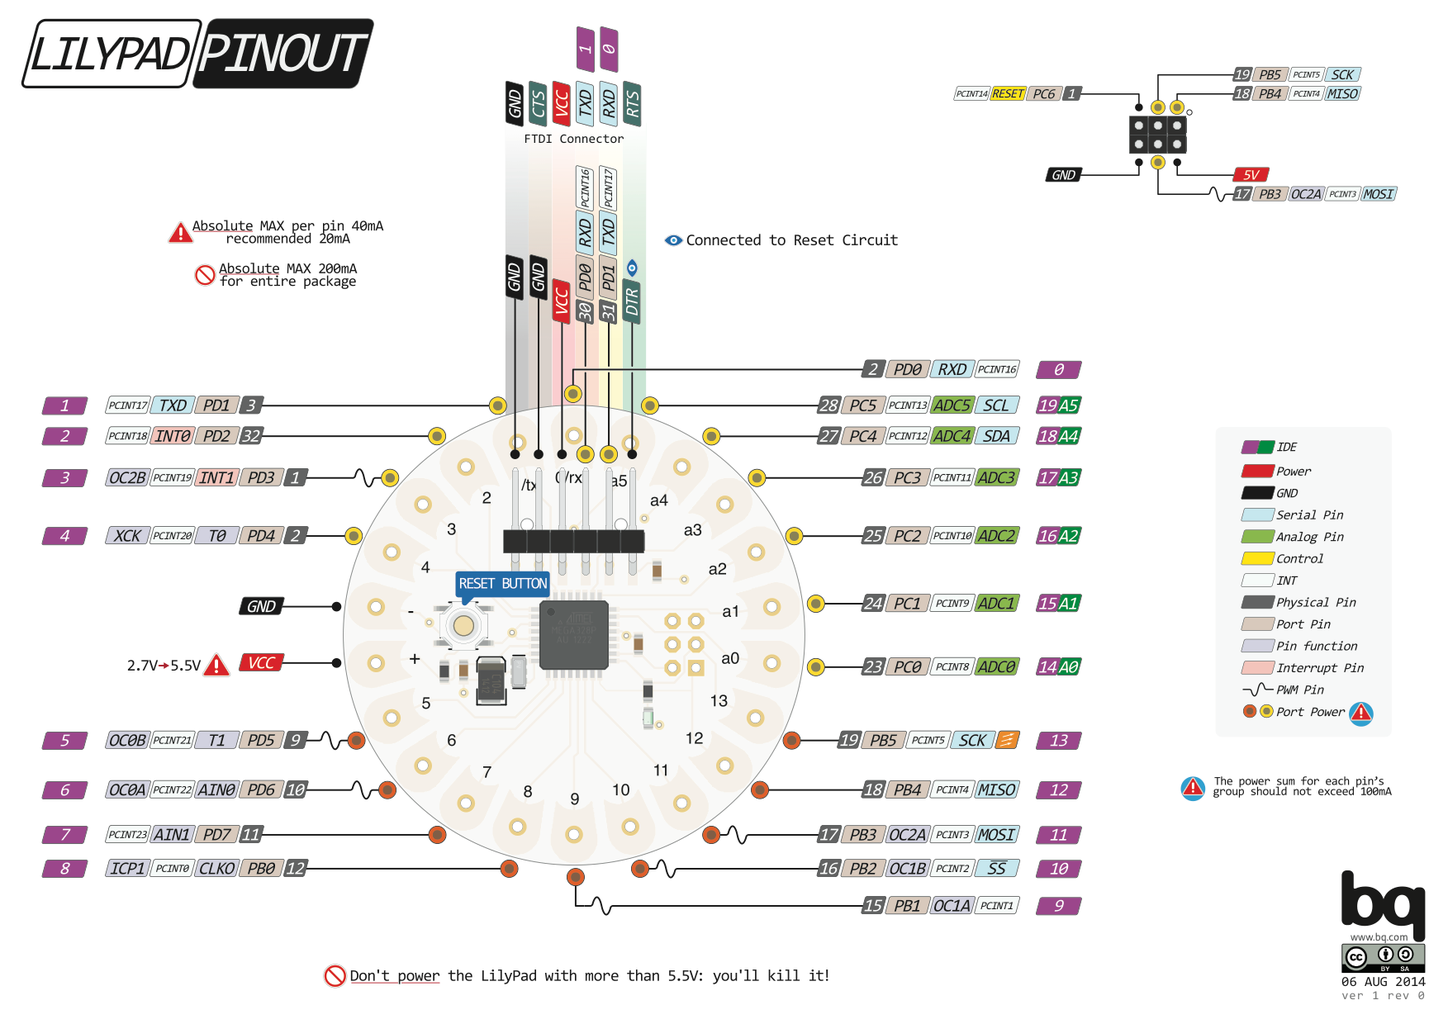
Arduino UNO's Pin 0 (RX) ==> Fourth pin of (see picture) Lilypad Arduino
Arduino UNO's Pin 1 (TX) ==> Fifth pin of (see picture) Lilypad Arduino
Arduino UNO's GND ==> First and Second pins of (see picture) Lilypad Arduino
Arduino UNO's 5V ==> Third pin of (see picture) Lilypad Arduino
Arduino UNO's RESET ==> Sixth pin of (see picture) Lilypad Arduino
Step 3: Arduino IDE Details & Example Code & Result
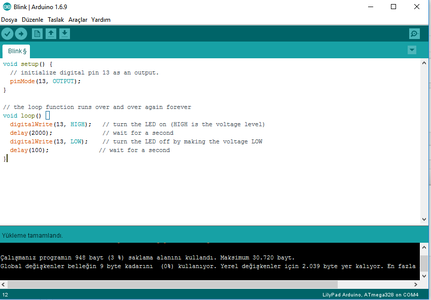
On Arduino IDE Settings:
- Tools --> Lilypad Arduino
- Processor --> ATmega 328
- Port --> **your COM port number**
Here is an example code:
<p>void setup() {<br>  // initialize digital pin 13 as an output which Arduino Lilypad have onboarded LED we will use.
  pinMode(13, OUTPUT);
}</p><p>// the loop function runs over and over again forever
void loop() {
  digitalWrite(13, HIGH);   // turn the LED on (HIGH is the voltage level)
  delay(2000);              // wait for a second
  digitalWrite(13, LOW);    // turn the LED off by making the voltage LOW
  delay(100);              // wait for a second
}</p>
Press upload button on Arduino IDE and wait your Lilypad to run a basic blinking LED.
.
That's all !
Step 4: BONUS: Reading This Instructable
NOTE: This instructable's step is aimed for visually impaired people to hear the sentences to learn what's going on here. Watch the video, it explains all steps.


