

Introduction: Import a Code Library to Arduino


Import a Code Library to the Arduino Software Environment.
This is a skill that anyone working beyond the basic code principles of the Arduino IDE will at some point have to learn.
This small instructable will be a part of short series of reference how-tos that will later point to a larger build on Instructables.
Step 1: What Is a Library? Where Do I Get One?

There are all kinds of really cool additional code libraries available on the Internet for download that add functionality to the Arduino IDE. Each one offers some unique communication skill to the IDE that allows Arduino to 'talk' with unique hardware modules, like sensors, switches, LED light strips, almost anything.
For the purpose of this Instructable, I will demonstrate how to install the FastLED.io Library
Like most libraries, It is available for download as a .zip file on GitHub.
Step 2: Good 'ol GitHub..


A lot of code is hosted on GitHub, it's a web-repository of programs that developers have crafted, and a great way for them to provide access to that code, as well as receive community feedback.
The FastLED.io library is hosted here.
I have attached the necessary file to this step.
Attachments

Step 3: Import the Library


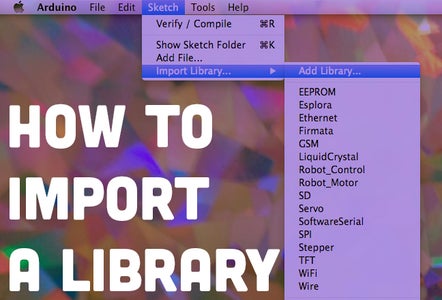
Open the Arduino IDE and Navigate to the menu bar.
From there go to Sketch>Import Library.
Select the library from your download folder to be imported into the IDE.
The library now appears in the Sketch Menu! You did it!
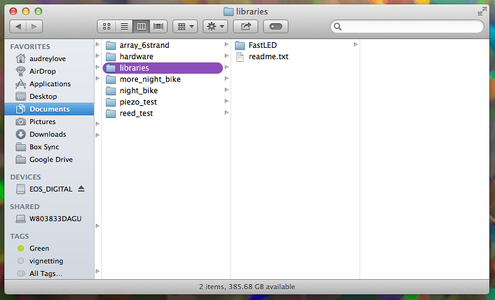
You will notice that this also adds a folder in your hard drive's file tree.
Step 4: Upload Some Code


Copy and paste this code into the Arduino IDE, and upload it to your board!
//        demo project for the Radioshack LED Tricolor Light Strip
//        a project for Arduino
//             by AUDREY LOVE
//
//
//
//        with great support from the FastLED.io Library
//            download it here: https://github.com/FastLED
//
//
//

#include "FastLED.h"

#define NUM_LEDS 10 //this defines the number of LED Segments in the Strip

#define DATA_PIN 7 //plug the green wire of the TM1803 Radioshack Strip into Pin 7

CRGB leds[NUM_LEDS];

void setup() {
  FastLED.addLeds<TM1803, DATA_PIN, GBR>(leds, NUM_LEDS);
  Serial.begin(9600);      // initialize serial communication at 9600 bits per second:
}

void loop(){
  leds[0] = CRGB::White;
  FastLED.show();
  delay(30);
  leds[0] = CRGB::Black;
  FastLED.show();
  delay(30);

}
Step 5: Test It!

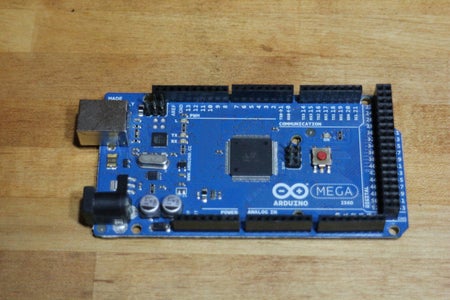


I used a 12V wall wart, an Arduino Mega and a Radioshack Tricolor LED Strip.
The tricolor LED Strip has 3 wires coming off of it.
- The green signal wire goes to DIGITAL PIN 7
- The red wire goes to Vin (voltage coming into the arduino)
- The black wire goes to the GND
Fire that sucker up (plug it into the 12v power supply.)
Step 6: Party.

Congrats! You've installed a code library to the Arduino Development environment. Now go make something awesome!


