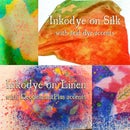
Introduction: Inkodye Tips & Tricks
The Transistor had a Lumi build night on Saturday before our monthly meeting. We had fun experimenting with the Inkodye and learned a few things about working with it.
We'll likely use it again soon, since there are some techniques we want to try (some involving our laser cutter). In the meantime, here's a compilation of our suggestions for working with Inkodye.
Step 1: Gesso+canvas=not So Absorbent
One attendee brought pre-stretched canvas on which to print a picture of her dog. Spreading the Inkodye evenly showed a bit of a problem; the canvas had apparently been coated with gesso or something like it, making it non-absorbent. We attempted to go through with the print, spreading the Inkodye as evenly as possible.
It exposed nicely enough, but when it came time to wash off the Inkodye... well... the Inkodye started to wash off completely.
Suggested Remedies:
Use uncoated canvas or sand off the coating on a prepared canvas before spreading Inkodye over the surface. We'd started to do sand off the coating from another canvas, but the attendee decided it would be easier to make a print on the back of it. This print worked out MUCH better than the first. She also layered two transparencies together for a clearer print. One transparency doesn't quite block out enough light for maximum print contrast.
Step 2: Masking Tape Isn't Bleedproof
We noticed a bit of bleeding beyond the masking tape on t-shirts.
Suggestion:
use a masking fluid. We plan on ordering some and trying this again for cleaner lines.
Another note about blue Inkodye: it can produce beautiful, intensely dark images. It's also tough to wash all of the unexposed dye out of fabric.
Suggestion: agitate like my brother in elementary school without his adderall. Seriously. Scrub the fabric by hand as if your life depends on it, using the proper amount of Inkowash detergent. This is also apparent in our first instructable when the blue splatters under the leaves showed up later.
Step 3: Don't Be Impatient, Wharff.
This is Wharff.
He's sometimes hard to catch, so we don't have pictures of his finished shirt.
It needed a bit more contrast, though.
Suggestions: duct tape
(also two transparencies, a bit more contrast in the greyscale of the transparencies, longer exposure, more scrubbing, and possibly another color of inkodye after the blue exposure to enhance some of the colors in the figure)
Step 4: Clear Surfaces Still Distort Light
Supersoftdrink wanted to experiment with the detail one can obtain on silk. The larger pieces of glass and plexiglass were in use for other prints. Since SSD also wanted to see the difference in prints covered and prints made without a glass or plastic covering the transparency, a small piece of glass was placed over some of the print here.
Conclusions:
Silk can yield some incredibly detailed prints. The details are more visible when glass is holding the transparency tightly against the fabric.
Glass does more than just hold transparencies flat. It also keeps the Inkodye wet, which results in a deeper and more accurate exposure.
Transparencies will block some light, even in the clear areas. If you're trying to be efficient with your transparencies and cut them into pieces and arrange them on a shirt, you'll have small halos around your designs unless you cut RIGHT against the printed black lines on the transparency. The halos are more apparent if you use more than one transparency layered. A halo might be a neat effect, depending on what you're aiming for.
Also... mixing blue and orange Inkodye makes a nice brown/sepia shade, as many others on the interwebz have suggested.
Step 5: Checking for Optimal Exposure
It's important to expose Inkodye prints enough for full color development, but exposing them for too long can darken the light areas of the design.
One problem is that sunlight is different depending on a whole lot of factors - time of day, location, clouds, whether it's streaming from outside a window, etc. It's not always easy to accurately time an Inkodye exposure, and sometimes a print might look like it's already fully dark or may need a little more exposure when the opposite may be true.
The best way we found to see if something was fully exposed was comparing colors on the same fabric. One could probably expose a sample of the same fabric and keep it outside to compare to the main print, but that's not nearly as fun as using lasers.
UV lasers can expose a print pretty quickly.
If you happen to have one, hold it down on the print for a few seconds (don't look at the spot - it's pretty bright). Check to see if the Inkodye that was under the laser is any darker than the surrounding area. If not, your print is done!


