

Introduction: Knocki Knockoff


Introduction
This article is brought to you by ControlEverything.com for all of your electronic hacking needs.
First we would like to start off this article by saying it was completely inspired by Knocki. If you have not heard of Knocki you have to check them out HERE! When we saw this we were instantly drawn in. It is such a simple concept but just really cool. I know they have put a huge amount of development into the product and I am convinced that it will be a wonderful functioning polished product. I cannot wait to get my hands on one to play! Now. All that said I was way to excited about getting a Knocki to wait until February 2017. So.... I started playing and tinkering with some products we had laying around(always trying to come up with something you all will find interesting). I initially tried using a 3 axis accelerometer, it just really didn't work well. So I started researching and found another post where a user was turning a light on and off with a knock. Perfect! He just used a Piezo(duh... why didn't I think of that). So I got a Photon module(go to for simple projects like this), an A/D mini module, a 3 char display, a piezo, and our work began. About 8 hours or so later we have something I feel is good enough to share with all of you. This thing is by no means anywhere near the fabulous finished product Knocki is putting together and I am 100% confident it does not work as well and definitely doesn't look as good! Enough talk, lets do the darn thing.
Step 1: Hardware

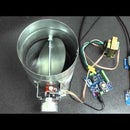
(Horns)Hardware Assemble!!!! Easiest part right here. Connect the Piezo to the screw terminals on the ADC mini module. Then use the I2C cables to connect the ADC board and 3 segment display to the I2C interface module, plug in the photon, apply power via USB cable plugged into Photon. Done!
Here is the hardware you need:
Step 2: Firmware

Step 3: Test

With everything hooked up, firmware loaded, it's time to give it a test. I have found the easiest way to do this is to go to https://dashboard.particle.io Login, then click on the console icon on the left to view a live stream of events. Now place the piezo sensor on a flat surface such as a desk, then knock twice on the desk. The character display screen should read 2 and you should see an event on the Particle dashboard with the name knocks and the data 2-knocks
Should look like this in the dashboard console. The name of my Photon module is Knocki
You can play around knocking on the desk and have a good time for a while now. Once you're done keep on reading.
Step 4: Do Something With It IFTTT!

Ok so knocking on the desk and watching the display and dashboard are fun and all but it's way cooler to do something with it. This is where Knocki is captivating audiences! The simplest way to get the most bang for your buck is to monitor the event on IFTTT and trigger actions based on the number of knocks. Honestly I do not know if this is how Knocki will work once it's released or not. This is just how I see it put to best use. Simply go to IFTTT and create a recipe. Use Particle as the Trigger channel and register it on New Event Published. Enter knocks as the name of the event and for data enter X-knocks replacing X with the number of knocks you want to trigger this recipe. Now for the Action Channel in the recipe let your imagination be your guide. You can trigger Phillips Hue bulbs to turn the lights on, the Particle channel to trigger an action on another Photon module in a distant galaxy, etc. I just had it send a notification to my Phone through the IF channel if someone knocked 5 times(kinda sounds lame but dont knock it till you try it ;)
Step 5: Make It Better and Don't Forget to Share!

This an open source project. The beautiful thing about that is you can help make it better. We did not spend a huge amount of time building this project but it was a bunch of fun. We hope you enjoy it and figure out ways to make it better. If you do make improvements be sure to share them with everyone by submitting pull requests to the GitHub repo.


