

Introduction: LED Pattern1 Using Atmega16


Here I am going to say on how to make a pattern using led's and a microcontroller. Here I have used avr trainer board which uses atmega16 IC. So lets take a look on further steps.
Step 1: Requirements:


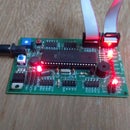
1. AVR trainer board( LED's are already there on the board)
2. AVR USB programmer( Used to upload the code from PC to trainer via this programmer).
3. 10-10 FRC (Flat Ribbon Cables)
(FRC are used for connection)
4. 12V adapter for power supply (5-12V adapter can be used. Do not exceed 12V).
Step 2: Process:
First of all connect the USB programmer to trainer board by FRC. The pink wire on FRC should be kept towards ground side(this is needed for easy recognition of connection in case of complex circuit). Now connect the portB of trainer board to LED port on same board. Upload the program by connecting the USB to pc. You can download the code below. After uploading the code, remove the USB and connect the 12V adapter and switch on. The LED start glowing in pattern. Adapter is optional. Power can also go from USB port
Attachments

Step 3: Demonstration:
You can see the video to get it easily:
Step 4: End
For more details you can email to


