

Introduction: Laser-Cut Windowed Teabox


Hello :)
I want to show you the teabox I made.
I made this one for my girlfriend last christmas, that's why her name is written on the frontside. I changed the text a little bit in the files I attached. But you can modify it as you want, I will explain this later.
You will need:
- Plywood (best would be 4mm, because otherwise you would have to modify the .svg files pretty much, I used poplar)
- Acrylic Glass (clear, also 4mm)
- A Lasercutter
- Glue (should stick on wood and acrylic glass)
- Wood Oil (for the finish)
- Tea
Step 1: Lasercutting

So the first step is the lasercutting. You should use 4mm wood plates so that the parts match up. Only for the window on top I used 4mm acrylic glass.
You can use InkScape to modify the .svg files and add some Text or pictures.
For cutting I used VisiCut. In this program red lines will be cut, black lines will be engraved.
You will need
- 1x Front.svg
- 1x Back.svg
- 2x Front_Back_pt2.svg
- 2x Sides.svg
- 1x Top_pt1.svg
- 1x Top_pt2.svg
- 1x Bottom.svg
- 4x tea_separating_parts.svg
- 1x Window.svg


Step 2: Glueing


The next step is glueing everything together. I think it should be clear which part belongs where by the file names, otherwise the pictures will help you.
This is important:
Glue Top_pt1 and Top_pt2 together, so that there is the same distance to all the sides. The window should perfectly fit into Top_pt2. All together theses 3 parts combined should perfectly fit in the rest of the box.
In one picture you see that the heights of the "front_back_pt2" and the "tea_separating_parts" don't match exactly. I fixed this for you. Now it should be the same height ;)
Step 3: Oiling
When the glue is dry (after about 2 days) it's time to oil the wood. On one hand this is to give the wood a pleasurable touch and look, on the other hand it makes the wood more durable. It's important for the glue to be dry, otherwise, if you oil the box too early, the glue won't stick very good.
You can also glaze or paint the wood, but I decided to use oil.
I used a linseed oil without any pigments so that the text and images stay identifiable. For the wood not to bleach out it would be better to use a darker oil with pigments. Your choice.
When the box is dry you can add a second and if you want to a third layer of oil, I made two layers.
In principle you can use every oil you want, olive oil or rapeseed oil. This would be much cheaper, but doesn't protect the wood as good as a special wood oil.
Sorry that there are no images in this step :(
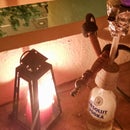
Step 4: Fill It Up With Tea!


Your box is complete now. You can fill it up with any tea you like :)
Have Fun :)


