

Introduction: Light Box From Cardboard Box

I wanted to be able to take some professional looking photographs of my projects, but I needed a solution that was quick and cheap. What I needed was a light box, and while good quality ones aren't exactly expensive at about $20-$40, I found a solution that was free (since I already had the materials) and only took about 10 minutes to make. So without further ado, let's get started.
Step 1: Materials and Tools

This project is incredibly simple and only requires the following materials and tools:
Materials
- Cardboard box
- White printer paper
- Packaging tape (really any tape will do)
Tools
- Sharp knife or scissors
You'll also need a couple of lamps to light the box. Cheap desk lamps will work well.
Step 2: Putting It Together
To start, you'll want to cut out a rectangular section slightly smaller than your piece of paper from the top, left, and right side of the box. Next, tape a piece of plain white paper over each of the holes you just made. This is where the light will enter the box, the paper dispersing the light and giving the inside a nice glow. Finally, line the inside of the box with more paper. Try to avoid overlapping the pieces as you will see the line in your pictures. However, this is easy to hide with a decent photo editing software, so it's not critical. And that's all there is to it!
Step 3: Results


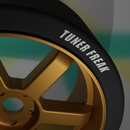
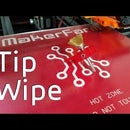
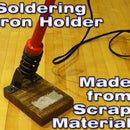
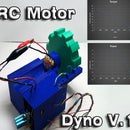
This light box works great and makes photos look much cleaner and more professional. It's very useful for making thumbnails or anything where you want to layer multiple images, as the white background is easy to separate from the foreground. Plus this took less time and cost less than 3D printing a background holder.
Thanks for reading and please check out my other Instructables!

Participated in the
Cardboard Contest 2016


