

Introduction: Line Follower Robot Using Arduino


The Line Follower robot tends to follow the black line until the robot receives the black area where it completely stops and hence we aim to make this kind of robot.
This kind of concept can be used in the future, where self-driving cars seem inevitable.
Supplies
We would be using the following things:-
>Arduino UNO
>Driver motor (to drive the motors)
In my case, I used the L298N model
>Chassis or body of the car
>Two IR Sensors
>2 DC Motors (Prefer to use low-voltage motors)
>Some 9V batteries
Step 1: Understanding the Concept


Before starting, we should know the concept on which it works. IR sensor would send Infrared light to the ground and light gets reflected back once it strikes the ground. What we need to know that black bodies absorb most of the radiation, so light is not reflected back. Hence we can distinguish between black and white ground.
That would be done by IR Sensors. And according to it, our driver motors will drive our motors with the help of Arduino
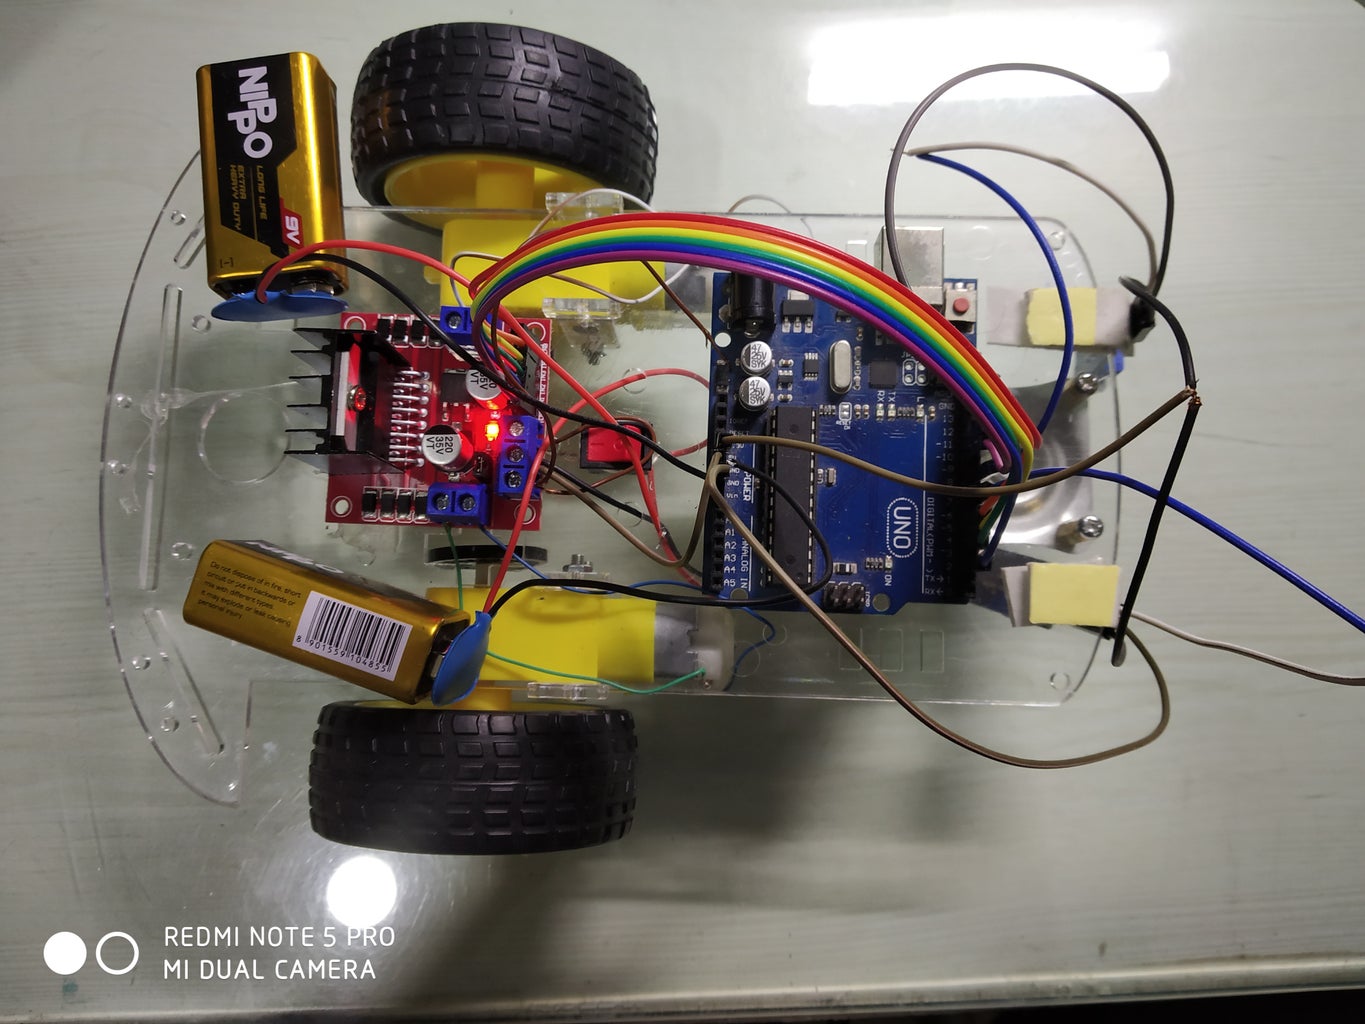
Step 2: Attaching the Circuit

The circuit may seem a bit difficult but understand what I have to say.
(Note: I did my whole circuiting in L298N So I would be telling you only that)
>Driver Motor to Motor
Connect one of the motors to OUT 1 and OUT2 terminal in driver motor and other to OUT3 and OUT4.
The motors usually have two pins available for it.
>Aduino UNO to Driver Motor
IN1 to 2
IN2 to 3
IN3 to 4
IN4 to 5
ENA and ENB must be connected to the pins which have PWM (Pulse-Width Modulation) pin i.e. pins having "~" (Tilda) sign before the number. Search about it before you do!
I connected ENA and ENB to ~10 and ~11 pins respectively.
I connected the grounds of Arduino (GND pin) and Driver motor (GND pin) to keep the ground at the same potential.
To give power to the system I connected 9V battery positive supply to +12V and negative potential to the GND pin to either Arduino and Driver motor.
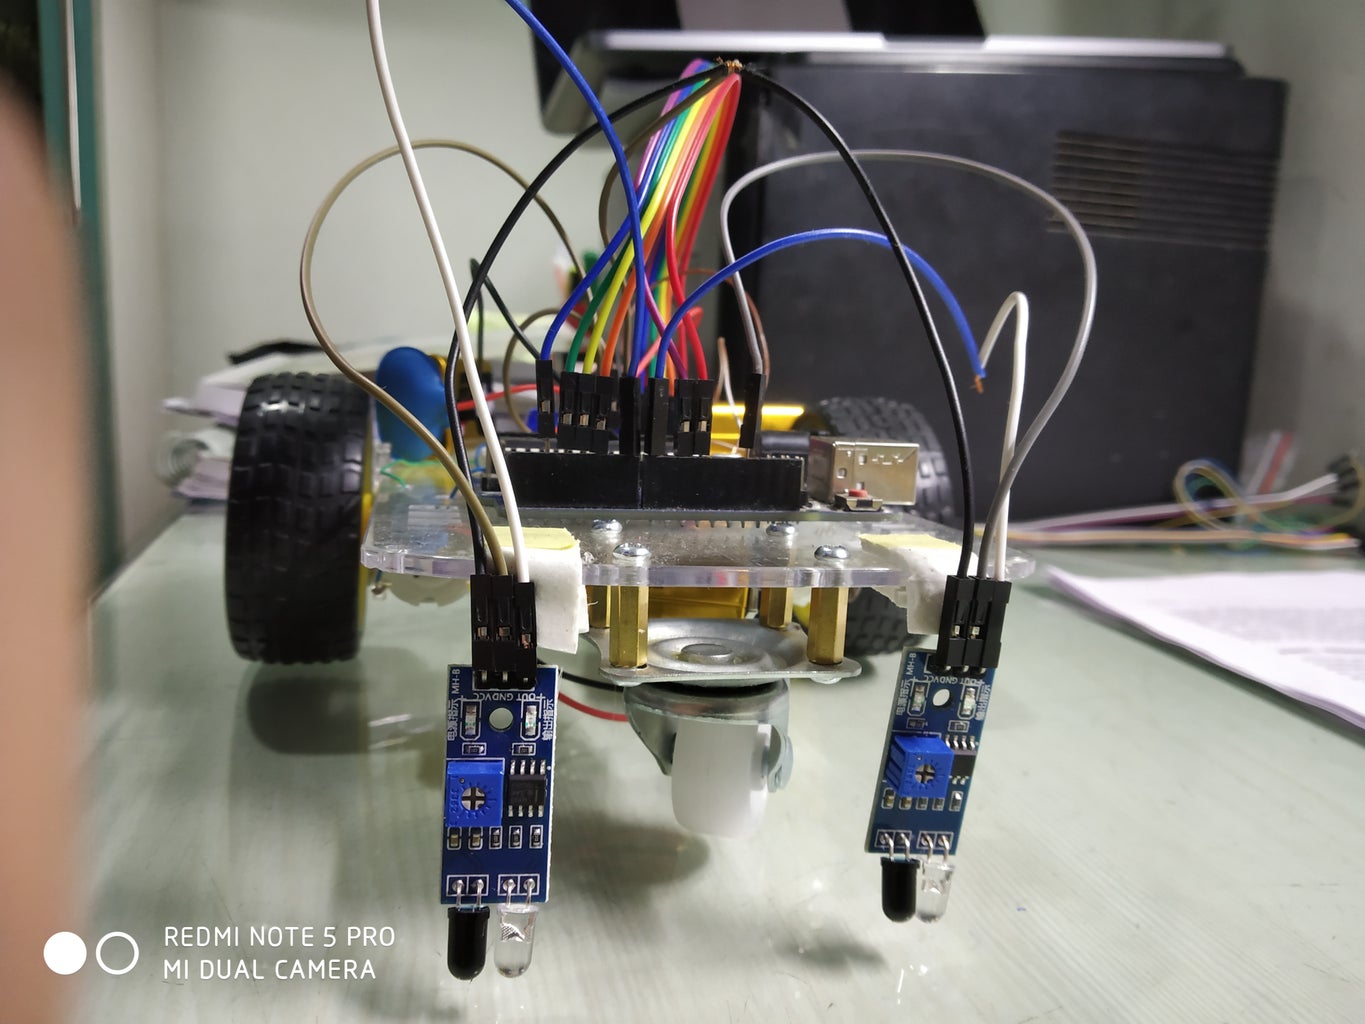
Step 3: More About IR Sensors
IR sensors usually have 3 or 4 pins
>OUT
>GND
>VCC
IR sensors don't need to be connected to PWM pins. Therefore, I connected the two of them to 7 and 8 pins respectively.
I connected the GND pins of them to the ground of Arduino.
I connected the VCC pins to each other and one of the pins was connected to the 5V pin in Arduino.
So this way both were connected to the 5V pin of Arduino.
Step 4: Writing the Code for This......

/*Download the software from above*/
int ENA = 10;
int IN1 = 2; int IN2 = 3; int IN3 = 4; int IN4 = 5; int ENB = 11;
int RightSensor = 7; int LeftSensor = 8;
void setup()
{ Serial.begin(9600);
pinMode(IN3, OUTPUT);
pinMode(IN4, OUTPUT);
pinMode(IN1, OUTPUT);
pinMode(IN2, OUTPUT);
pinMode(ENB, OUTPUT);
pinMode(ENA, OUTPUT);
pinMode(LeftSensor, INPUT);
pinMode(RightSensor, INPUT);
analogWrite(ENA, 125); //this checks the speed of the robot
analogWrite(ENB, 125); //Same with this
delay(200); }
void loop()
{ if ((digitalRead(LeftSensor) == 0)&&(digitalRead(RightSensor) == 0)) forword();
if ((digitalRead(LeftSensor) == 1)&&(digitalRead(RightSensor) == 0)) turnLeft();
if ((digitalRead(LeftSensor) == 0)&&(digitalRead(RightSensor) == 1)) turnRight();
if ((digitalRead(LeftSensor) == 1)&&(digitalRead(RightSensor) == 1)) Stop(); }
void forword(){
digitalWrite(IN1, HIGH);
digitalWrite(IN2, LOW);
digitalWrite(IN3, LOW);
digitalWrite(IN4, HIGH); }
void turnRight()
{ digitalWrite(IN1, LOW);
digitalWrite(IN2, LOW);
digitalWrite(IN3, LOW);
digitalWrite(IN4, HIGH); }
void turnLeft()
{
digitalWrite(IN1, HIGH);
digitalWrite(IN2, LOW);
digitalWrite(IN3, LOW);
digitalWrite(IN4, LOW); }
void Stop(){
digitalWrite(IN1, LOW);
digitalWrite(IN2, LOW);
digitalWrite(IN3, LOW);
digitalWrite(IN4, LOW); }
Step 5: Precautions
In some places, the Arduino while starting may give a screeching or high-frequency sound that means the power supplied may not be enough so you can connect another battery to Arduino.
For this, Connect 9V battery positive end to Vin terminal of Arduino and negative to GND pin. Then it may stop making that sound or use new batteries.


![Tim's Mechanical Spider Leg [LU9685-20CU]](https://content.instructables.com/FFB/5R4I/LVKZ6G6R/FFB5R4ILVKZ6G6R.png?auto=webp&crop=1.2%3A1&frame=1&width=306)


