

Introduction: Mini Hydroponic Basil Farm

Mini Hydroponic Farm made from a couple of tin cans, and a DC submersible pump, controlled by a Raspberry Pi.
I'm using tin cans as these are easy to source and stack-able to sit the growing container on top of the reservoir (I'm using bean tins with ring pulls so they are still stack-able after eating the contents - Some tin openers may remove this function after opening )
I'm currently growing basil on the window sill as a test - If this works I'll up-scale for tomatoes and peppers next spring.
Parts List:
- 1 Large tin can
- 1 small tin can
- 12v DC submersible pump (Example pump)
- 8mm* Tube (*Internal Diameter)
- Raspberry Pi
- PiFace (You could use a a transistor to control the pump, but I'll not cover that here)
- Basil cutting
- Nutrients
- Clay Pebbles
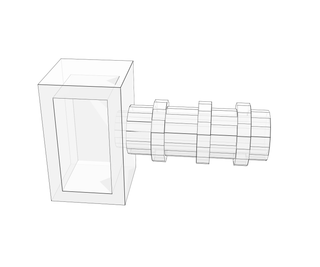
- 3D printed water diffuser (Optional)
- Small piece of cloth
- Zip-tie
Tools:
- Drill/Dremel
- Small Drill bit eg.1.5mm
- Large Drill bit (10mm)
Step 1: Big Can Preperation

Drill a small hole in the top side of the larger can to feed the pump power cord out from the reservoir
Step 2: Small Can Preperation

Drill 1 big hole (10mm) in the base of the small can towards the edge
Dill multiple small holes in the base for drainage (I used a 1.5mm drill bit)
Step 3: Pump Preperation
Add the small square of cloth to the pump inlet to act as a filter (Secure with a zip-tie)
Attach the tube to the pump outlet (cut to length so the tube sits at the top of the can)
Insert the tube up the big hole in the small can. (Fit a [optional] 3D diffuser to disperse the water)
[I've attached the STL file for my simple diffuser]
Attachments
Step 4: Add the Clay Balls and Cutting


Add the clay balls and the cutting to the small tin
(Optionally you can add a small diffuser to the top of the pipe to spread the water when the pump is on)
Fill the bottom reservoir with water and nutrients - Don't go higher than the hole you drilled in the side of the tin ;)
Step 5: Program the Pi

The Pi controls the pump I'm using a PiFace expansion board.
The PiFace has all inputs and outputs protected so you are less likely to fry your Pi. But you could power this from the 5v GPIO pin and a transistor (I'm not going to cover that here).
This script runs the pump for one minute every ten minutes and saves a log file to a web page so I can view it over my home network. This only runs between 7am and 6pm. As I don't want to water at night (But the pump is very quiet)
[I've scheduled this script to run every minute using crontab]
These settings can easily be adjusted in the script to suit your needs (See attached):
Attachments

Step 6: Wait & Hope

Now its time to wait and hope!
Remember to change the water every 10 days or so ;)
I've only just started this project - but the Basil cutting has already grown 1cm ;)
I may add a temperature gauge to log the temp and water sensor to check the levels in the reservoir and send a email warning if its low.
If this works I'll make a bigger outdoor farm with tomatoes and peppers next spring.

Participated in the
Formlabs Contest

Participated in the
Tech Contest

Participated in the
Microcontroller Contest


