Introduction: Music Box
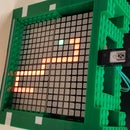
Hey everyone, I'm back with another project. This one's basically a boom-box that can play, pause increase/decrease volume and skip songs. I made it using some Legos and a Microduino 302 kit although I think the 202 has the parts as well. My only issue is adding tracks to the device must be done in the code otherwise it works great (big sound quality improvement over the 301 kit).
I also added a fun feature which is a link between the microphone and LED matrix which changes intensity based on the analog output from the mic. When paired with music it makes for a pretty cool and simple visualizer!
My materials for this project are as follows:
- Lego Bricks (excuse knockoff pieces)
- 1x6 blocks (x3)
- 1x4 blocks (x15)
- 1x3 blocks (x3)
- 1x2 blocks (x4)
- 2x8 plates (x20)
- 4x4 plates (x1)
- 1x2 plates (x2)
- Microduino mCookie stuff
- Core Module
- Audio Pro Module
- SD Module
- LED Matrix Module
- Hub Module
- Any other module to use as a filler to get the right height (I recommend the motor module)
- Speakers from kit
- Capacitive touch or bumper sensors (x3)
- Microphone sensor
I want to mention that when programming or adding more music, the box must be opened up because of issues with the number of pins in use preventing the ability to program the Core and the physical ability to access the microSD card. The programming issue can be solved by popping the hub off the stack.
Step 1: Assemble the Base
So this step could be skipped if you have a 8x16 plate piece but I didn't so this is how I made my base. I think it's pretty self explanitory. It uses 14 - 8x2 plates and 4 - 2x2 round feet.
Step 2: Add the Microduino Parts
Before assembling the box I added all my microduino pieces to the base. This includes the speakers, sensors and battery + modules. I hope the wiring is clear enough to follow in the pictures. I will be redundant and state how they are connected below:
- Microphone (Pin A6/A7)
- Right Button (Pin 2/3)
- Middle Button (Pin 4/5)
- Left Button (Pin 0/1)
The left button controls volume down and skips to the previous song if held for over a second. The right button does volume up and skips forward. The center button is for play/pause.
The order in which the modules stack does not matter except that the hub and LED matrix modules should be on top (The hub is too thick to go anywhere else).
Step 3: Build the Box
The image above is the entire box with the base and Microduino parts removed. It's mostly made of 1x4 blocks with the 'roof' made of the remaining plate pieces.
I started the construction by building the walls next to the speakers and then focused on creating the opening for the LED matrix. This proved a bit tricky as there are only 2 attachment points on top of the modules but attaching the pieces to the roof worked pretty well. The hole for the LED matrix is 2 blocks deep and 3x3 in width and length. I used the 1x6 blocks to connect the modules to the two side walls.
Step 4: Uploading Music and Code
Now that the box is complete, it's time to do add music and the program. First, get an SD card up to 8gb. The 302 kit comes with a 512 mb SD card. Add whatever music files you'd like to it (mp3 format). I had some issues with complex song names so I simplified them to just alphanumeric (0-9 and a-z) and it worked fine. Next, open up the project attached in Arduino for Microduino and edit the following lines to add your tracks:
const static int NUM_SONGS = 1;
const String SONGS[NUM_SONGS] = {"TakeFive.mp3"};
The first constant is the number of tracks you'd like to be able to play. The second is the list of song names (there must be the same number of song names as number of songs and they will play in the order they are written).
If I wanted 3 songs the variables would look like this:
const static int NUM_SONGS = 3;
const String SONGS[NUM_SONGS] = {"SongOne.mp3",
"SongTwo.mp3",
"SongThree.mp3"};
Put it back together, turn it on and that's pretty much it! I hope you enjoyed my second instructable!
Attachments
Step 5: Enjoy the Music!

Participated in the
Microcontroller Contest 2017


![Tim's Mechanical Spider Leg [LU9685-20CU]](https://content.instructables.com/FFB/5R4I/LVKZ6G6R/FFB5R4ILVKZ6G6R.png?auto=webp&crop=1.2%3A1&frame=1&width=306)


