

Introduction: Oblivion Keyblade Prop - Kingdom Hearts


More by the author:


About: I am a graphic artist during the day and at night, I create soul food. Cosplay is a joy is my passion. Illustration has been placed on hold since the "2020 dumpster fire" of year. I'm working on it
My first prop for my first major cosplay/costume I made many many years ago. The keyblade prop was made directly after I finished Kingdom Hearts I. I was so enamored with the teaser called "Deep Dive" and had to make the costume of the character "blind Riku". Had so much fun with this costume. <3
SUPPLIES
Structure:
Paper mâché:
Paint:
SUPPLIES
Structure:
- wooden stake (one they would use for a lawn sign)
- wire (16 gauge, tie wire, usually in the gate area of a hardware store)
- thinner wire
- cardboard paper
- cheap mat board
- heavy duty staples (staple gun)
- hammer
- plastic chain links
- box material
- hot glue gun
- 2 - 2.5 inch note card ring
Paper mâché:
- news paper
- flour (I did use geso but that was a mistake. WAY TOO HEAVY)
- water
Paint:
- flat black spray paint
- color acrylics
- pearlescent paint (blue)
- satin finish clear acrylic spray paint
Step 1: Structure - Part 1


Steps:
- Took some paper and drew out the keyblade to actual size. I used butcher paper which is very useful for all sorts of things.
- Laid the wooden stake in the middle of the keyblade drawing. It is to be where I can hold the prop without crushing it.
- Created the wire edge of the keyblade following the drawing exactly.
- As I crossed the wire over the wooden stake as I made the frame. Stapled it to the stake and hammered the staples later to strengthen the connection point.
- Repeat #3 - #4 so that you will have a wire frame outlining the keyblade sketch/drawing for both the top and bottom.
- Since the keyblade head has very sharp angles/edges I decided to cut out mat board to the shape and use that to sit on top of the wire frame. Worked very well. (Hind sight, I could have done that on the whole blade over the wire frame.)
- At certain points I had to thread thin wire in and out long strips of card board to act as spaces between the top and bottom wire layers. (picture #2)
- I also hot glue spacers made from rolled up box material between the edge of the blade and the wooden stake. (picture #2)
Step 2: Shell - Part 2


Paper mâché:
- cut long strips of news paper from 1.5" to 2" in width.
- mix flour with water until you get a pancake consistency. Add more water as it congeals more.
- dip strips in flour/water mixture and start wrapping the blade wire structure.
- let it dry in stages before adding more layers of strips.
- Once it is dried completely, it is ready for painting.
**NOTE
Glue - Also heard of fish glue used for paper mâché. I have also used Elmers or white (water soluble) glue dissolved in water too in the past. Worked just as well.
Mistake - don't use geso. Too heavy after covering the full blade. Wears you hands out faster while carrying it. **
Step 3: Painting and Finish - Part 3


Main body:
Cheers.
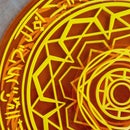
- used a flat black spray paint acrylic to work as both a primer and base coat.
- painted out the main components in yellow paint. (Color theory = most final colors used on the blade are purples and cold blues. Complementary color is yellow (round about). The idea is your subconscious will see the yellow interacting the with the top colors no matter how much the final paints cover making the finished piece electric.)
- finished off the main painting, all with acrylics.
- outlined the edge of the blade, front and back, the blue pearlescent paint. You don't really see it until light hits it on and pow! It really pops out the blade in a good way.
- finish off the blade with at least 2-3 coats of satin finish clear acrylic spray paint. Helps make teh paint job last longer through wear and tear.
- cut out 2 "crown" shapes. Hot glue them together with a link sandwiched in between at the end of the chain.
- used a flat black spray paint acrylic to work as both a primer and base coat.
- edged the "crown" with the blue pearlescent paint.
- finish off the chain/key chain with at least 2-3 coats of satin finish clear acrylic spray paint.
- I made 2 small holes at the end of the blade and inserted a note card ring that hinges and closed it with the key chain attached.
Cheers.

Participated in the
Halloween Props Contest


