

Introduction: OctaMeasure: 3d Printed Measuring Tape for Visually Impaired


OctaMeasure displays the Ones and Tens digits on the 2 Wheels with Braille markings. The Ones Wheel has a ribbon wound around it. When the ribbon is pulled out 10cm, the Ones wheel with 10 braille markings (from 0-9) moves a full turn. Due to a 4:1 gear ratio, the Tens wheel (with 4 braille markings 0 -3) moves 1/4th turn to the next mark.
The Ones and Tens digit can together show measurements upto 39 cm.
Here is my first instructable. Hope you find it useful.
Step 1: The Design
Inspiration
The inspiration for this device came from a Mechanical Odometer and Surveyor’s wheel, with the underlying idea that the distance traveled by a circle in one full rotation is equal to it’s circumference. Using a geartrain, a mechanical odometer displays the total distance traveled, by moving different digits linked to different gears.
I used the same working principle, to display the distance traveled by a string/band wound around a pulley, in the form of digits that can be read by a human, in this case braille numbers that can be touched by visually impaired people, or even people with normal eyesight to measure distance in low light conditions(gotta learn braille though!).
The Design
The design consists of 2 Wheels for Tens and Ones digits, with braille markings on each. These wheels have inter-connecting gears that move them in the ratio of 4:1
The Ones Wheel has a ribbon wound around it. When the ribbon is pulled out 10cm, the Ones wheel with 10 braille markings (from 0-9) moves a full turn. Due to a 4:1 gear ratio, the Tens wheel (with 4 braille markings 0 -3) moves 1/4th turn to the next mark.
2 slots cut into the casing expose the braille markings on the two wheels.
I named it Octa-Measure due to it’s octagonal shape which is easy to 3d print and also covers circular gears without wasting much space.
Goals:
The primary goal was to prove the underlying mechanism’s working in real world, get something that ‘works’ and identify challenges for a better second iteration. Ergonomics, Aesthetics, etc were not much important for the first prototype.
Step 2: Parts Required

- 3d Printed Parts: Total 7 (I ordered mine through 3d Hubs, printed in PLA at 200 microns.)
- 8mm Shaft – 70mm Length (I used 8mm Aluminium shaft)
- 5mm Shaft – 20mm Length (Cut off from an M5 machine screw)
- Adhesive
- M8 Washers – 4
- A Ribbon – Atleast 45cm length

Step 3: Assembly


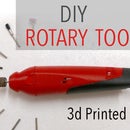
The 3d prints required some finishing for the gears to move smoothly and the enclosure to fit together. Minor sanding of the holes where the shafts rotate was required for smooth operation. All the finishing was done using my own 3d Printed Rotary Tool which I designed and built.
1) Stick only the Ones wheel and Small Gear to the 8mm Shaft using adhesive.
2) Insert a ribbon into the slot cut out in Ones wheel, take it out from the other side, form a loop and Stick it. The small arrow indicates the correct side to insert the ribbon from.
3) Assemble the Tens Wheel on 8mm shaft and multi-gear on 5mm shafts with washers between moving gears as shown, and place the shafts in the lower part of the enclosure. Washers are mainly to provide spacing.
4) Bring the ribbon out through the small slot cut out in the lower casing. Measure and cut 39 cm of the ribbon. Create a loop at the end as a stopper. Optionally, Add something like a piece of fiber tape in between the loop.
5) Close the top half of the casing and stick the winder wheel to the outer end of the 8mm shaft.
6) Measure!
Step 4: Improvements for V2

This design was done on a very short timeline to enter it into ongoing contests, and since I don’t own a 3d printer, the time and money constraints meant I had to get things right the first time.
For this reason, the prototype is mainly to prove the underlying concept without much focus on aesthetics, ergonomics or any complicated design features. Just something that works.
While it works great for a first prototype, there are several improvements that can be done for better usability.
Improvements
1) Replace adhesive with mechanical connections.
2) Reducing gear size.
3) Improved Ergonomics and Aesthetics.
4) Adding a spiral spring like in Measuring tapes.
5) Increasing the Measurable distance.
6) Possibly a mechanism that moves different pins to form braille numbers.

Participated in the
Design Now: In Motion Contest


