

Introduction: PIXEL - Interactive LED Art


In this Instructable, I'll talk about PIXEL which is currently on KickStarter (Shameless Plug). And also how a guy with a day job can take an idea and turn it into a real product.
The KickStarter for PIXEL also includes the DIY Kit version of this projectas well as a turn key, fully assembled version.
**** UPDATE KickStarter Funding Successful ***
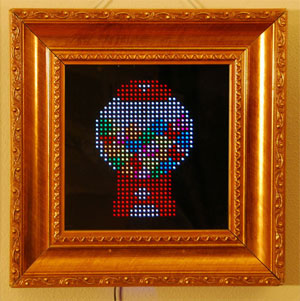
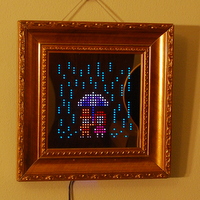
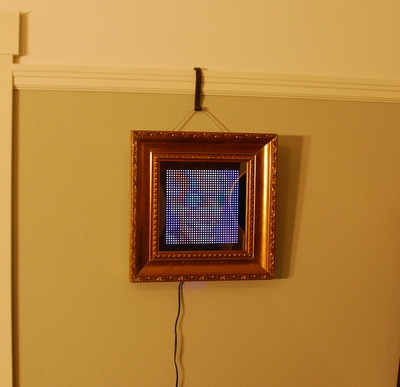
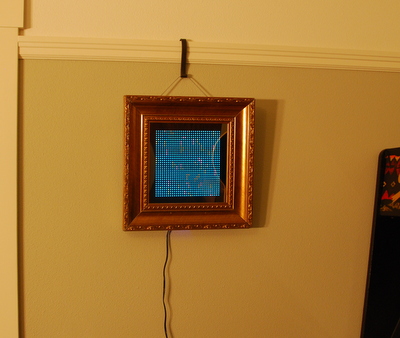
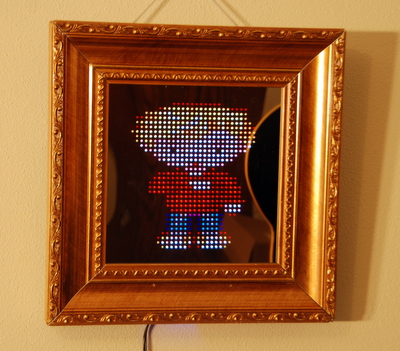
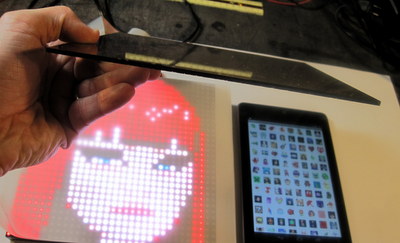
PIXEL is an LED based picture frame that displays pixel art. Pixel art is a retro form of digital art where the image is manipulated pixel-by-pixel. PIXEL comes in two frame options: a gold, ornate frame or a modern, black frame.
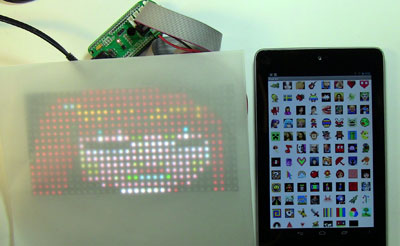
You set the image or animation on PIXEL from your Android device. Sorry iOS users, only Android is supported at this time :-(
An image like this | An animation like this | |
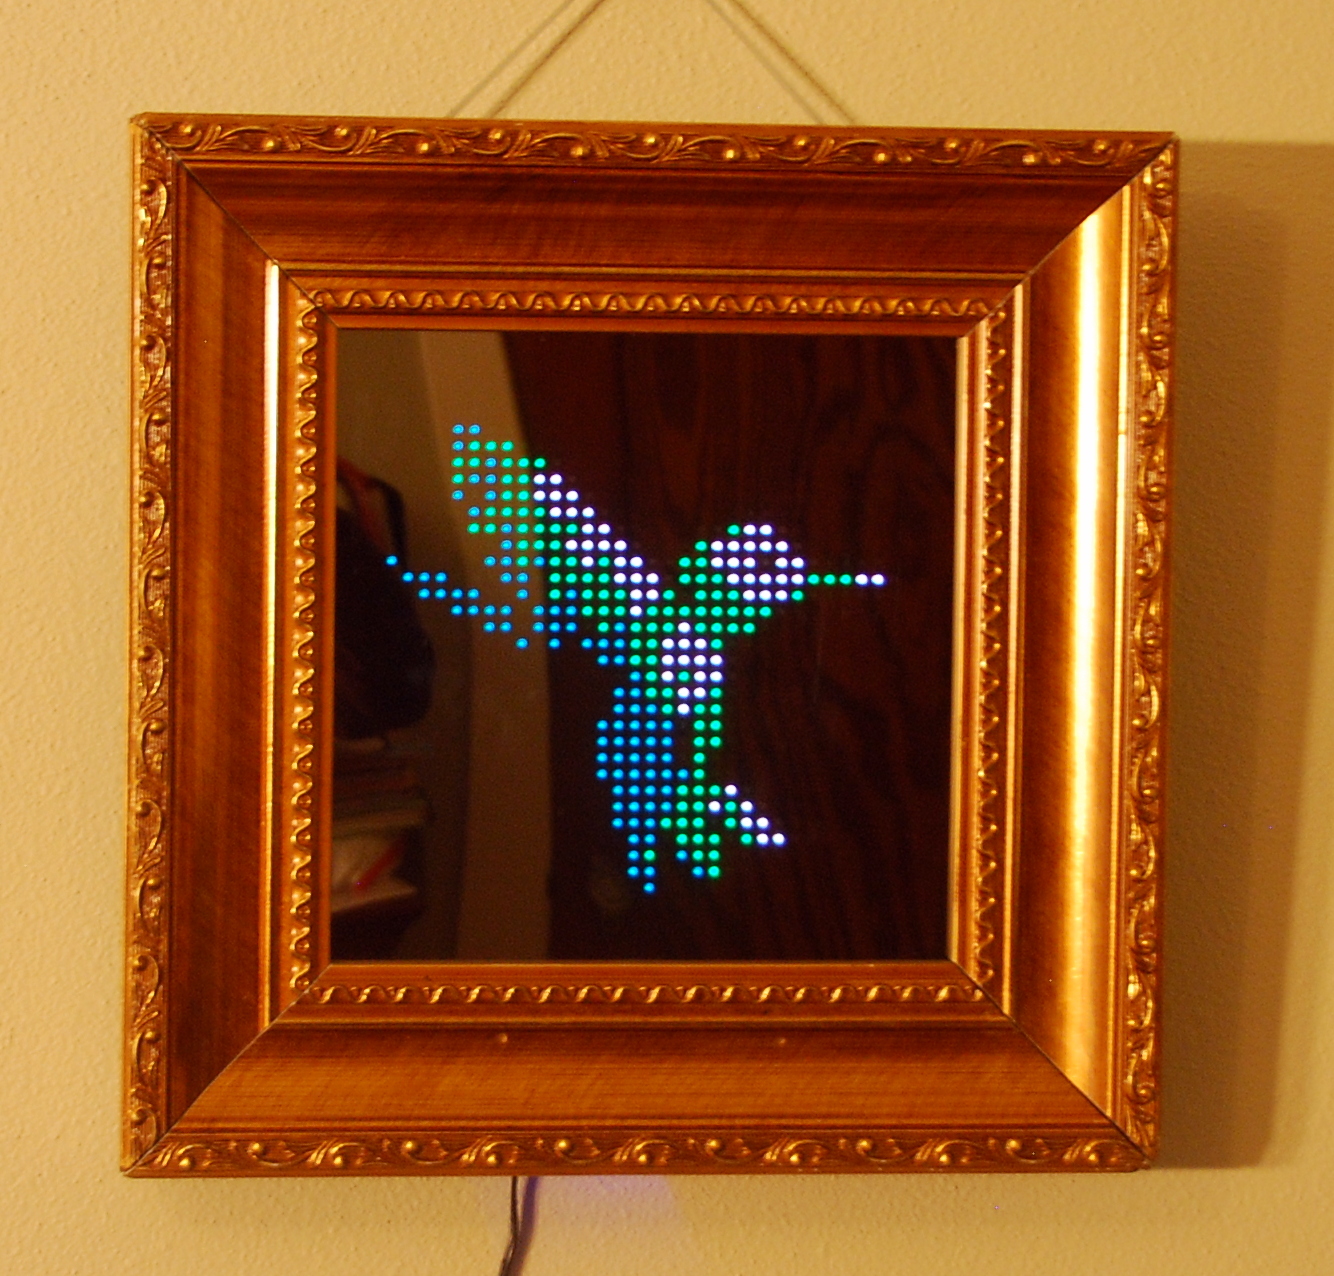
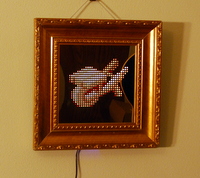
Looks like this on PIXEL
| Looks like this on PIXEL |
My goal was to market PIXEL as an art piece so I knew to pull that off, I was going to need some real art. The content I did myself definitely was not going to cut it. PIXEL's display is 32x32, essentially each LED equals one pixel. So as luck would have it, there is a sub-culture of throw back artists who like to work at the pixel level just like it was done in the early days of computers and video games. They call themselves pixel artists and can be found on sites like pixeljoint.com and wayofthepixel.net. So I posted on those forums what I was looking for and much like the Maker community, they are a friendly bunch willing to help. I offered a nominal fee in exchange for their art work, some of it existing and some new. Below are 5 artists who offered to help. The deal was I get some art work for a decent price and they get some exposure. I also signed up to do one Android app for each artists showing their work on PIXEL.
 | Kirk Barnett (Pixel PileDriver) is a programmer and artist. Attending the Digipen Institute of technology he studied Art Production, Real-time Simulation Programming, and lots of math that blew his mind. He enjoys pixel art, painting, animation, shaders, particles and anything video game related. Currently he is an indie game developer and co-founder BlockLight. Everyone says he works too hard, but to him that just doesn't seem possible. | |
 | Felipe Alfonso is a chilean Game artist and Developer who really loves making 2D art for videogames. He has been pixeling since he was 16 years old, 8 years later he is still pushing pixel like there is no tomorrow. He has worked on several mobile and web games and now he is a full time indie game developer. | |
 | Gabe Mir is a pixel artist who resides in South Florida. He has always been interested in video games since his youth, and has been practicing pixel art for a few years. Academically, he is an alumni of Florida International University, where he studied psychology. Currently, he works at an office, but enjoys making art as a hobby as well as freelance work. | |
 | Zhi Jiang is a pixel artist living in China. Zhi has eight years of pixel art experience from commercial games to web site illustrations. | |
 | Rommel Brittany is a freelance pixel artist living in Louisville, Kentucky. He has been pixeling for six years now starting at the age of 10. Rommel has lent his talent to several online games and other projects. |
Animations from pixel artist: Kirk Barnett (Pixel PileDriver)
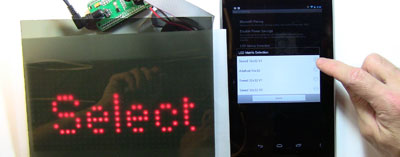
Interactive animation with the proximity sensor
Animations from pixel artist: Christopher Goldsmith (imkrut)
Step 1: Targeting the Non-Technical User
Using PIXEL, the user simply needs to copy their animations or images to their Android device and then run one of PIXEL's apps.
How to add Still Images
Still images on PIXEL are really easy. Using your favorite editor, save your image in 32x32 resolution using the .PNG file format. If your image is not 32x32, the PIXEL Art app will scale it for you. Just keep in mind high resolution images will not display well on a 32x32 LED display. You'll select the desired image from your Android phone or tablet and then can turn the device off, the image will remain on PIXEL as long as it has power so your phone or tablet isn't tied up. Here's a few samples and the associated source .PNG file.
 |  |  |  |
Adding Your Own Art Work
Step 2: How to Author Animations on PIXEL
Animations from Pixel Artist: Kirk Barnett | |
Step 3: LED Content Guidelines

 |  |  |  |
Stay Away from Low Contrast Colors
Low contrast colors (colors with a small difference between them) don't display well.
 |  |
Use Black Backgrounds
Use a black background for images that don't take up the full 32x32 canvas. Images with white backgrounds won't display well. Note that a PNG saved with a transparent background is the same as a black background.
 |  |
Larger than 32x32 resolution
Images larger than 32px by 32px are ok. PIXEL's apps will scale them to 32x32 on the fly. Just keep in mind images with high detail will not come out well.
 |  |
| Original Image: 380px by 308 px | Not so good |
 |  |
| Cropped to 197px by 187px | Better |
Step 4: PIXEL Guts 1024 - the DIY Version
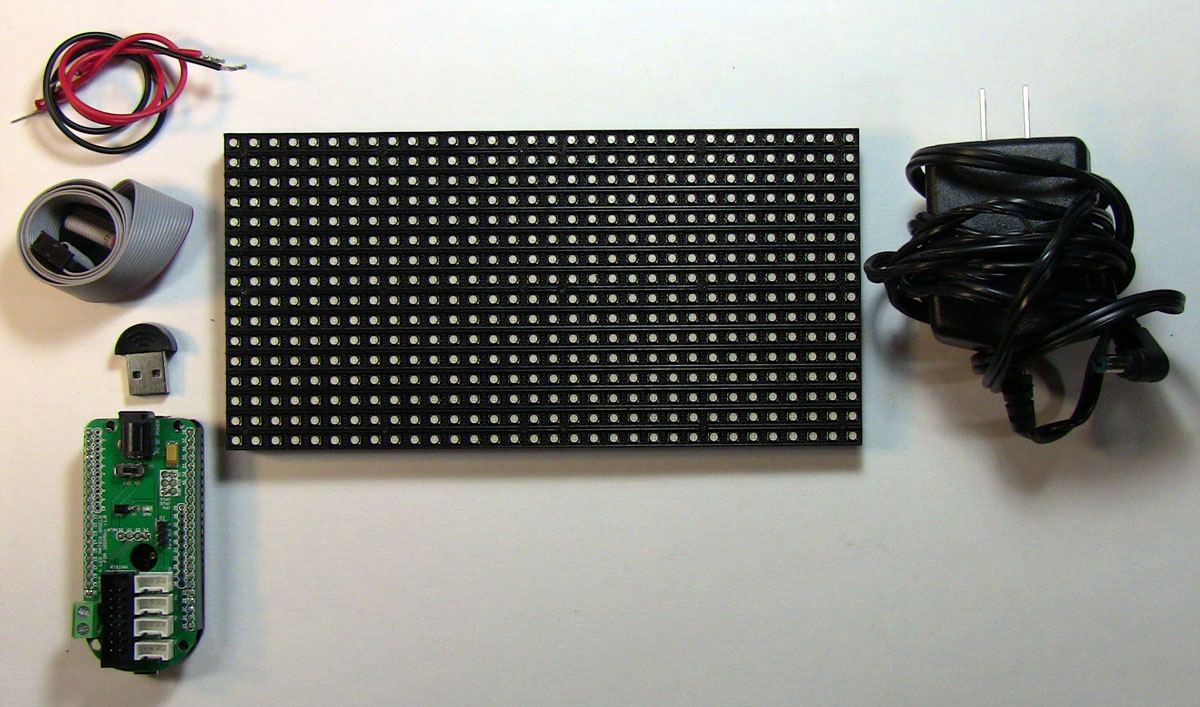
So we decided to also make available two DIY versions of PIXEL which we're calling PIXEL Guts. PIXEL Guts 1024 features a 32x32 LED Matrix (1,024 RGB LEDs) and a more affordable version, PIXEL Guts 512 featuring a 16x32 LED Matrix (512 RGB LEDs).
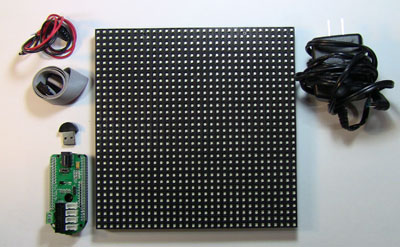
| Included Parts | Specs |
1024 RGB LEDs, 190mm x 190mm x 15mm (7.5" x 7.5" x 0.625") | |
Bluetooth Dongle | |
Power Supply | 5V power supply rated at 4A |
Cables | LED Matrix Data (IDC) and Power Cables |
PIXEL Guts Setup - Video Tutorial
This video tutorial (running time: 8:15) walks through the setup of PIXEL Guts as do the step by step instructions below.
PIXEL Guts Setup - Step by Step Instructions
| PIXEL Guts includes a 32x32 RGB LED matrix, IOIOMint board + LED matrix shield, Bluetooth dongle, cables, and power supply. | |
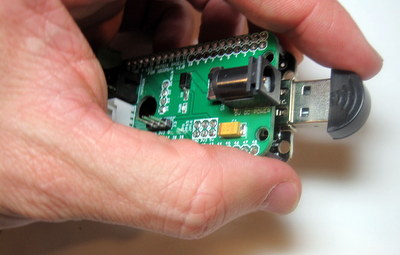
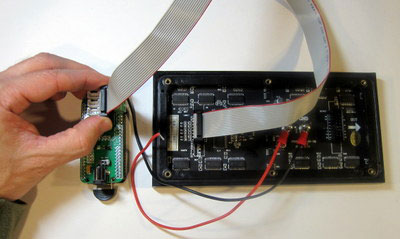
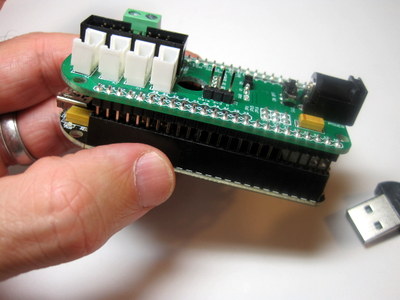 | Snap together the shield (green board) to the IOIOMint board (black board). | |
| Plug in the Bluetooth dongle | |
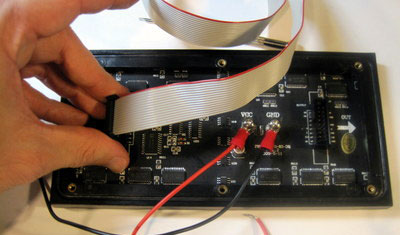
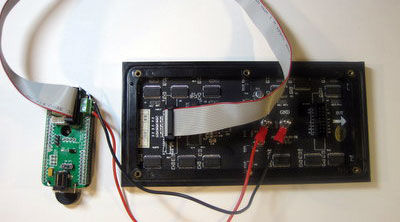
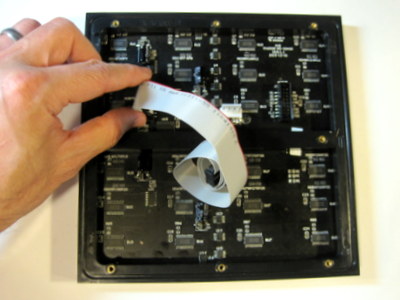 | Flip over the LED matrix and plug in the cable. Note the two up arrows etched on the side of the LED matrix. Ensure those two arrows are pointing up. Plug in the cable to the connector on the left. The cable connector is notched and will only go in one way. The connector on the right will not be used. | |
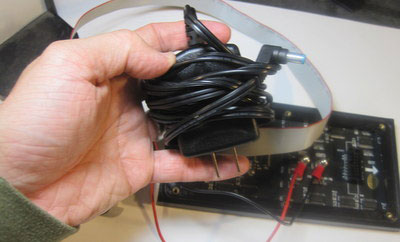
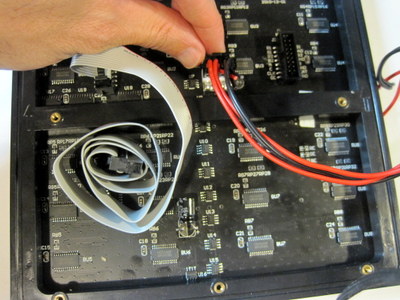 | Plug in the LED matrix power cable. This cable also only plugs in one way. | |
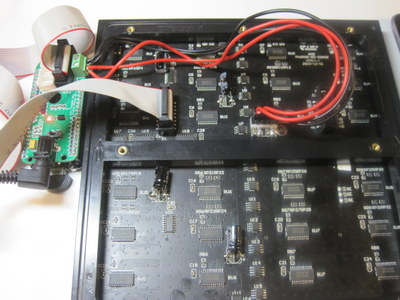
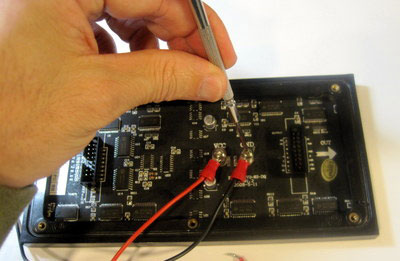
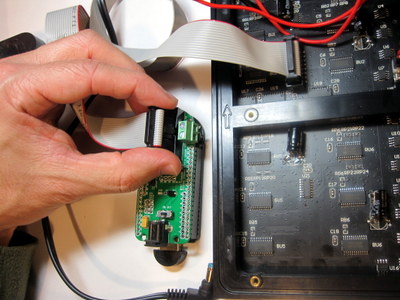 | Plug the other end of the LED matrix cable to the board. Just like on the LED matrix side, the cable only goes in one way. | |
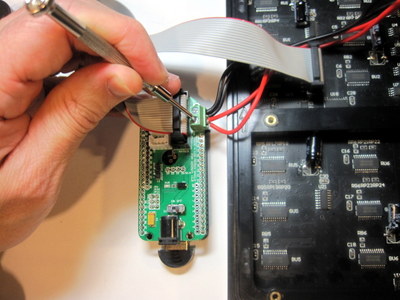
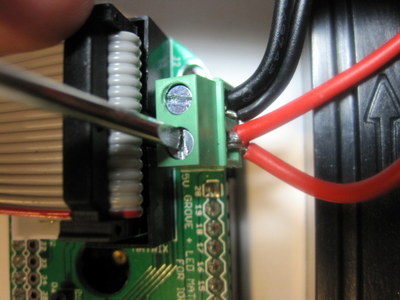
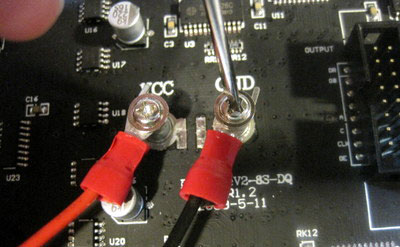
| Screw in the other end of the power cable from the LED matrix to the board. This end of the cable doesn't only go in one way so pay very careful attention that the red wire goes next to the 5V label and the black wire goes next to the GND label as shown in the picture. | |
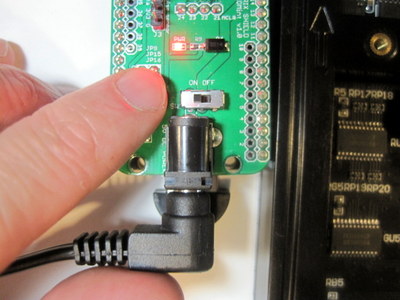
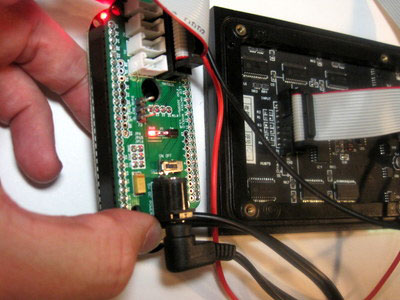
| Plug the power supply into an AC outlet and then plug the power jack into the board. Turn on the board using the switch, the red LED will turn on. | |
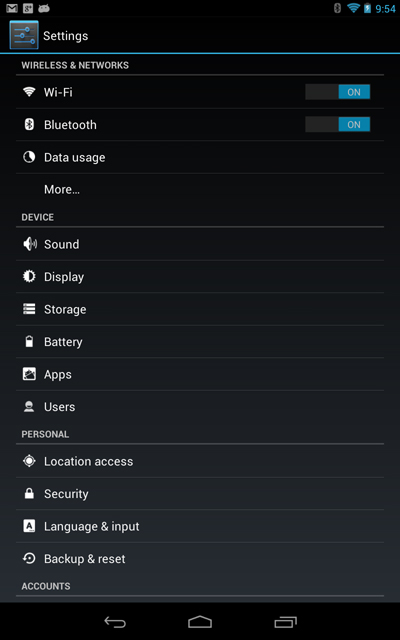 | Congratulations! You've got the hardware connected and powered. Now let's get the hardware talking to your Android device. From your Android device, go into Android settings. Tap "Bluetooth" and then search for Bluetooth devices. | |
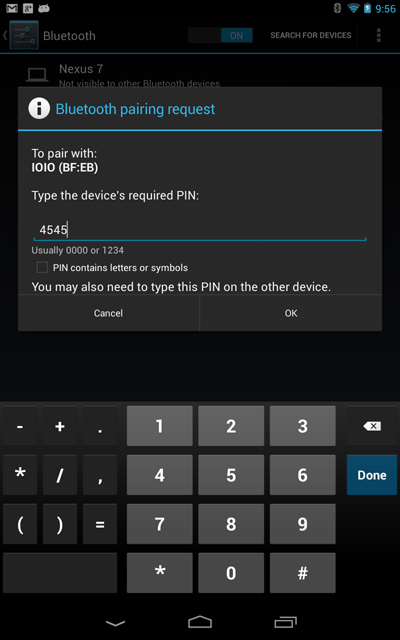 | You'll see a device called "IOIO". Tap on "IOIO" and enter "4545" to Bluetooth pair. | |
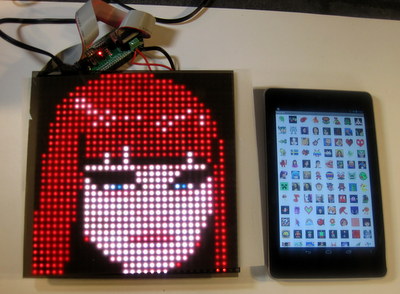
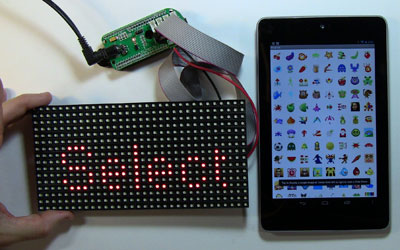
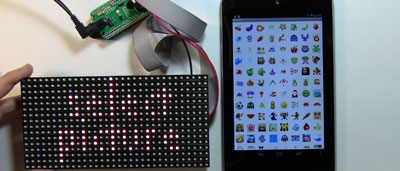
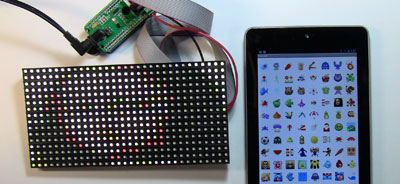
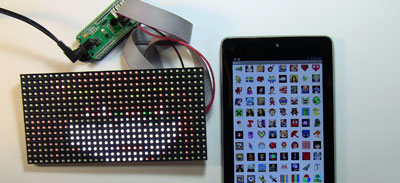
 | After downloading PIXEL's apps from Google Play, launch the "PIXEL Art" app. | |
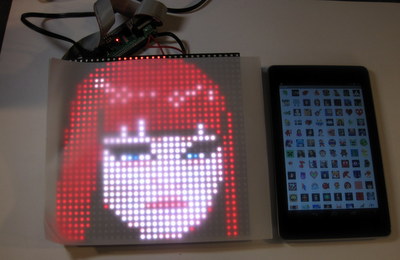
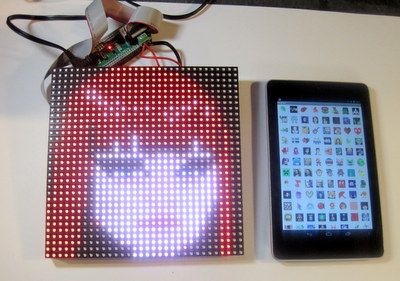 | Tap an image to display it on PIXEL. | |
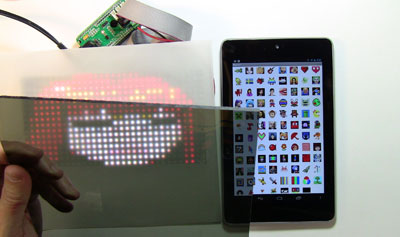
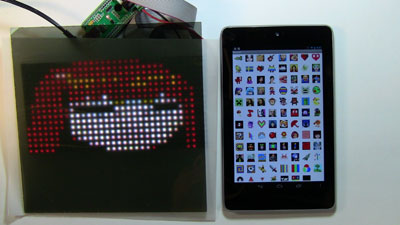
| All Done! Now it's your turn to install PIXEL Guts in some cool way. Note that you'll get better resulting by diffusing the LEDs by using a thin layer of parchment paper and/or acrylic sheet. | |
Step 5: PIXEL Guts 512 - the DIY Version
PIXEL Guts 512
| Included Parts | Specs |
512 RGB LEDs, 95mm x 190mm x 12mm (3.75" x 7.5" x 0.472") | |
Bluetooth Dongle | |
Power Supply | 5V power supply rated at 4A |
Cables | LED Matrix Data (IDC) and Power Cables |
PIXEL Guts Setup - Video Tutorial
As reference, here's how same animations look on the larger PIXEL Guts 1024.
PIXEL Guts Setup - Step by Step Instructions
| PIXEL Guts includes a 16x32 RGB LED matrix, IOIOMint board + LED matrix shield, Bluetooth dongle, cables, and power supply. | |
 | Plug in the Bluetooth dongle | |
| Flip over the LED matrix and attached the red wire to the VCC terminal and the black wire to the GND terminal. Be sure and get the polarity correct as you'll damage the board if not. | |
 | Plug in the cable to the connector on the left. The cable connector is notched and will only go in one way. The connector on the right will not be used. | |
 | Plug the other end of the LED matrix cable to the board. Just like on the LED matrix side, the cable only goes in one way. | |
| Screw in the other end of the power cable from the LED matrix to the board. Pay very careful attention that the red wire goes next to the 5V label and the black wire goes next to the GND label as shown in the picture. | |
| Plug the power supply into an AC outlet and then plug the power jack into the board. Turn on the board using the switch, the red LED will turn on. | |
| Congratulations! You've got the hardware connected and powered. Now let's get the hardware talking to your Android device. From your Android device, go into Android settings. Tap "Bluetooth" and then search for Bluetooth devices. | |
| You'll see a device called "IOIO". Tap on "IOIO" and enter "4545" to Bluetooth pair. | |
| After downloading PIXEL's apps from Google Play, launch the "PIXEL Art" app. | |
| PIXEL's apps will be expecting the 32x32 matrix by default so we'll just need to go into the app's settings and tell it we're using the 16x32 matrix. From the app's settings, tap "LED Matrix Selection", and then tap "Seeed 16x32 V1". This will saved and only needs to be done once. | |
| Close the app and restart. Now just tap any image to display it on the LED matrix. | |
| All Done! Now it's your turn to install PIXEL Guts in some cool way. If you don't mind sharing, we'd love it if you posted your installation on PIXEL's facebook page. Note that you'll get better resulting by diffusing the LEDs by using a thin layer of parchment paper and/or acrylic sheet. |
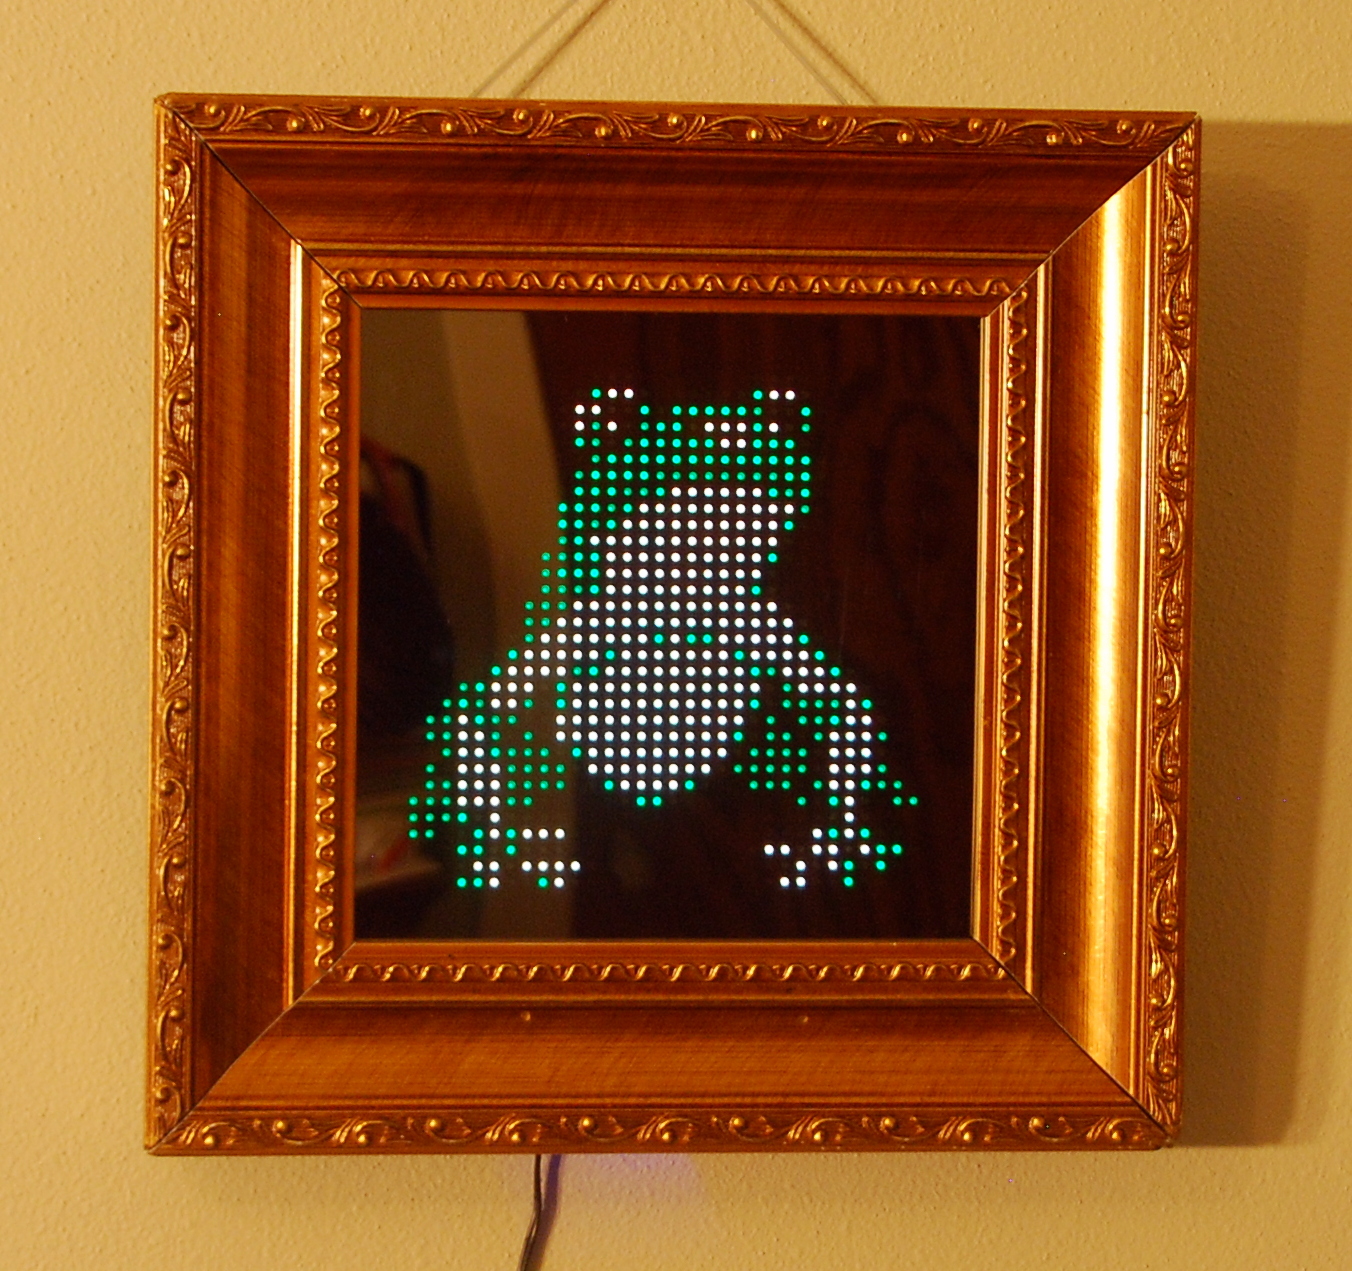
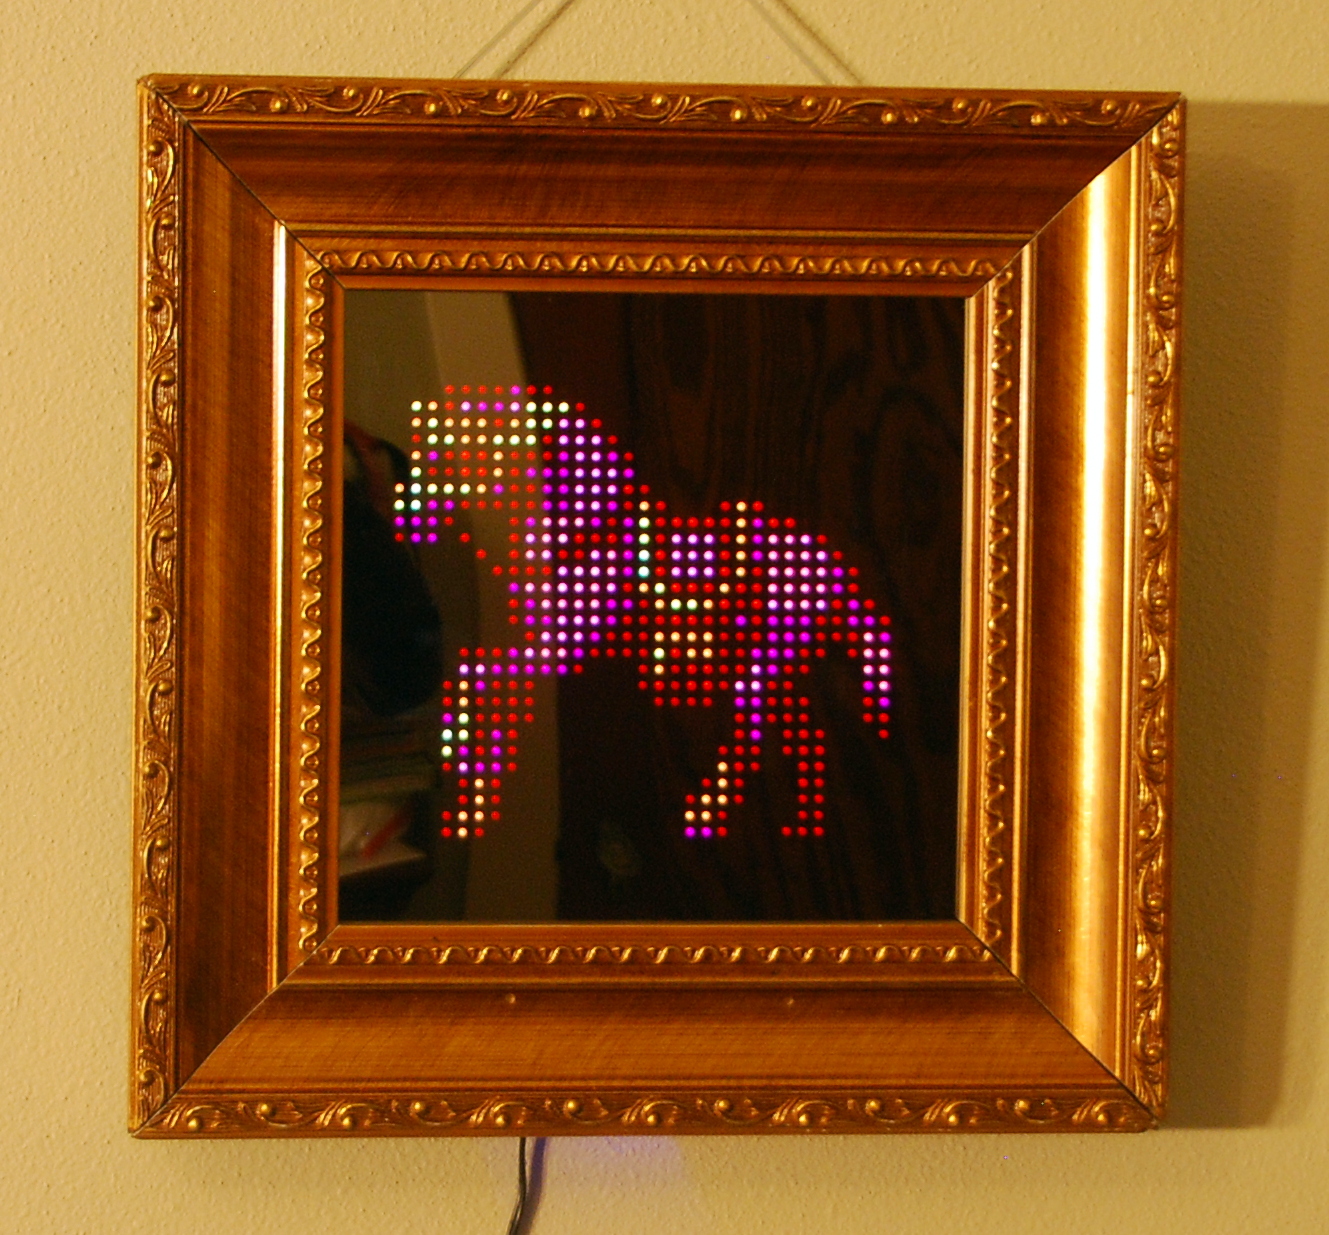
Step 6: Images on PIXEL


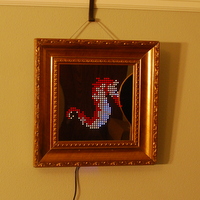
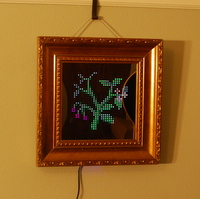
Here's a few select still images from the work of the various pixel artists. This content is all included with PIXEL via it's free apps.
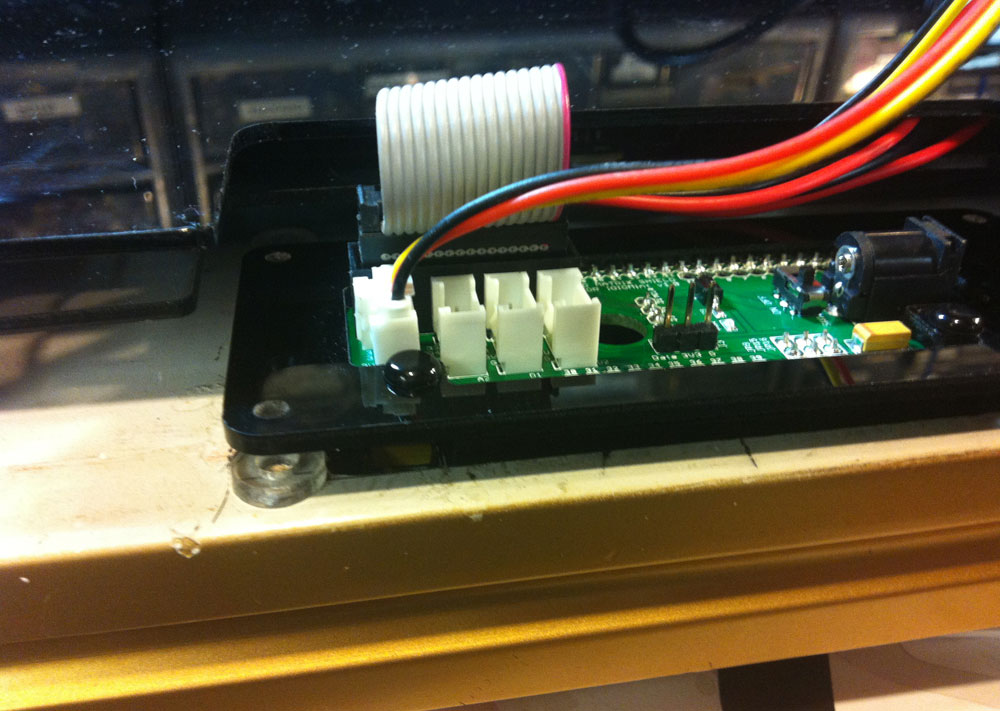
Step 7: Under the Hood and Case


My manufacturer, Seeedstudio, took care of this part of the design for me which was a huge help. To keep things nice and clean, a laser cut acrylic case covers the back.
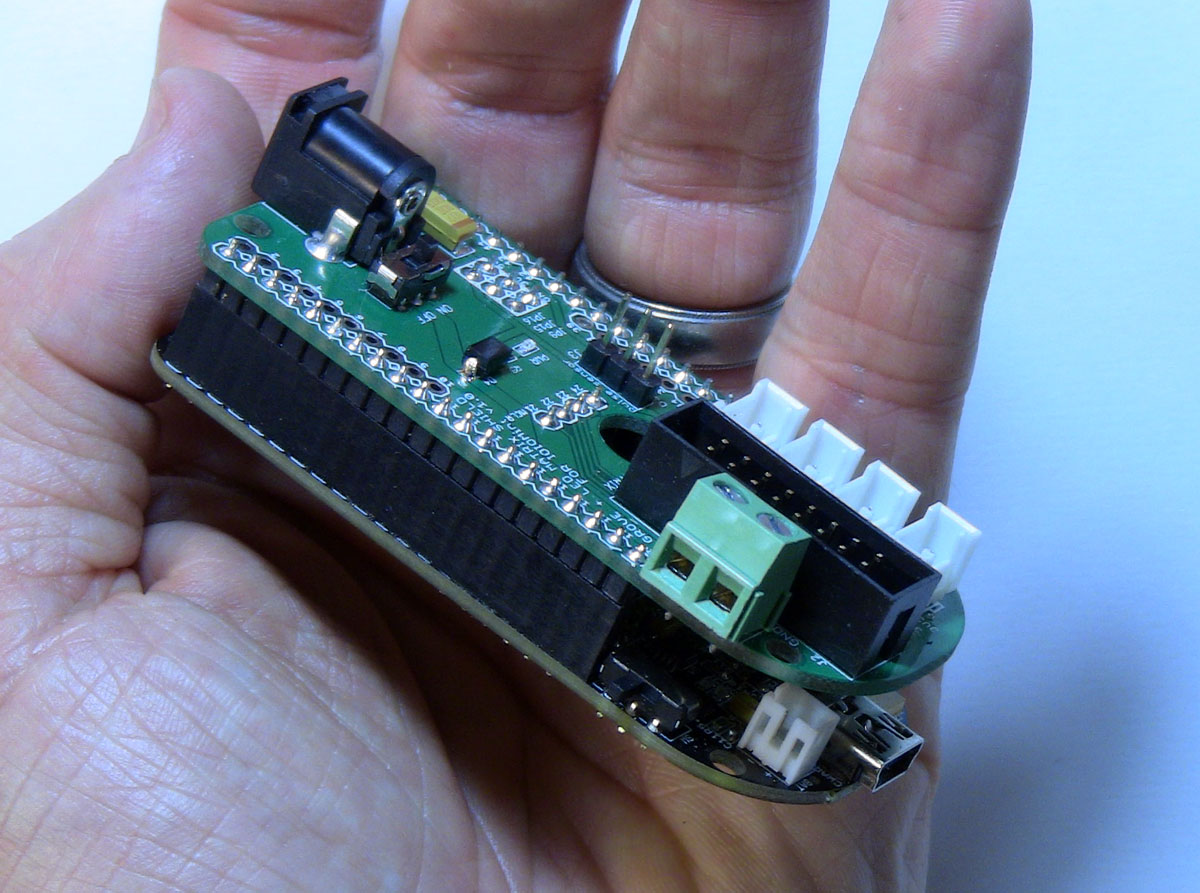
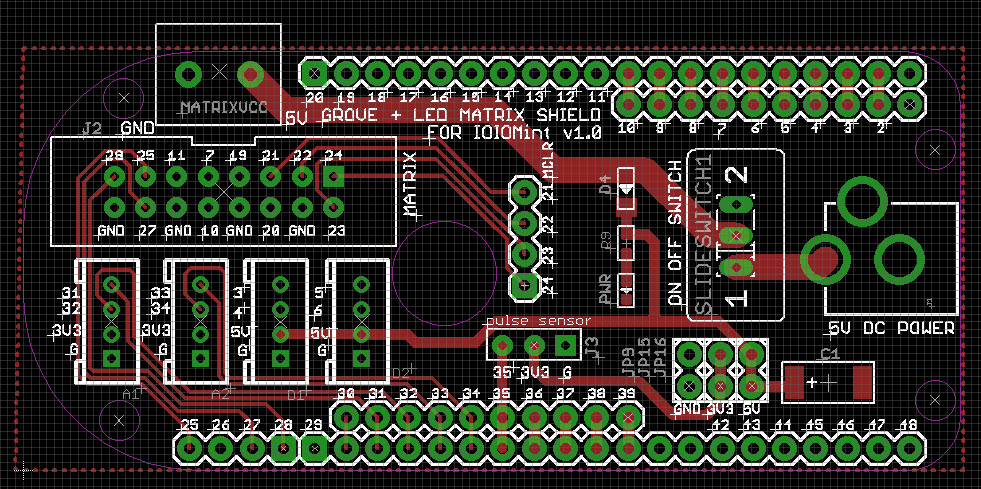
Step 8: IOIO Board and LED Matrix Shield


The hardware portion of PIXEL is based on the open source IOIO platform which controls a 32x32 LED matrix totaling 1,024 RGB LEDs in total. For those familiar with Arduino, IOIO is similiar with the primary difference that IOIO comes with dedicated Android libraries and firmware meaning you only need to focus at the Android application layer. The lower level stuff (firmware, Bluetooth connectivity, etc.) is all taken care of for you. A separate Arduino like sketch on your microcontroller board for example is not required. Just develop in Android using the IOIO java libraries which handle communications (digital I/O, analog inputs, PWM outputs, SPI, TWI) to the hardware for you.
PIXEL uses a modified IOIO board called IOIOMint. A specially designed shield sits on top of IOIOMint for the LED matrix connections (shield Eagle CAD files). PIXEL comes with three open Grove ports. PIXEL includes four Grove ports in total with one used up by PIXEL's hidden IR proximity sensor. Grove is a sensor connector interface created by Seeedstudio. Using a Grove based sensor, you can just plug in the sensor with no soldering. You would however still need to develop the app to utilize the new sensor.
Ytai was kind enough to write a IOIO API to interface with PIXEL's 32x32 LED matrix. Note that this is a different LED matrix than Adafruit's 32x32 and 16x32 LED matrix.
Step 9: PIXEL's Apps

You can find the source code for the apps and PIXEL's firmware here on Github. Using PIXEL's API, it will be pretty easy for you to develop your own Android apps.
PIXEL's Android apps are free and available on Google Play now. At the moment, there are 10 Android apps available. PIXEL's apps can display still images, animations (using the animated .gif format), interactive meaning the still image or animation changes when someone is near, or something else like the magic 8ball fortune telling app for example.
| QR Code | Android App | Category | Description | |
 | PIXEL PileDriver | Animation | Featuring the animations of Pixel Artist, Kirk Barnett (Pixel PileDriver) | |
 | PIXEL Creatures | Still Images | Creatures from Pixel Artist, Gabe Mir | |
 | PIXEL Orient | Still Images | Images of the Far East from Pixel Artists, Zhi Jiang | |
 | PIXEL Animate | Animations | Generic animations, customize this app by adding your own in animated. gif format | |
 | PIXEL Art | Still Images | Generic images, customize this app by adding in your own images, includes a slideshow mode | |
 | PIXEL Halloween | Still Images | Scary Halloween images, use PIXEL as a prop for your next Halloween party | |
 | PIXEL Halloween Interactive | Interactive | As your Halloween party guests approach PIXEL's mirror, they'll be greeted with a scary image. This app uses PIXEL's hidden proximity sensor. | |
 | PIXEL 8Ball | Game | Ask the Magic 8Ball on PIXEL | |
 | PIXEL Compliments | Interactive | Displays a complimentary message when someone comes close. This app uses PIXEL's hidden proximity sensor. | |
 | PIXEL Touch | Game | Displays what you draw on your Android device's touch screen to PIXEL |
Step 10: Writing Your Own Android App for PIXEL

Refer to the PIXEL Developer's Page for all the information you need to develop your own Android or PC (Windows) based app for PIXEL.
PIXEL Developer's Page
Step 11: Shooting the KickStarter Video


I picked up these halogen construction lights at Home Depot for $30 each and diffused them with oven parchment paper. Word of caution, these things runs really hot! If you go this way, do not leave them on for extended periods of time and definitely only keep them on while you're filming. You'll also need to remove the protective metal grates on them as those will cast a shadow. Video purists will frown on these cheap lights as there are other factors for good video lighting like color wavelengths and things like that. But since I'm not filming a Hollywood movie, I think they're good enough.
Outside of the lighting, the obvious things apply here. Have your script written and scenes planned out in advance.
You're also going to need some background music. I found some good music on http://freemusicarchive.org/ but there are plenty of other sites like that one.
If you use family members as in my case with my 8 year old daughter, be prepared to bribe them as they will most likely want some form of compensation.
Step 12: Marketing
Well this part is still in progress so I can let you know how it went later. What I can share now are a few lessons learned from a previous failed KickStarter campaign as well as some friends who have been successful on KickStarter.
The key thing you need to understand going into KickStarter is KickStarter is going to do zero marketing for you. There are so many projects going through KickStarter, they feature a very small handful, don't count on yours being one of them. That means you need to do the marketing leg work. Hit up all the tech blogs (hackaday, engaget, gizmodo, techcrunch...), forums, etc.. I've had the most success when pre-writing the article but keep in mind these folks get a lot of requests.
Step 13: Manufacturing and Distribution
If you've got a day job like me, I highly recommend outsourcing this part. This allows you to focus on innovating and leave the manufacturing and logistics to folks who can do the job much better than you. I'd worked with a manufacturer based out of Shenzhen, China called Seeedstudio on a few previous projects with very good results so they were a natural selection for this project. In fact, Seeed even went one step further and designed the case and LED mount for PIXEL. They even leant me their graphic designer who did the web site design for ledpixelart.com. Seeed is well known in the open source community and have been the manufacturer of choice for many open source projects.
Because I've got a day job, I definitely don't have time for packaging and shipping. For this project, Seeed will handle that too. I will send them the names of those who ordered PIXEL on KickStarter and then Seeed will drop ship directly.
After KickStarter, Seeed also has their own web shop which will be used to sell PIXEL. I'll need to decide at that time whether to add re-sellers or just sell direct from Seeed.
So that's it, I hope you enjoyed it and found this helpful. Just shoot me a note if you have any questions.

Second Prize in the
Instructables Design Competition

Participated in the
Holiday Gifts Contest

Participated in the
UP! Contest


