

Introduction: Paper Santa's Village!


This year for Christmas, I decided to make a mini Santa's village. This project is very easy to recreate and all you need is glue, scissors, paper and the knowledge of basic origami folds. The end result is really satisfying and can be a very nice show piece for your house.
In this instructable, I will show you how to make :
1) Christmas tree with a star
2) Santa Claus
3) A cute little gift box
4) Candy canes
5) A gingerbread house
ALL OUT OF PAPER!
Let's get started!
Step 1: Making the Christmas Tree


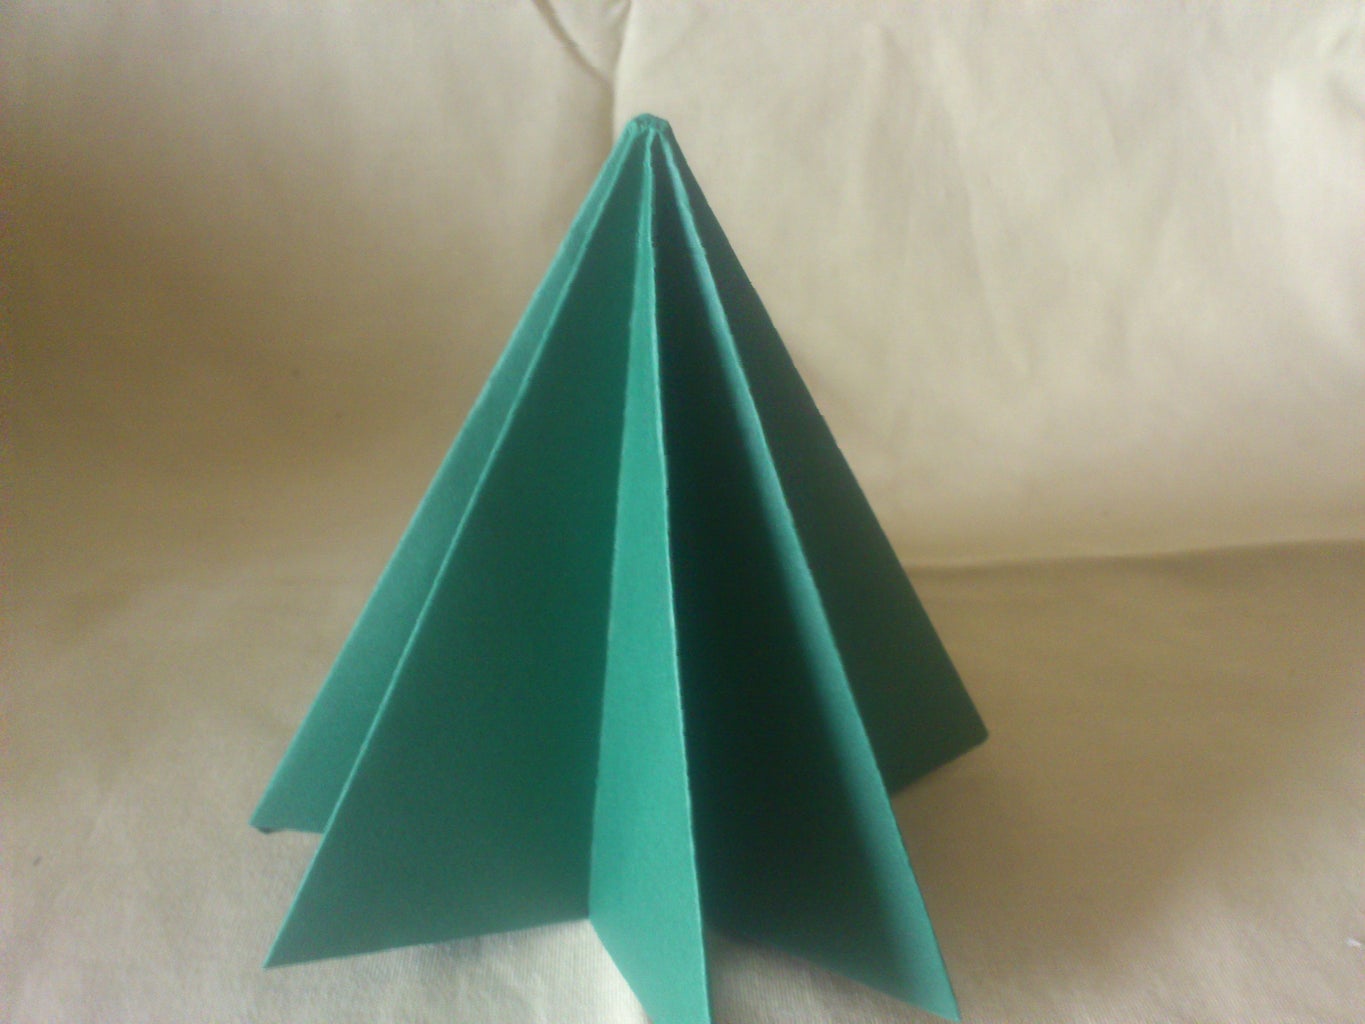
You will need to know how to make a preliminary base for this model. If you do, great. If not, I'll help you out!
1) Take a square sheet of green paper.
2) Fold the paper diagonally from both sides.
3) Open it up and fold the paper length-wise.
4) Pinch the model at its ends and bring them together so the meet in the center.
5) You should a diamond model with 4 flaps.
6) Flatten the model and take one the flaps.
7) Press down on it (squash fold) and flatten it.
8) Repeat the squash fold on the rest of the flaps.
9) You should have a triangle with white flaps sticking out.
10) Turn the flaps over so that the green part covers the white parts on both sides.
11) Fold the green parts over and then tuck them in the model.
12) Repeat step 10 and 11.
13) When you spread the flaps open, you should have completed the model!
Step 2: Christmas Tree Star


Top the christmas tree with this cute puffy star!
1) Take a small strip of yellow paper (the ratio of width to length should be about 1:13).
2) Make a loop from the paper.
3) Remove the short piece of paper (as you were making a knot).
4) Pull the ends of the paper to tighten it and then flatten it.
5) Take short part of the paper and fold it inwards.
6) Take the long piece and keep wrapping/folding it around then model.
7) When you have a small stub remaining, take that and tuck it under a flap.
8) Hold the model by the edges as shown in the picture.
9) Using your fingernail, curve the sides to make a star shape.
10) If it does not turn out puffy, You might not be holding it by its edges.
11)You're done! Now just stick it on top of your Christmas tree.
Step 3: Candy Canes


These serve as great Christmas ornaments and can be made easily within minutes.
1) Take a red paper with the white side up.
2) Fold the paper diagonally, leaving a bit of white space (this will be the stripes).
3) Turn the model over and start folding the paper upwards (with a width of around 1 cm).
4) When you reach the end, take the excess paper and glue it to one side.
5) Take the 1/3 of the top and fold it so it forms a 90 degree angle.
6) Make another 90 degree fold to it, and you're done!
NOTE : You can fold it in any way to get it curved, the most common is the one I showed above.
Step 4: Origami Gift Box


This box is made of 2 parts, the base and the lid. Perfect for using it to gift something.
1) Take a piece of paper and fold it diagonally.
2) Take all 4 corners and fold it towards the center.
3) Take 2 sides and fold them towards the middle, then unfold them.
4) Repeat step 3 for the opposite sides.
5) Hold 2 sides and remove the other 2 sides.
6) Push the opened side towards the edge of one side.
7) Take the flap and push it down to the base.
8) Repeat the step 6 and 7 on the other side.
9) Repeat steps 1-8 to make the lid, then put one on top of the other!
NOTE :This is complicated, so try and look at the pictures and figure it out.
Step 5: The Gingerbread House


This is just an added piece of decoration. I searched for gingerbread house templates and found this one. I cut it out and glued the tabs and it was done!
Step 6: Making Santa!!


Santa's body :
1) Take a square sheet of red paper and fold a bit of the edges inwards.
2) Fold it in half.
3) Unfold it and fold both the sides to the center line.
4) Turn the model over and fold the sides to the center.
5) Take both the edges and fold them outwards as shown in the picture.
6) Take the model and fold the upper part over.
Santa's body is complete!
Santa's face :
1) Take a piece of paper which is 1/3 the size of the original red paper
2) Fold it in half diagonally and take both the edges and fold it inwards to the center line.
3) Turn it over and that's it!
Santa's hat :
1) Take a piece of paper that is 1/3 the size of the original red paper.
2) Fold it in half diagonally and unfold.
3) Fold the edges inwards to the center line.
4) Fold the white part upwards and unfold.
5) Unfold the whole model.
6) Take the bottom corner and fold to the bottom line.
7) Fold it upwards twice.
8) Turn the model over and fold the edges inwards.
Assembly :
Push the head into the hat and glue it in place. Then glue the unit on the body!
Merry Christmas!
Step 7: The End Result


I added some cotton for the snow and glued everything on it. I also decorated the Christmas tree with a few strips of paper. You could also add some lights to make the whole thing bright. In my opinion, this turned out be a very good decoration my house during the festive season.
Thank you for viewing this instructable, and I wish you a Merry Christmas and a Happy New Year!!

Participated in the
Papercraft Contest


