

Introduction: Personal Bluetooth Speaker


Step 1: Gather the Parts


- A rechargeable battery, I used an old cell phone battery of 900mAh which gives me about 6 to 7h of music.
- A charging module, I bought one for €1,32 one DX.com (charging module @ DX.com)
- A power switch, you can use almost any power switch. I used one of a nightlight.
- (OPTIONAL) An LED light, I used this as indicator if the speaker is turned on.
- An amplifier, you best check which one is best for your speakers. i have 2 1W and 2 2W speakers so I went for a 2-channel 3W amplifier. I first bought a cheap one of DX.com for €2,10 (the red one - Amplifier @ DX.com but this one died on me after a week so I bought a better one for about €11 in a local electronic store (the blue one from adafruit). If you want more control and an overall beter performance you shouldn't go for the cheapest options. Although the first (red & cheapest) did perform rather well, better than I expected.
- A bluetooth audio receiver, I also bought this part on DX for about €6 (Bluetooth receiver @ DX.com).
Step 2: Solder the Circuit


The circuit is very easy to make. You can see two drawings above. Just make sure to wire it correctly and use good cables. For power I used basic copper cables. For the audio I used old audio cables I recycled from old headphones. They are shit to solder but deliver the best sound.
I've placed my power switch in the center of my circuit. Everything before is for the battery so you can charge your battery when the power isn't switched on. With the power switch you enable the bluetooth module, amplifier and LED. In a future project I'll add an extra switch for the bluetooth module becaus even when I'm playing through the audio jack my bluetooth module is consuming power.
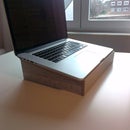
Step 3: Make a Casing
My first idea was to 3D print a casing but it would be much more expensive than make a casing out of wood. I paid €10 for a piece of wood at my local hardware store. The hardes part is the drilling of the holes but you'll figure it out.
For my paintjob I first putted a primer on it, then I painted it in dark blue and at the end I painted it with light blue grafitti. I then directly pressed a crumpled newspaper against it which cracked the paintjob. A nice and easy effect I often like to use.
Step 4: Glue All the Parts Inside of the Casing

Now the easiest part. Just glue all the parts inside of your custom casing and seal it!
Enjoy your personal wireless speaker!


