Introduction: Processing Using the Proteus Arduino Model


This application note describes how to use processing with
the LabCenter Proteus software to simulate the Arduino through a virtual COM
Port.
It assumes that the user is familiar with Proteus, the Arduino
IDE and the Processing IDE.
What you will need:
LabCenters Proteus software and the Proteus
VSM for Arduino™ AVR® option.
The free version of Virtual Serial Port Emulator.
The Processing IDE.
Step 1: Virtual Serial Port Emulator

Download and install the Virtual Serial Port Emulator.
http://www.eterlogic.com/Products.VSPE.html
Step 2: Create New COM Port


Open VSPE.
Click on the create new device icon.
Select Pair and click next.
Click next in the window.
Now the Ports are active
Step 3: Create a New Project in Proteus


Open Proteus and select the New Project tab.
In the next form, give the project a name, click the From Development Board option and choose the Arduino board you wish to emulate.
Step 4: Place the COM Device


Type “compim” in the Keywords section of the Pick Devices
pane, Select the device and click ok.
Step 5: Connect the Pins

Place the component and connect pin IO0 to IO0 and pin IO1 to IO1.
Step 6: Set Up the Communications

Right click on the COMPIM device and on the form, set the COM Port and Baud rate as shown.
Step 7: Enter the Arduino Code


In the Proteus schematic window click on the Source Code tab.
Delete the default code in the window.
Enter the code to test the COM port.
Attachments

Step 8: Compile the Code

Select Build Project from The Menu.
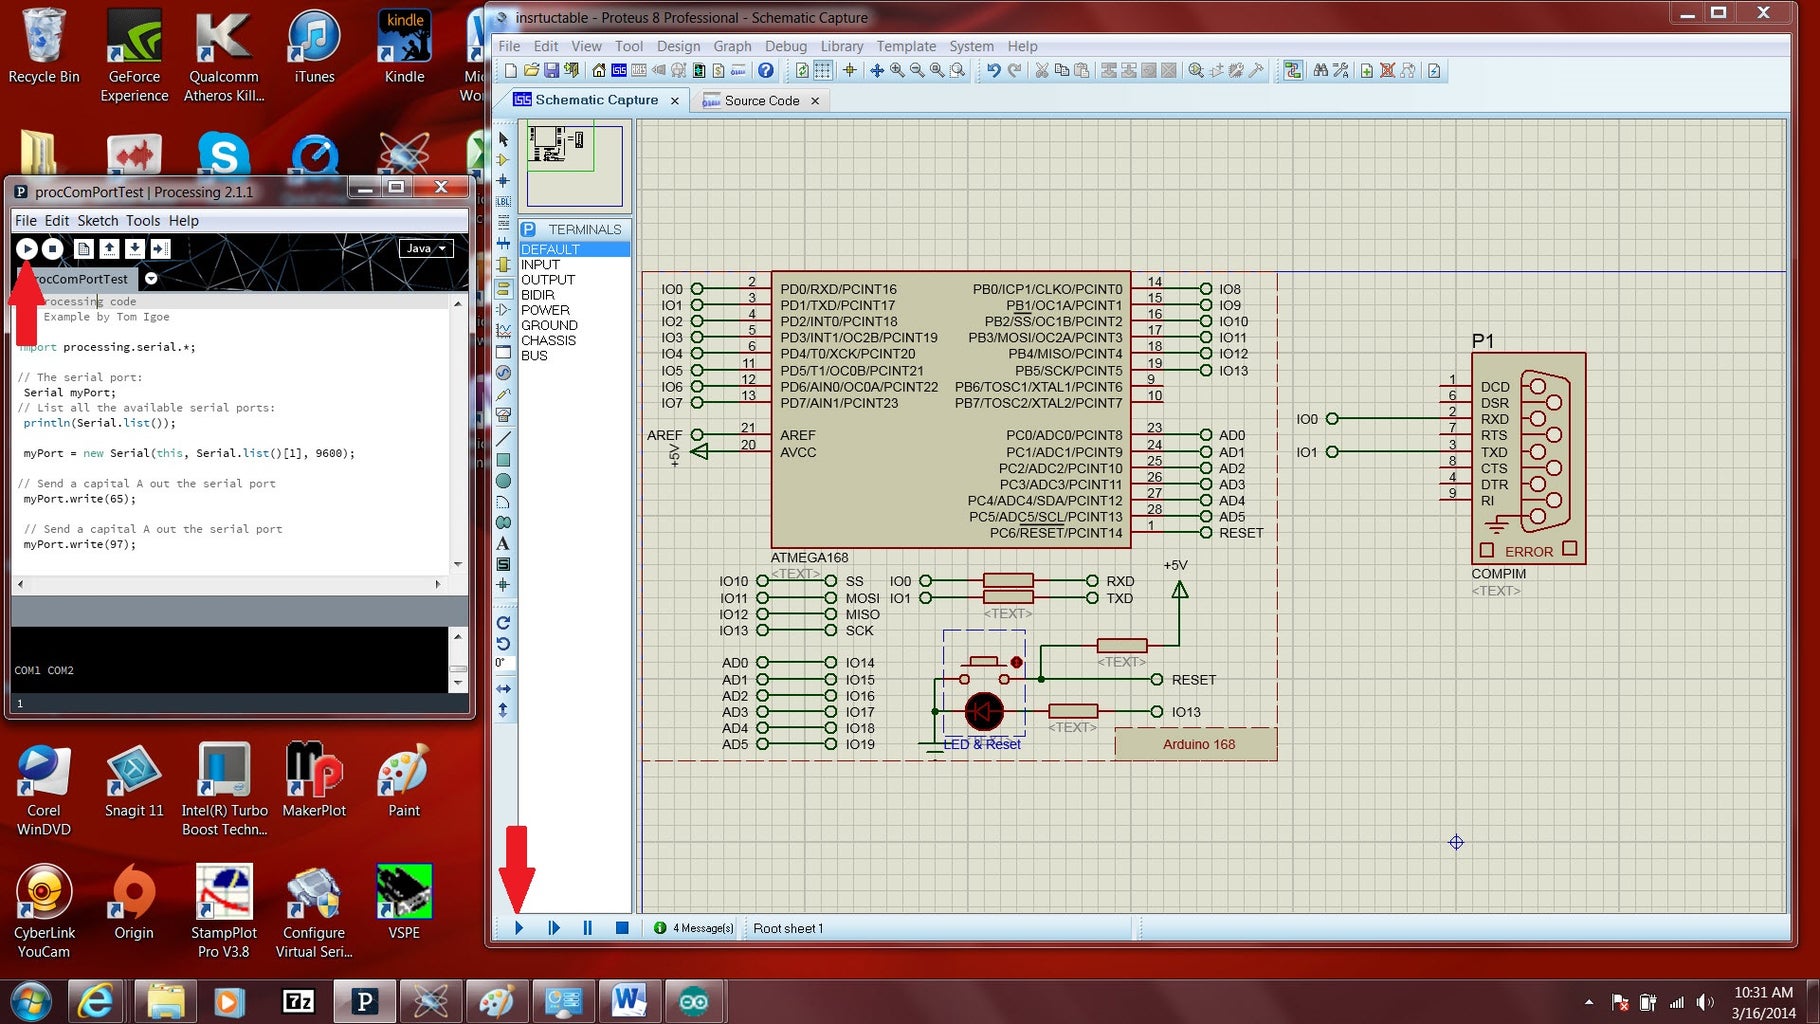
Step 9: Processing IDE
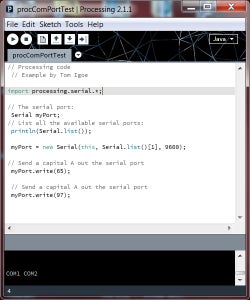
Open the processing IDE and load the procComPortTest Code.
Make sure the Com Port is set to 1 and the baud rate to
9600.
myPort = new Serial(this, Serial.list()[1], 9600);
Go to the schematic in proteus and click on the arrow to
start the simulation then click on Run in the processing IDE.
If everything is setup correctly the LED in the Arduino
model should turn on then off each time you run the processing code.
Attachments
Step 10: