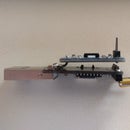
Introduction: Program/Flash the ESP8266MOD ESP-12 Module Using the Witty Board and Arduino IDE
This Instructable will guide you through the process of wiring, configuring and flashing an ESP8266MOD also known as ESP-12 module using the Witty Board.
I have tried various paradigms to flash the ESP8266MOD modules and I do not have a stable solution. In my experience, almost all had some hiccups and were unreliable. Additionally, I wanted to have a clean setup that would work every time.
In this instructable the word program and flash are interchangeable.
Step 1: Things Needed
Things needed
1 - ESP8266MOD module
1 - ESP8266MOD module adapter plate with pins
1 – Lower half of ESP8266 Witty Board
1 - AMC1117 or XC6206P332PR 3V3 regulator (I used AMC1117)
1 - LED
1 - Micro USB data cable
Step 2: Why Use ESP8266MOD?
WeMos D1 mini are fairly inexpensive. They come with the CH340 USB to Serial controller chip. Why go through the hassle of using the ESP8266MOD?
The only reason I would not use an integrated WeMos D1 mini is to limit my power consumption and extend the battery life apart from saving a few dollars. The CH340 chip and its associated components draw valuable power and are only required during programming. If it is a remote unit operating on battery power, you might want to consume the least possible.
Step 3: ESP8266 Witty Board
The ESP8266 Witty Board is a two-part module with the ESP8266
module on the top board whereas the communication and flash circuitry on the bottom board. For our purposes, we will need the bottom board which we will call the programmer.
The programmer consists of the communication IC CH340 along with a micro USB port, a RESET and a FLASH switch.
There are two rows of headers to receive the pins from the adapter plate.
Step 4: Preparing the ESP8266MOD Module
This part involves five steps in the sequence listed.
Remove the register in the middle, ensure that the two pads are not connected/bridged.
Solder the ESP8266MOD on the adapter plate.
Solder the pins
Solder the LED on GPIO 14
Solder the regulator. If you are using the XC6206P332PR the pads match with the pins of the regulator. I do not know if this is the case with XC6206P332MR (significantly cheaper).
Step 5: Programming the ESP8266MOD
The instructions to flash/program the ESP8266MOD is described in the following Instructable - Programming the ESP8266 WeMos-D1R2 using Arduino software/IDE. Be sure to select the Board as WeMos D1R2 & Mini. As the program is compiling and uploading to the ESP8266MOD module, hold down the FLASH switch until the upload is complete.


