

Introduction: Resin Sheets


Resin art is so popular and fun. When creating with this form of plastics we really have no boundaries. This Instructable features a few ways you can play and create custom works . I remember as a kid in the 70’s we would make metal sun catchers by pouring plastic particles in a metal frame and melt in the oven or we had a vac-u-form by: Mattel and made plastic shapes we could paint. No matter what your experience has been with plastics know that they are good if respected.
Help save our planet and use and discard plastics the proper way!
Follow the steps for colored resin sheets and watch video for other ways.
Let’s get bent!
Step 1: Supplies and Tools


Lamination pouches (standard)
UV resin or casting resin For quick 1 day projects use UV resin.
UV lamp
Gloves ,glasses,mask ( for your safety)
Heat embossing tool
Nail stamping plates
Nail polish
Alcohol Inks
Glitter or pearl powders etc
Rubber stamps (what ever designs you like)
Silicone brush or toothpicks
Scissors
Roller or Brayer
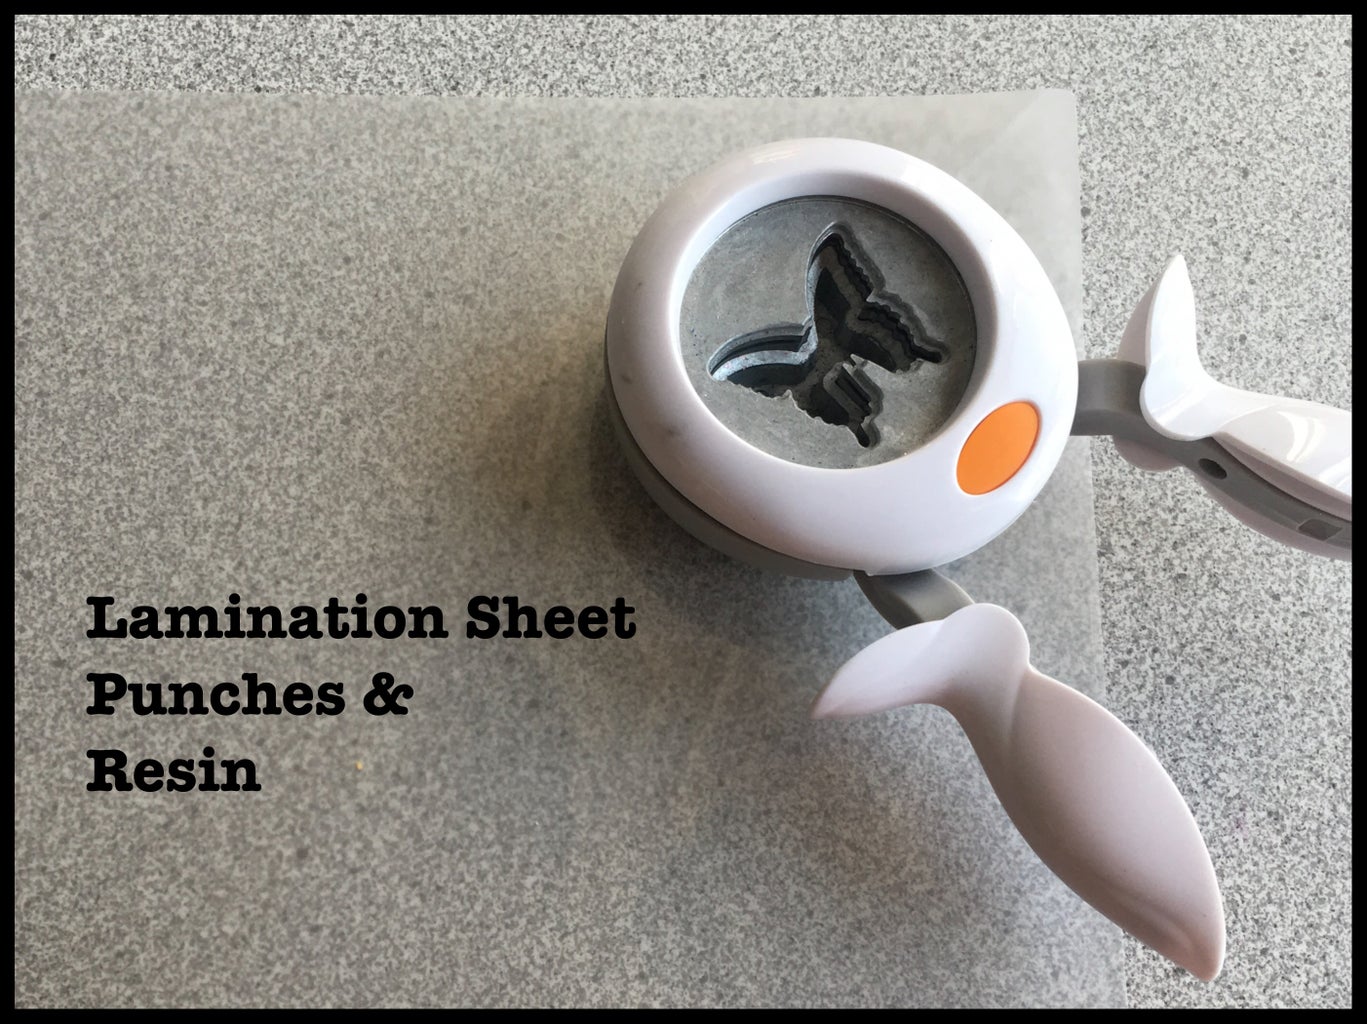
Pattern punches
Step 2: Making Solid Sheets


Tear the lamination pouches apart. We will use glossy sides. The sheets are cut into smaller manageable size that will fit into UV lamp.
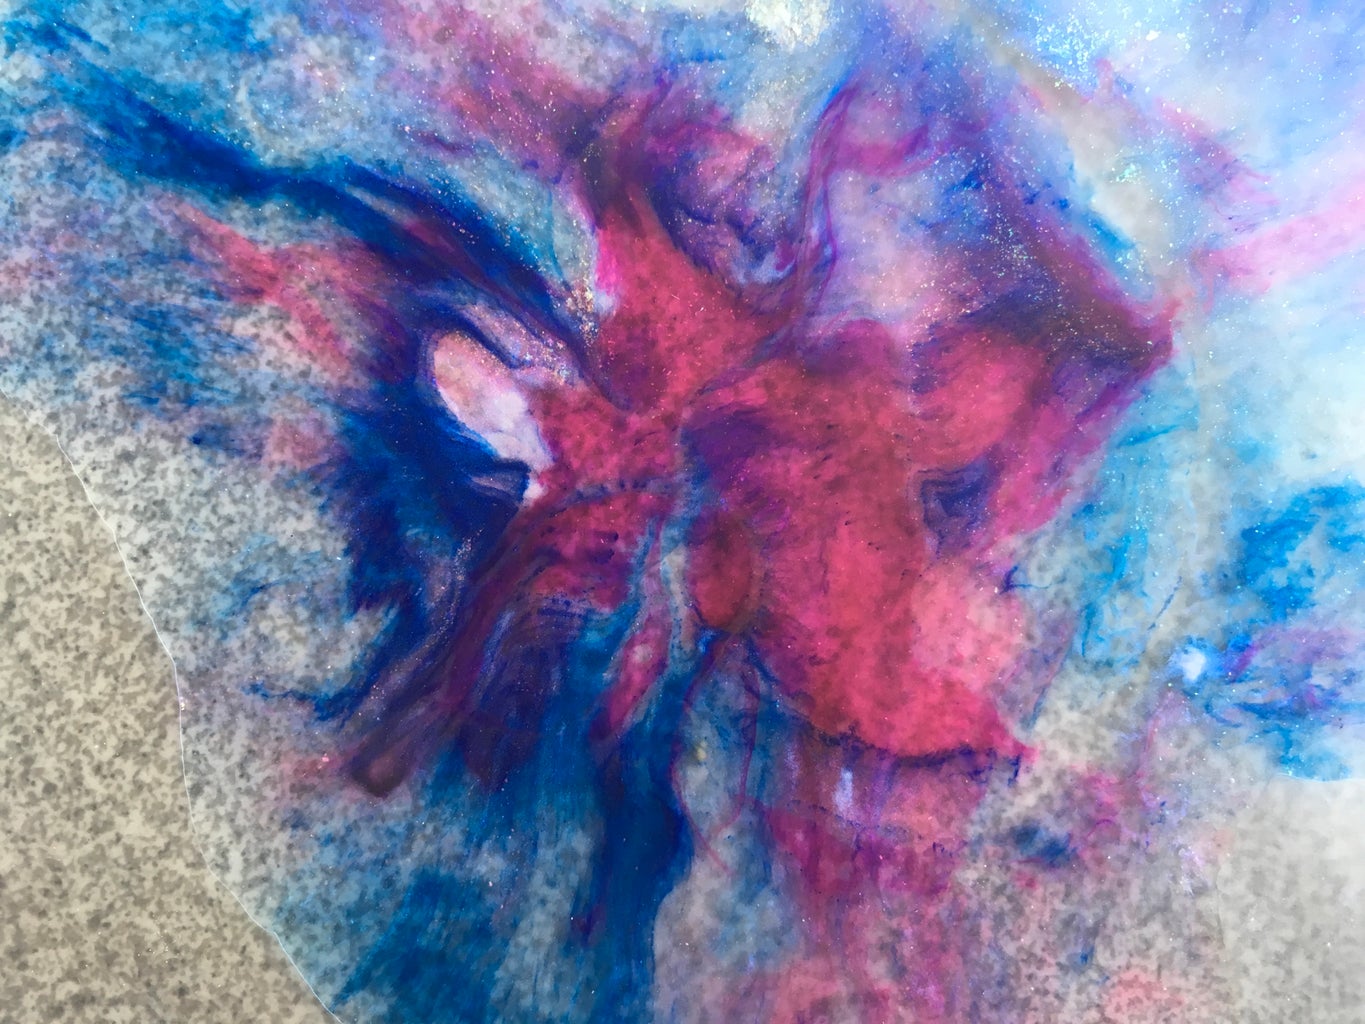
Place one sheet shiny side up. Sprinkle on glitter or powders, then pour on small amount of resin ( just remember it will spread out)
Drip desired colors of alcohol ink,pigments, etc. With the silicone brush mix or swirl in color.
If you want a solid color premix the color into the resin and then pour. Put plastic sheet on top with shiny side facing down. press out with fingers or with roller. Do this for desired thickness.
Resin can be opaque , translucent or transparent depends on the pigments you incorporate and the amounts.
Step 3: Cutting the Sheets.


Place under UV lamp or in the Sun to cure about 5 - 10 min Do time tests on the resin,this will help when making multiple pieces. Remove from lamp , peel the resin sheet free. Warm till pliable and cut patterns with scissors or hole punches.
Let cool and incorporate into a design piece or cast in other projects. Hope you enjoyed this quick and easy way to put your spin on your resin art.
Peace! Julia

Participated in the
Plastics Contest

Participated in the
Hand Tools Only Contest 2017


