

Introduction: Resin Suction Cup Art


A while ago I found this amazing store on etsy called Ugly Baby, that makes these fun and funky pieces of shower art out of rubber, glitter, and suction cups. My roommate and I bought several of their pieces, and as any DIY-er, I wanted to try making them myself! I have no idea how the artist make their awesome pieces, and I've never worked with rubber, but I love working with resin and glitter and I wanted to come up with some of my own funny sayings to make them personal. Obviously, the ones in the store look better than mine turned out, but they are professionals and I'm just doing this for fun. I'll show you how I made this one and give you some tips and tricks I learned along the way for doing big chunks of resin like this. Let's get started!
EDIT: It's come to my attention that UglyBaby uses rubber and I've updated my text to reflect that. Rubber is most definitely a superior polymer for this project (hard resin hurts when it falls on you in the shower!), but I have no experience working with it. I'll leave that to the professionals!
Step 1: What You Will Need:

Here's what you'll need:
- casting resin (I used this for the clear resin and this kind to for the last layer)
- mold in whatever size and shape you want. I used this square one I got at TAP Plastics, and I would recommend using a flat shape for the most readability in your final design.
- glitter
- letter beads
- little props to illustrate your saying. I found this super cute little set of yarn, knitting needles, scissors, and book.
- suction cup
Step 2: First Layer (and Notes About Resin)


The first layer you will pour will just be a thin layer of clear resin. This will keep your letter beads and little props from falling to the front of the resin and leaving holes where the resin didn't reach all the way around them.
A note about resin: whatever brand you are using, make sure you read all the instructions carefully and measure the amounts carefully. I use these little cups that have markings on them for measuring medicines and are disposable so you can just throw them away afterwards! The main tip I can give about resin is to make sure you mix it thoroughly. I add both parts to a bigger cup and mix it for several minutes, then pour it into another cup and mix it for a few more minutes. Let it set for a few minutes to let most of the bubbles escape, then pour it. The resin I used took a long time to set, so make sure you follow the directions on your resin, that's just my tip for this specific type.
Step 3: Design


While your first layer of resin is setting, figure out how you want to arrange your design. Make sure you have enough space to fit it all in there! I found it helpful to lay out the letters backwards so the would be facing the right way from the front. This was kind of confusing, but it was super helpful to set them up that way before hand so I wasn't trying to figure out what I was doing while I was setting them in the resin.
Pour another thin layer of resin after the first layer is pretty set and then arrange your letters and extras in the liquid resin. I found using tweezers to be extremely helpful for this step. It's important to do this while the second layer is very liquid-y to allow any trapped air bubbles to escape. I didn't do that on the first one I made and you can see when it's finished there are some air bubbles trapped in front of the letters that slightly obscure their readability.
As for other little things to add, I learned the hard way that it's really better if you can use plastic or metal, or other dense materials. The bowl of yarn and the tiny book I was using were both made out of wood and kept trying to float to the surface of the resin! I ended up having to do several thin layers of resin, letting each layer solidify before doing the next one, in order to get them to stay down! What a pain! The tiny scissors, on the other hand, worked great!
Step 4: Glitter!


Continue adding layers of resin until it completely covers your letters and extras. When the final layer is pretty set but still tacky, you can sprinkle glitter over it in a thin layer. Make sure you cover all of the resin, but keep the layer really thin. You don't want big piles of glitter or the next resin won't stick very well!
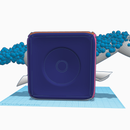
Step 5: Attach the Suction Cup


Mix a small amount of the quick-setting white resin and pour it over the glitter layer. Position the suction cup in the center and wait for the resin to set. You could also use a strong magnet or a little hook to hang it from in this step if you would prefer.
Step 6: You're Done!

Wait for all the resin to fully solidify and pop it out of your mold! Stick to to your tile walls, your car windows, anywhere you need a bright spot of color or to cheer up your day! The hardest part for me was waiting for the resin layers to solidify, so it helps to have other stuff going in that you can go do so you don't sit around picking at it. Overall I think the results were well worth it!
If you got this far and don't want to make your own, I would encourage you to purchase your own awesome shower art from UglyBaby on etsy! They do amazing work!

Participated in the
Crafting 101

Participated in the
Glitter Challenge


