

Introduction: Self Replicating Arduino - Clone Arduino UNO Into ATtiny85 Microcontroller


I know, this is an old and repeated project but it's still fresh and useful. Who doesn't use Arduino?
And who doesn't want to make his Arduino project permanent?
But the problem is that when you make your Arduino project permanent you are giving away your favorite Arduino board to that project and you are wasting a valuable prototyping tool for this single project.
You may go and buy another Arduino board. That's fine. But what if you could use a less expensive Microcontroller chip and a smaller footprint one?
That's exactly what happened with me when I decided to make my Arduino project permanent and on a remote area. That means that I couldn't use my Arduino UNO board anymore.
So I've decided to go through it and build my own ArduinoUNO clone using this little Atmel ATtiny85 Microcontroller chip.
Here is my Channel on Youtube:
AeroArduino
Step 1: Install ATiny on Arduino IDE


I first made this step in a separate video to try my hand into it to get myself in action.
Note:
I'm using Arduino UNO 1.8 so it's much easier than older versions.
Just follow the following steps:
- Get the link from here and copy it.
- Open File --> Preferences. Paste the link in Additional Board Manager text box.
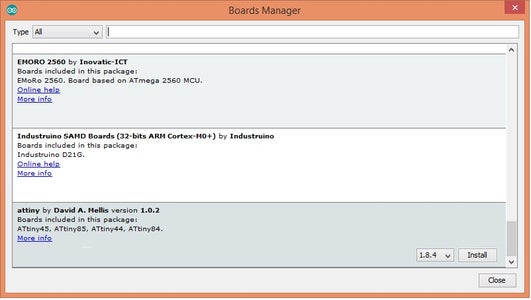
- Open Tools --> Board --> Boards Manager
- Choose attiny and press Install
Now you have Attiny in Arduino IDE.
-
Step 2: Programming Circuit - Connect ATtiny to Arduino UNO


Step 3: Prepare Arduino UNO to Be an ISP Programmer


Step 4: Burn the Bootloader


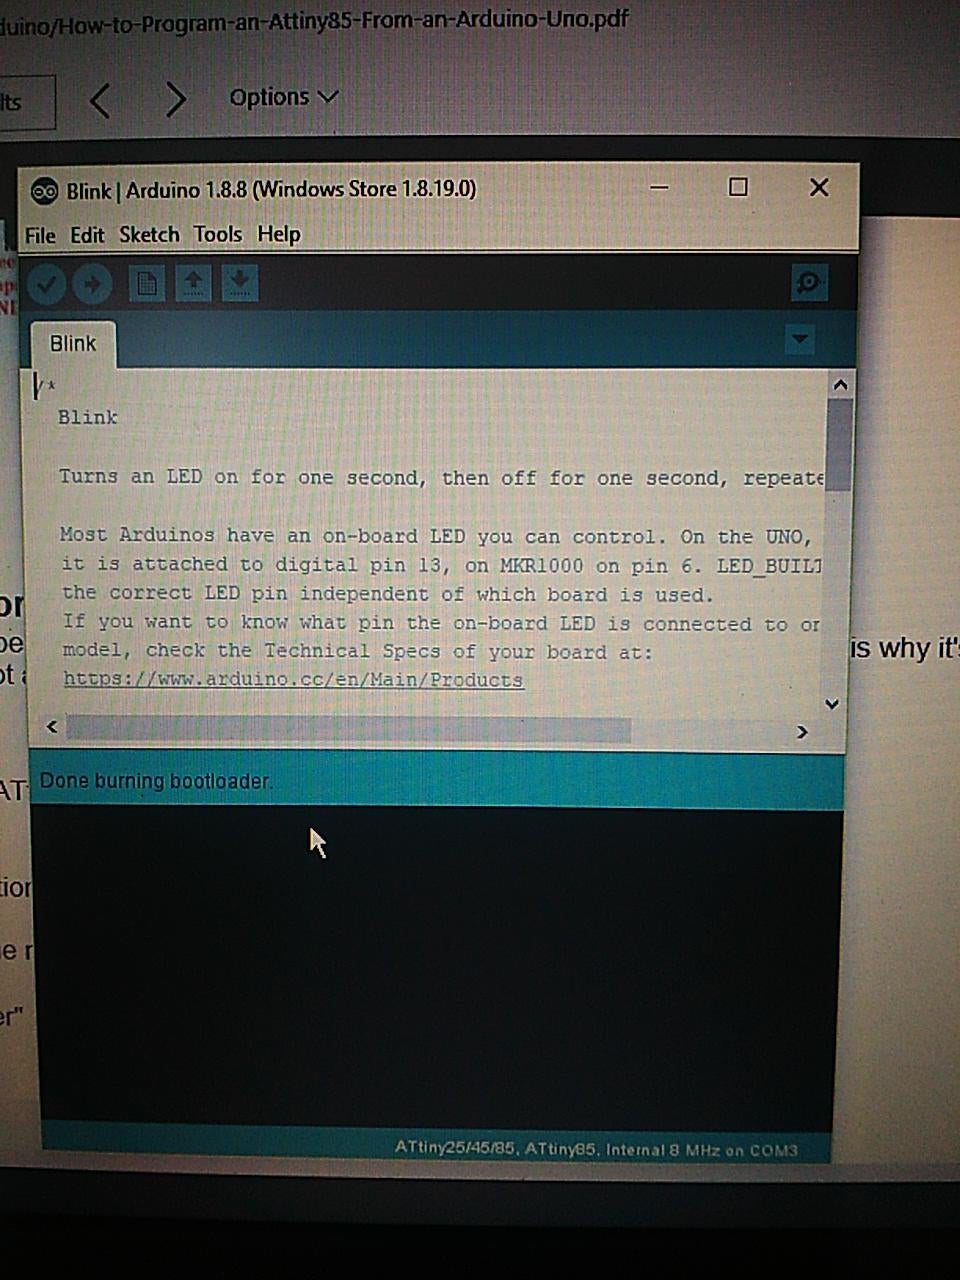
Now choose ATtiny 85 as follows:
Tools ---> Boards: ATtiny25/45/85
Tools ---> Processor: ATtiny85
Tools ---> Clock: Internal 8MHz
Tools ---> Programmer: Arduino as ISP
Now you are ready to burn the Arduino Bootloader on ATtiny85 as follows:
Tools ---> Burn Bootloader
First I got this error message. Then I checked the connection and it just worked fine without any error.
Step 5: Upload the Blink Sketch - or Just Any Other Sketch


Now you can program ATtiny85 just as any other Arduino Board.
Just choose the desired sketch and then choose upload.
Note:
You need to handle the differences between Arduino UNO board and ATtiny85 Pin Mapping.
For example, In the Blink sketch, you can see that LED 13 is named LED_BuiltIn. This gives error when compiling the Blink sketch for ATtiny85 Microcontroller. So you need to change it to another PIN on ATtiny85.
Step 6: Test Your New ATtiny Arduino
Congratulations. Now you officially have your new Arduino intelligence on a small ATtiny85 Microcontroller that costs about $2.
Now you can connect it to VCC and GND and connect the LED to PIN 0 and GND.
Read on My Website:
Read on Embedded Egypt Blog:
https://embedded-egypt.blogspot.com/2019/09/how-to-program-attiny85-with-arduino.html


