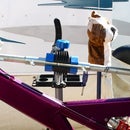
Introduction: Self Standing Bicycle Repair Stand With Optional Tool/Parts Tray
I have been a professional bicycle mechanic for 14 years and although a professional stand is nice, I just couldn't justify the cost, so I built one myself. I used 3/4" gas pipe. Not only is this a very sturdy stand, but it breaks down for easy storage and transport. I also built a box for that purpose. I also built a bench model stand. You can see both of these on my website at:
www.there-cycleshop.com
This stand does require some welding.
Materials List:
All pipe is 3/4 inch gas pipe.
8 - 6 inch pieces of pipe2 - 2 foot pieces of pipe
1 - 4 foot pipe1 - 2 inch pipe
1 - 1 inch pipe1 - 12 inch pipe
2 - 90 degree connectors4 - T type connectors
4 - End caps
3 - Straight through connectors
1 - Pipe clamp2 - Pieces of 2X2 wood
1 - T-nut and bolt
1 - Plastic or metal tray.
Home Made Repair Stand
Want to do some of your own repairs, but don't have a way of holding your bike? Well here are some plans and photos of a very inexpensive bicycle repair stand you can build yourself. It does require some welding.
I have built a few of these for my various shops. They are simple and work great. A professional repair stand can cost over $400.00. These can be made for about $20.00 to $30.00
Parts List:
Bench Stand - 2 - 6" lengths of 3/4" gas line threaded pipe
1 - 3" length of 3/4" gas line threaded pipe
2 - 90 degree 3/4 " gas line threaded joints
1 - 4" C-clamp
1 - 3/4" threaded base plate
2 - 2" pieces of 90 degree angle iron
Instructions:
Mount the base plate on the front of your bench, using four substantial wood screws. Thread in one of the 6" pipes into the base plate. Thread on a 90 degree joint on the other end of the 6" pipe. Now thread in the other 6" pipe into the 90 degree joint. Next thread on the other 90 degree joint and thread in the 3" piece of pipe into this 90 degree joint. Once all of the pieces are put together, tighten them all as tight as you can get them. The assembly should be straight out from your bench and should be straight up and down. Once you are satisfied with the placement of the stand, remove the assembled pipes from the base plate and weld the pipes and joints so they don't move. Once it is welded, grind out a slot at the end of the 3" piece of pipe. This slot will be for the C-clamp. Weld one of the pieces of angle iron on the fixed end of the C-clamp so it is straight up and down. (see the photos below). Now weld the other piece of angle iron to the screw end of the C-clamp so that it matches up with the fixed end. Once the angle iron is welded onto the C-clamp, insert the C-clamp and weld it to the pipe. Make sure that it is nice and straight. I used a quick release type of C-clamp. If you don't have a welder or know how to weld, you can take it to a welding shop. Once the assembly is all welded up, thread it into the base plate on your bench and you have a great repair stand. You can use the round pipe foam on the bike when you clamp it into the stand to prevent scratching.
Self Standing Bicycle Repair Stand
I just finished building a self standing repair stand for about $60.00. Most professional bike stands are $200.00 to $300.00. This does require a little welding. It works extremely well for about 1/4 the cost.
Materials List:
All pipe is 3/4 inch gas pipe.
8 - 6 inch pieces of pipe
2 - 2 foot pieces of pipe
1 - 4 foot pipe
1 - 2 inch pipe
1 - 1 inch pipe
1 - 12 inch pipe
2 - 90 degree connectors
4 - T type connectors
4 - End caps
3 - Straight through connectors
1 - Pipe clamp
2 - Pieces of 2X2 wood
Assembly Instructions:
Start by laying out the base. Screw two of the 6 inch pieces together using a straight through connector. Assemble two of these. Now connect these two assemblies using the T-type connector in the middle. The T-type connector should be pointing up. Now on each end, screw in another T-type connector. In the end T connectors screw in two 6 inch pieces on one end of each T. On the other end, screw in a 2 foot piece on each side. Now use the 4 end caps on the 6 inch and 2 foot pieces.
As you can see there are 8 welding points. These just need to be tacked to prevent the crossbar from moving when you clamp in the bike. Next you screw on a T-connector to the 4 foot piece of pipe.
Once you install the the 4 foot pipe onto the base, line up the T-connector so the threaded openings face the front and the back of the stand. Once you have it where you want, tack weld the T-connector to the pipe. This will prevent the stand from moving side to side when the bike is clamped in. Now you can assemble the bike clamp.
To assemble the bike clamp, screw in the 2" pipe to a straight connector and on the other end screw in the 12" pipe. Then screw on the pipe clamp to the 12" pipe. To hold the bike in the clamp, I took two pieces of 2X2 wood, clamped them in a vice and drilled a 1" hole in the middle between the two pieces. I then chipped the corners where the hole is to accomadate a varity of seat post sizes. Once this is assembled, screw the assembly into the T-connector on the 4 foot piece of pipe. Once every thing is lined up, tack weld the two pieces of pipe, the 2" and the 12" to the straight connector. I also tacked the pipe clamp, the threaded portion to the 12" pipe. Once I had this all assembled, I put a bike in the stand and the weight of the bike twisted the clamp assembly so the front wheel of the bike was on the ground. To prevent this from happening, have someone hold the bike where you are comfortable working on it. I then ground down the edge of the straight connector, the one facing the front of the stand, until it was flat. I then drilled a hole through the connector and the back of the 12" pipe. Put a small bolt in the hole and this will prevent the clamp assembly from moving and keep the bike where you want it.
Your stand is now complete. Simple to assemble and dis-assemble. For my stand I built a tool and parts tray that goes on the back of the T-connector on the 4 foot piece of pipe. This is optional.
For the tool and parts tray screw in a piece of 2" pipe into a 90 degree connector and a 6" piece of pipe into the other end of the 90 degree connector as shown above. This assembly should come straight back from the T- connector on the 4 foot piece of pipe. On the other end of the 6" piece of pipe, screw in another 90 degree connector so that it points straight up. Once you have this assembled, screw the assembly into the T-connector on the 4 foot piece of pipe. Once it is lined up where you want it, tack weld the connections as shown above. Now what I did to attach my tray, which I just used a plastic serving dish that you can buy at any dollar store. I used a threaded T-Nut, flattened it out in a vice and put in on the top of the 90 degree connector that faces up. I tacked the T-Nut into place, drilled a hole in the center of the tray and attach it with a bolt, this is done for easy install and removal.
For my stand I built a box to store and transport the stand. To build the box is extremely simple. I used 3 1X6" planks and one 1X8" plank. Cut the pieces to size, in my case it is 52 inches long. I then glued and screwed together a box. I added three hinges, a handle and to keep my box closed, I used an Ikea type fastener. You can use whatever you need to keep it closed. It works perfect
This is a very simple yet very effective stand. The entire stand cost me around $60.00 and the box was about $20.00. You can leave everything raw or if you so choose or you can paint it all. If you do not weld, get everything lined up the way you want it and take it in to a welding shop and have them tack it together. If you have any questions at all about the stand, please don't hesitate to email me. I will be happy to help you understand the assembly and answer any questions.
spokes729@shaw.ca
Thanks for looking.

Participated in the
4th Epilog Challenge


