

Introduction: Setting Up AVR Development Environment and Uploading Code


In this instructable,you’ll get set up with everything you need for coding, compiling,and flashing your programs into the bare silicon of the AVR chips that are sitting on your desk right now. To do so, you’re going to need some hardware (a flash programmer) and some software (a code editor, C compiler, and the program that’ll communicate with the hardware flash programmer). Finally, you’ll need to hook up some wires from the programmer to the AVR chip and get set up with a power supply.
In this process, there are a lot of different approaches that will get you to the top of the same mountain. Ultimately, the different approaches are all basically the same at some abstract level, reach the top.
Toolchain
Getting from typed letters on a computer screen to a working piece of electronic machinery requires a chain of tools called, a toolchain!
Toolchain overview
1. Write your source code in an editor.
2. Turn your source code into machine code with a compiler (and associated software tools).
3. Using uploader software on your big computer and a hardware flash programmer, send the machine code to your target AVR chip, which stores the instructions in its nonvolatile flash memory.
4. As soon as the flash programmer is done, the AVR chip resets and starts running your code.
Step 1: Setting Up the Toolchain
The first step in your toolchain is going to be a text editor. There are lots of text editors available out there. If you’ve already got a favorite code editor, by all means feel free to use it. But for the case of this instructable I'll be using Programmer's Notepad. On Windows platforms, you’ll probably find the editor that comes with WinAVR which I'm gonna tell about in a minute.
Windows users have two options for the software toolchain, one based on the (huge) Atmel Studio and one based on WinAVR. I'll tell you how to setup Atmel Studio in my next Instructable post. But for now we'll go with the simplest of all...WinAVR.
The current download link is from SourceForge and is a little bit old, though I’ve had no troubles with it. It’s very well tested and fully debugged. You can find it here: WinAVR Download . Install it with all the default settings. You can change the directory as well but you'll have to remember during the course of time.
WinAVR installation comes with built in text editor called Programmer's Notepad. Within this editor, you can write, edit and upload code to AVR chips. You can find this editor in default directory C:\WinAVR-20100110\pn\pn.exe
In the next step I'll tell you how to setup this editor to edit and upload your code.
Step 2: Setting Up Your Environment
Before you can write and upload your code, you'll have to make some changes to a file called MakeFile. A Makefile is nothing but bunch of dependency rules and instructions for processing them, and then you just run the make command and everything compiles.
You can find Makefile in my Github Repository. Download the make file and open it in programmers notepad. Now for your makefile to work you need to make some changes to it. First you need to change the controller you are using. Now I have been working with Atmega8. But you might be working with something else. Download the make file and open it in programmers notepad.
In the make file which you have just opened. Find the line "MCU = atmega8" and change it to the controller you are working with say atmega88 or atmega328p.
Now change the programmer type you are using to upload the code to the controller. I have been using USBasp as my hardware programmer. Find the line "PROGRAMMER_TYPE = usbasp" and change it to whatever hardware programmer you are using for example "usbtiny" or to "avrisp" if you are using arduino as your programmer.
Note: The library path is set by default to C:\WinAVR-20100110\avr\include, if you are using any other directory for your library or over time you want to add some more header files to your existing library then add them to the same path "C:\WinAVR-20100110\avr\include" oryou can change your directory in the make file. Find the line "LIBDIR = C:\WinAVR-20100110\avr\include"and change it to the directory where your new include files are present.
Finally save this make file in a location which is convenient for you as you gonna use it very often.
Step 3: Uploading Your Code!
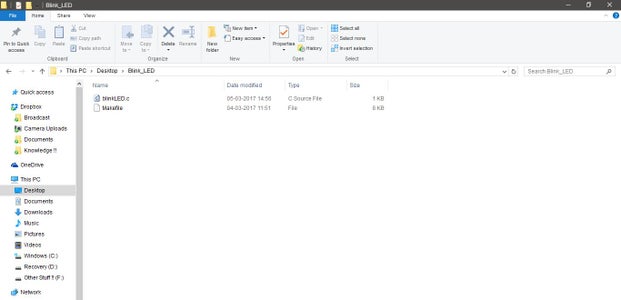
After you download and install WinAVR, You need to write a sample code Blink_LED. Check out the screenshot shown above for a clear understanding.
After you are done with saving files in your directory, open programmers note pad and go to Tools>[WinAVR] Makeall. Now your program starts compiling and you can see it your output window. If everything goes well you'll see a success message. You can confirm this by opening your directory where you saved your blink program. You can see all the build files such as blink.hex blink.elf blink.map etc
After you see that, again go to Tools>[WinAVR]Program. This will upload your code into your chip.
If you have attached an LED to any of the 8 port B pins then you can see it blink in 1Hz frequency.
That is it!! Have fun! Happy coding!!


![Tim's Mechanical Spider Leg [LU9685-20CU]](https://content.instructables.com/FFB/5R4I/LVKZ6G6R/FFB5R4ILVKZ6G6R.png?auto=webp&crop=1.2%3A1&frame=1&width=306)


