

Introduction: Simple Bots: Barreller


A Barreller Bot is a device that has seemingly eternal forward propulsion in a given direction. In other words, there is a motor that acts as an off-centered weight inside of a can. When the can rolls forward in the direction of the weight (the weight, being the motor), the motor turns upwards, hence, causing the can to roll forward again. Now, imagine this happening really quickly and for a sustained amount of time. It would give the can the appearance of rolling forward on its own and even cause it to do seemingly impossible things, like rolling up inclines. This bot is great fun! If you don't believe me, build one for yourself. It is quick and easy to do.
Check out my book Homemade Robots for more projects! |
Step 1: Go Get Stuff

You will need:
(x1) continuous rotation servo modified for direct drive **
(x1) paint can (or similar)
(x2) 1" paintbrushes
(x1) 4 x AA battery holder
(x4) AA batteries
(x1) tilt switch
(x1) assorted zip ties
(x1) template (see below)
**Learn to remove a servo controller board at this page.
(Please note that some of the links on this page contain affiliate links. This does not change the cost of the item for you. I reinvest whatever proceeds I receive into making new projects.)

Step 2: Disassemble the Brush
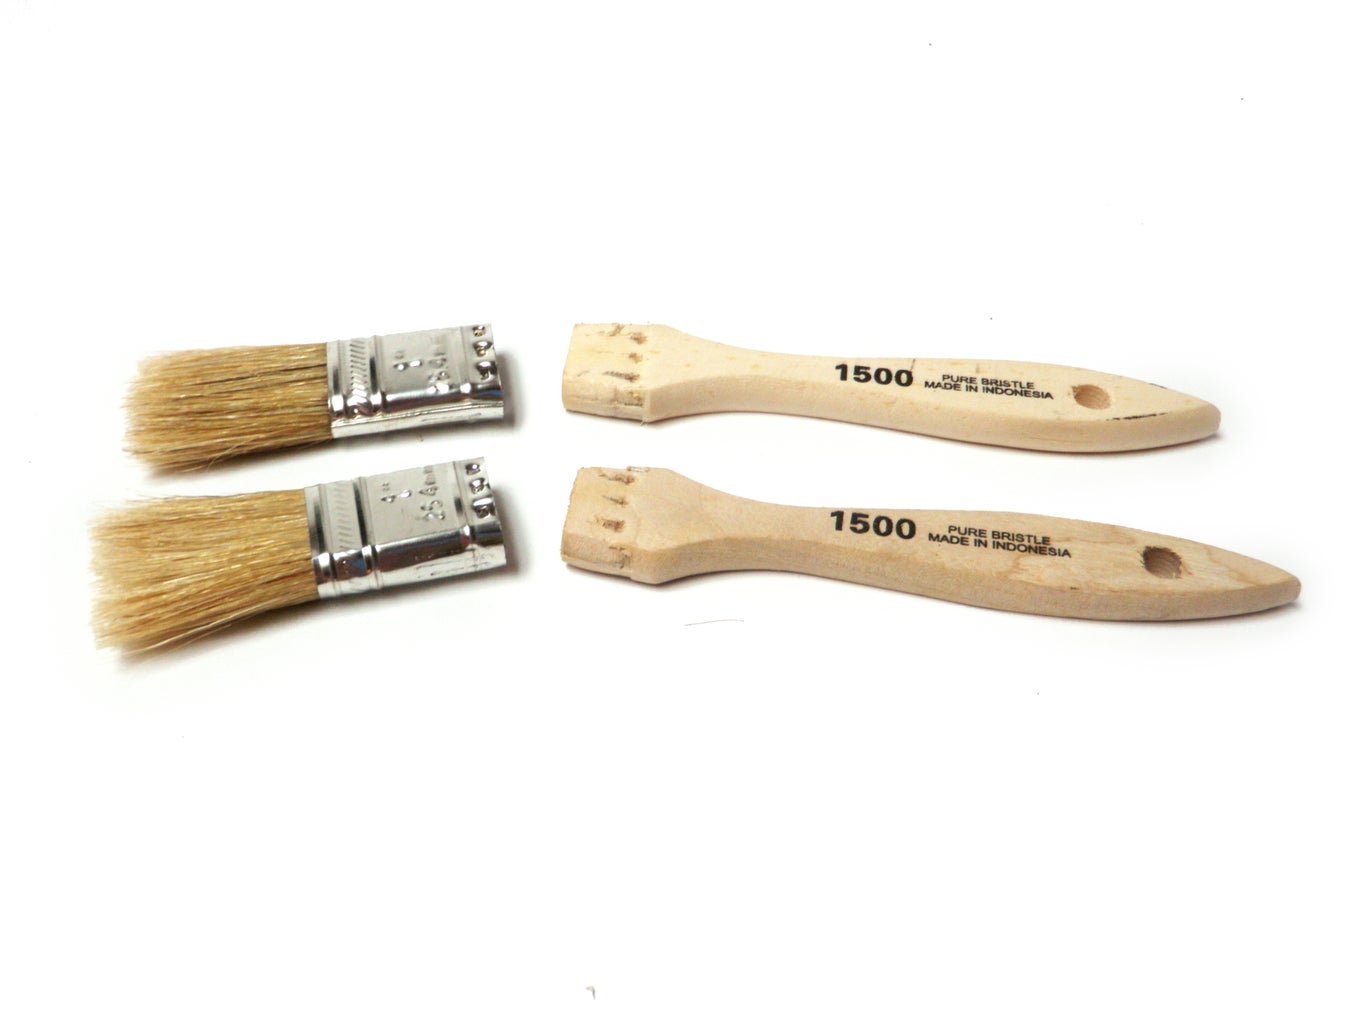


Take apart the paint brush such that you are left with the two wooden handles.
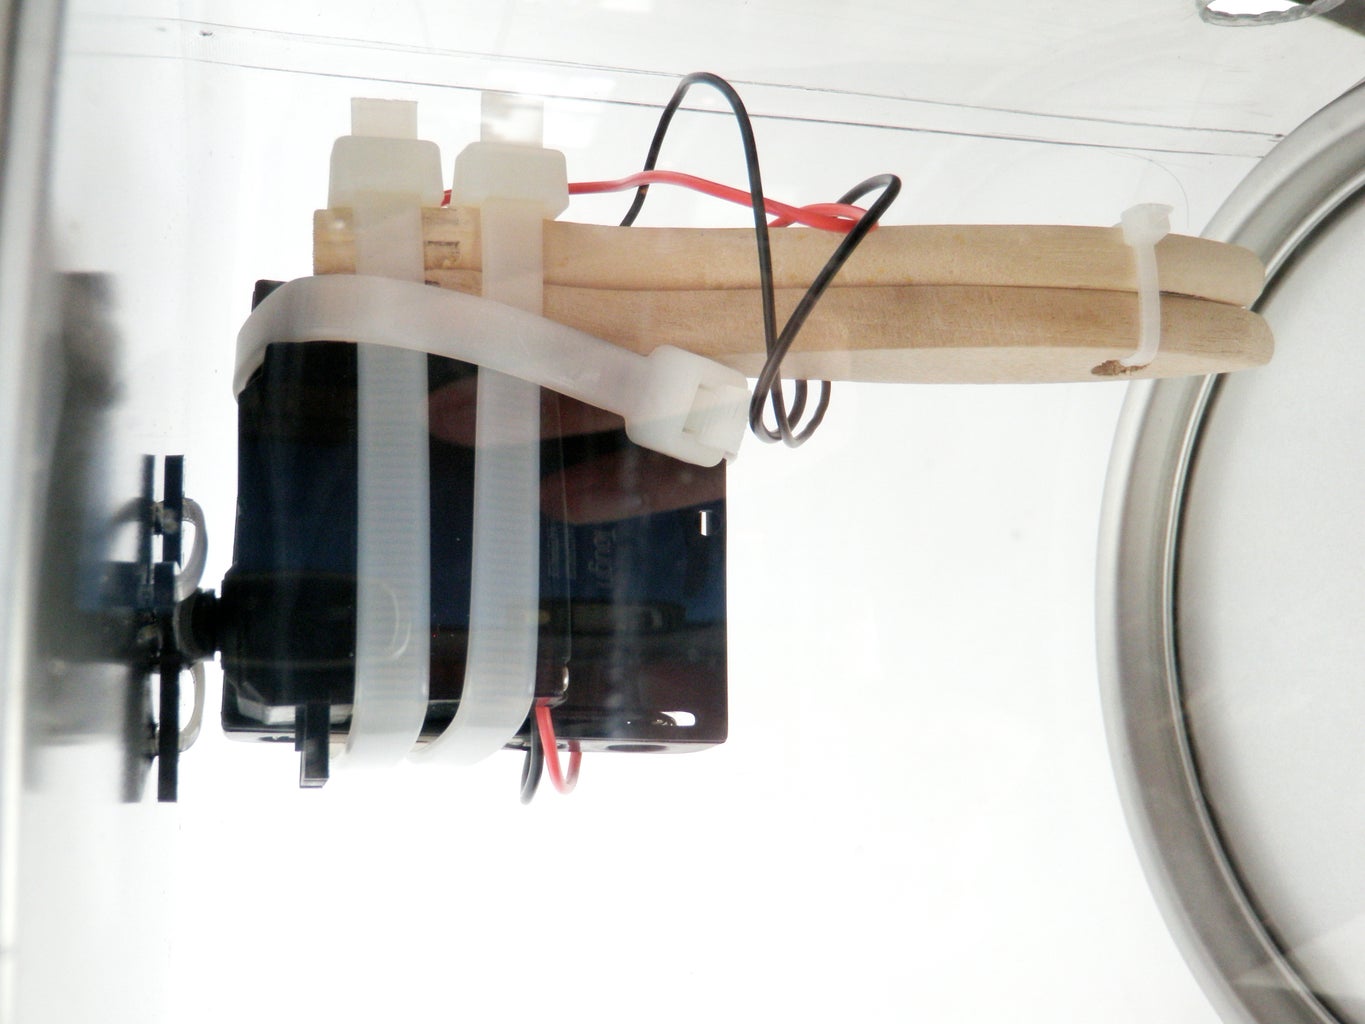
Step 3: Zip Tie


Put batteries into the battery holder and lay it down on top of a zip tie with the batteries facing down.
Place the motor on top such that the servo horn (the gear-looking object) sticks off perpendicularly in one direction and the wooden handles are sticking off in the opposite direction.
Zip tie it all together until it is one singular unit and won't fall apart.
Step 4: Wire It Up


Twist together the black wire from the motor with the black wire from the battery holder and solder the connection.
Solder the red wire from the battery holder to the little spike that sticks out of the tilt switch. Solder the red wire from the motor to the round metallic body of the tilt switch.
It makes it easier to solder to the tilt switch if you place a small pool of solder on it first.
Step 5: Clean the Can


Remove from the can anything that will prevent it from rolling, such as handles, and clean out anything that may already be inside.
Step 6: Drill Holes


If you have not done so already, print and cut out the template.
Tape the template to the bottom of the can and drill the four smaller holes with an 1/8" drill bit or one appropriately sized for your zip ties.
Step 7: Put It Together


Slip the zip tie between two of the batteries in the battery holder such that it is parallel with them. However, make certain this doesn't short out the switch. If you are concerned, wrap the switch once around with electrical tape.
Zip tie the servo horn to the holes that you drill in the bottom of the can. You may need to drill and/or widen the holes in the servo horn to accommodate the zip tie that you are using.
Trim the excess piece of zip tie when you are done.
Step 8: Case Closed


Put the lid back on when you are done.
If you store the can upright (in its normal position) it will keep the device from turning on.

Did you find this useful, fun, or entertaining?
Follow @madeineuphoria to see my latest projects.
Participated in the
Dadcando Family Fun Contest


