

Introduction: Simple LED Blink Using ESP8266


Hi friends, in this instructables we will be getting started with the new popular ESP8266 controller board. In this instructables, we will learn to blink an LED using the ESP8266. So, lets get started !!!
Step 1: Materials Required -
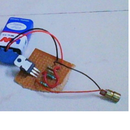
1) ESP8266 controller board. (I am using the ESP8266-01 board)
2) 7 female - male jumper wires.
3) 2 male - male jumper wires.
4) Breadboard.
5) FTDI FT232RL Breakout board.
6) LED with the color of your choice.
7) A laptop with Arduino IDE pre-installed.
8) Mini USB cable.
Step 2: The Schematic -

Step 3: The Code -
The Setup -
1) Go to Files and then click on preferences. A box opens. Type
http://arduino.esp8266.com/stable/package_esp8266com_index.json
in Additional Boards Manager URLs box and then click on the OK button. You can see a new section of the esp8266 board in tools ---> board. Select the correct board. Then select the port to which the mini USB cable is connected. You can do this by too;s ----> port and then select the correct port.
Go to Files menu ----> Examples ----> Basics ----> Blink. Write the number 2 wherever you can see BUILTIN_LED and then upload the code. Once the upload is done, the LED will start blinking with a delay of 1 second.


