

Introduction: Solar Powered DC Motor


DC motors can be used for a variety of projects and tasks, from homemade projects such as fans or improvised drills to more practical machines, like circular saws. The uses of DC motors are endless and can make your life easier. In this Instructable I will teach you how to make a solar powered DC motor that can be used a fan.
This small fan project has multiple uses and could be for keeping cool from the summers hot weather or possibly as a fan when soldering to remove fumes. The benifit is that it has a built in battery that will allow it keep working, even when the sun is not shining.
If you enjoy this Instructable please vote for it in the Solar contest and favorite it as well, thanks :)
Step 1: Materials and Tools


Materials:
. Mini DC motor
. Positive wire
. Negative wire
. Battery holders
. Solar cell 1.5V 100mah (Dollar store garden light)
. Popsicle stick (Fan blades)
. Diode
. Battery (I used a NiCd 1.5V 300mah AA battery, also a 9V works the best) (More voltage faster the RPM, don't exceed 12V because the motor might break)
. Ceramic capacitor (To minimizes RF noise)
Optional:
. Propellor
. Resistor (If necessary)
Tools:
. Soldering iron
. Solder rosin 60/40 core
. Electrical tape
. Wire cutters
. Drill (Not shown in diagram)
. Voltmeter (Not shown in diagram)
Step 2: Circuit Diagram

The circuit itself is pretty basic and the diagram shown will show you the layout of the components in the circuit. If you are using different batteries or components to increase the voltage then swap the out with the ones I have used. The resistor amount will be determined by your set up, depending on what type of battery you use or the solar cell you choose.
Step 3: Set Up Before Soldering

Make sure you have looked over the schematic diagram indicated in step 2. Set up everything as shown in the diagram, then look it over before you solder everything You can let your soldering iron warm up will doing this process.
Step 4: Solder

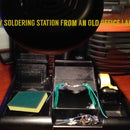
(Don't ever solder on a table, this was just for a demo. Use clips or a third hand to hold the wires)
Once everything is lined up prepare to solder everything together as was shown in the diagram.
Step 5: The Fan Blade


I used a popsicle stick as my fan blade and for maximum breeze shape the blades so they can create airflow. Google images can show you how to create effective blades just type in fan blades. For more realistic and effective blades I would recommend using a plastic mini propellor, these can be found at RC stores or even from old broken RC toys.
Step 6: Fan Stand (Optional)
If you want need a way of mounting your fan, you could make a tripod device, I used a cap to stand mine up.
Step 7: Finished!!! Feel the Breeze of Free Energy!


Now you can have a self producing and portable DC fan. The popsicle produced an ok amount of wind, but a plastic propellor would probably be more effective, also I tried a 9V and it was more powerful as well. I would recommend these upgrades as well.
Thank you for read my Instructable on how to make a solar powered DC motor fan, if you enjoyed please favorite it and vote for me in the solar contest, every vote counts.

Participated in the
Solar Contest 2016

Participated in the
Survival Ready Contest

Participated in the
Circuits Contest 2016


