

Introduction: The Handy Light.


Hi guys ,
In this instructable i will be making a handy led flash light that you can never drop ;).
I will try to make everything as easy as possible , using minimum resources.
most of the items are salvaged and recycled.
Step 1: Gathering Materials, Tools and Patience.


The part list is pretty simple. you ll need,
- Billiard/pool/snooker gloves.(looks cool,from ebay)
- Some brightLED's (salvaged from old key chain lights)
- Some thin wire ( salvaged from old headphones as the wire is pretty thin and insulated)
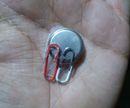
- 2 x Switches with three pins (hobby shop)
- 2 x 3v coin cell batteries (found at any hobby store )
- Coin cell battery holder (if you cannot find any holder you can make one easily by following my this Instructable)
- 1 x 1 watt LED (from hobby store)
- Fabric glue ( hobby store)
- A piece of cloth (was laying around)
- A needle with black thread. ( to clean everything up)
- TOOLS
Hot glue Gun
Soldering iron with solder
Scissors & pliers.
Step 2: Understanding the Circuit.

The working of our Handy light is pretty simple , as shown in the image.
- We have to LEDS at the Index finger and at the thumb ( for reading or low light mode )
- We have our BRIGHT 1 watt LED place on the Palm side of our glove (for bright light)
- we have our Toggle switch placed at the index finger for EASE OF USE.
Step 3: Building the LIGHT.


We have understood the circuit , all is left is soldering and fixing everything in place.
- First solder the wires to the leds.(as shown in the image)
- carefully insert the low power LEDs in Index finger side and the thumb side from the out side (as shown in the image)
- Follow the diagram shown before and connect the switches and the battery holder.
- Insert the 1 watt LED on the palm side of the glove,hot glue it.
- Hot Glue everything in place on the inside of the glove.
NOTE:SEE IMAGES FOR BETTER UNDERSTANDING.
Step 4: Finishing Touches.


Our Circuit is up and ready but all our glove needs is some final touches.
This part just needs some fabric glues , a piece of black cloth and a needle with black thread.
first cut two pieces of cloth enough to cover our wires.
apply ample amount of fabric glue on both , glove as well as the piece of cloth and join them.
LET THEM DRY.
Stitch the cloth and the glove together for extra strength.
Step 5: FINALLY ITS READY.


HOW TO USE IT ?
Simple , just power on the switch on the wrist, now you have the freedom to toggle between high brightness or low.
the toggle switch is conveniently placed on the index finger so that you can toggle without any problem.
ENJOY AND THANK YOU.
vote if this was helpful.

Participated in the
Wear It! Contest


