

Introduction: TouchPass: RFID Password Entry


You're supposed to have complex passwords. You're supposed to have passwords that aren't "12345" or "password." You're supposed to have different passwords for each one of you're accounts, but let's face it- every single one of your passwords is "qwerty."
Everyone wants a unique super-secure 20-character uncrackable password for each one of their myriad of accounts, but nobody can do that. It's nearly impossible to keep track of each one, and reading from a cheat sheet can be tedious. Even typing passwords you remember can be tedious, especially when they're long and secure.
Imagine never needing to do any of that. Imagine logging into an account with the touch of an RFID key. If you're imagining correctly, you just imagined the TouchPass. The TouchPass is a device that plugs into any computer, that allows you to scan an RFID tag instead of manually entering your password. It can be used with any password, regardless of length. It can be used with any computer, and absolutely no background software needs to be running on your computer. It can remember as many passwords as you have RFID tags.
How does it work?
On the inside, it has an Arduino Leonardo and an RFID reader. It is programmed with your RFID tag IDs and their corresponding passwords. When a card is scanned, it compares the card's ID to that of the ones programmed in, and uses the Leonardo's Keyboard library to write the corresponding password and enter.
How secure is it?
Surprisingly secure. As long as you don't let anyone take your RFID cards, it is, by my estimate, %80 secure. If somebody doesn't have your RFID tags, but does know their IDs, and if they have a little while with the programmed Leonardo, and if they have the right technical skills and determination, they can figure out your passwords. I don't know when those circumstances will arise, but I warned you. Also, if they have enough time with the programmed Arduino, and a computer with the right software, they could figure out your passwords.
Can I trust you?
No. I did design it to be very secure, but I'm no expert. I could possibly have overlooked something that could easily crack it, but I did put in a lot of time thinking about it. With that being said, I am not responsible for anything bad that happens to you because of this.
Can I see it in action?
Yes, of course you can.
.
Step 1: Supplies

Here are the supplies in which that you will need:
1 Arduino Leonardo
1 RFID Reader
1 RFID Reader Breakout
Many RFID Tags (one for each password)
1 Computer
Wire
Optional:
1 LED
1 Enclosure
Step 2: Wire Up RFID Reader

Solder the RFID reader to the breakout board. Then, wire as follows:
RFID reader pin 1 to ground.
RFID reader pin 2 to 5v.
RFID reader pin 11 to 5v.
RFID reader pin 10 to LED. (Optional: for debugging purposes. Will light up when a card is scanned.)
RFID reader pin 9 to Arduino pin 10.
RFID reader pin 7 to ground.
Done!
Step 3: Label Cards

For this step, all you need to do is label your cards. I only made three, but you may need a lot more, depending on how many accounts you have.
Step 4: Figure Out RFID Identifiers

Run this code on your Arduino:
#include <SoftwareSerial.h>
SoftwareSerial RFID = SoftwareSerial(10, 11);
void setup ()
{
Serial.begin(9600);
RFID.begin(9600); //Begins connection with the reader
}
char read;
void loop ()
{
while(RFID.available() > 0)
{
read = RFID.read(); //Read from the RFID reader
Serial.print(read); //Print results to the computer
}
}
While that code is running, open up the serial monitor. Scan labeled RFID tags and write down what showed up in the serial monitor. When writing, watch out as to not mix up 0s and Os.
You can discard your paper after you finish programming your Arduino.Print
Step 5: Program Arduino

Here's the basic code you need to put on your Arduino:
#include <SoftwareSerial.h>
SoftwareSerial RFID = SoftwareSerial(10, 11); //RX is 10, TX (which won't be used) is 11
String key; //The key that was scanned
void setup ()
{
Keyboard.begin(); //Begins the keyboard (obviously)
RFID.begin(9600); //Begins connection with the reader
}
char read; //The most recent character read
void loop ()
{
while(RFID.available() > 0) //Checks for input from the RFID reader
{
read = RFID.read(); //Takes input from from the RFID reader
key += read;
if(key.indexOf("4F0088AE355C") >= 0) //The ID of your "email" card
{Keyboard.println("myemailpassword"); key = "";} //The password for your email
if(key.indexOf("4F0088FAFCC1") >= 0) //The ID of your "computer" card
{Keyboard.println("mycomputerpassword"); key = "";} //The password for your computer
if(key.indexOf("4F0088DA978A") >= 0) //The ID of your "instructables" card
{Keyboard.println("myinstructablespassword"); key = "";} //The password for your instructables
}
}
Look through that code carefully. Certain lines need to be changed to match your cards' IDs and your passwords.
Once you've changed the necessary lines, you may upload it.
Step 6: Enclose

If you are planning to use an enclosure, enclose your TouchPass now.
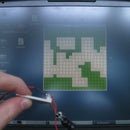
Step 7: Use!

Your TouchPass is now ready for use!
Simply plug it in, and scan one of your cards to enter your password. You may also create cards for entering usernames, URLs, commands, or anything else you can imagine!
If you have any questions, comments, or angry rants, feel free to post them in the comments section. I'll try to get back to you quickly.
Have fun and happy password entering!


