

Introduction: Tutorial: How to Control LED by Using Arduino and Relay
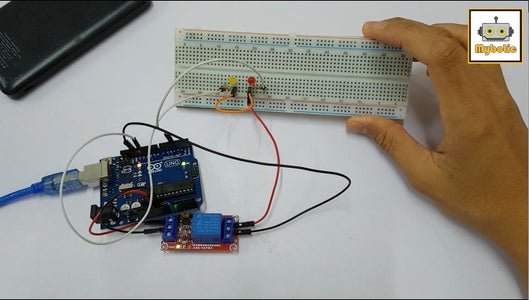


Hello guys! Today we're going to make project that use SIngle Channel 5V Optocoupler Relay module. This project objective is to control LED by using the combination of Arduino UNO and relay.
Before we start, let me explain to you for short what is relay. Relays are switches that open and close circuits electromechanically or electronically. Relays control one electrical circuit by opening and closing contacts in another circuit. As relay diagrams show, when a relay contact is normally open (NO), there is an open contact when the relay is not energized. When a relay contact is Normally Closed (NC), there is a closed contact when the relay is not energized. In either case, applying electrical current to the contacts will change their state.
But why we need to use arduino? Because we want the project control itself, not we are controlling it 24/7.
Step 1: Gather You Things Up!
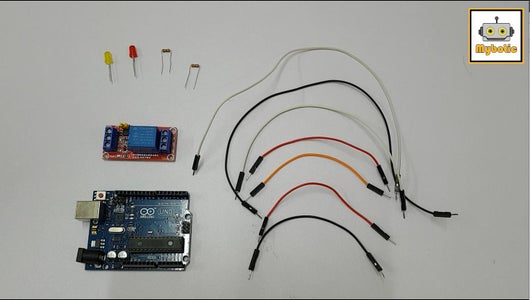

You need this components below in order for this project to work:
- Single Channel 5V Optocoupler Relay Module
- Arduino UNO
- 2xLED
- 2x 330 ohm resistors
- Jumpers
- Breadboard
- Power Supply (5V)
- Power cable (to connect arduino)
Step 2: Upload the Source Code Into Your Arduino UNO
Upload the source code into your Arduino code that we give. The source code is to control the relay by using timer. We just do the basic function, you can change it according to your creativity.

Step 3: Let's Start!
We made a video with on how to setup the project. It is more understandable than you reading it. Good luck on your project! :)


