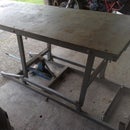
Introduction: Picnic Table and Bench - 2 in 1
This instructable is for an easy acces picnic table that folds to a bench in two seconds.
I couldn't find any designs that i liked so i created this one.
Ideal for a deck or area with limited space.
All the wood are two by fours (89x38)
A sketchup version can be downloaded here
Step 1: The Legs
I used untreated 2x4 softwood which is glued and screwed .
If you use treated wood it needs special glue i think.
The triangle block in front of the legs isn't in the first picture ,ive put it on later to make it more stable.
Step 2: The Tops
The short supports under the table are put on after assembly of the legs to make it easier to acces the hinges and to make a tight fit.
For the seat top i used 4 12mm (0.5 inch) steel rods.
First put three 2x4's together and drilled to almost the end.
Put some glue in the holes and placed some 15 mm (0.6) blocks between them and hit the rods in and clamped it.
Or maybe some other connection can be made with trench cuts .
Step 3: The Hinges
I've modified the hinge for the seat to make the gap between the 2x4's
Step 4: The Support
This piece is best made last to make if fit perfect
Step 5: The Top Lock
This is what is made to lock the top so it won't tilt .
But a sliding lock could also be used.
Step 6: In Inches
Step 7: Extra Bench
I also made an extra bench to put my feet on and to add some extra seats for the picnic table.
Another option is to attach an extra bench on the legs.

First Prize in the
Outside Contest
46 Comments
6 years ago on Introduction
can i tell you some? two by four (89x38) isn`t correct, it`s correct (5,08cm x 10,16cm), anyway thank for your proyect, from argentina. thank again
Reply 2 years ago
When the board is first rough sawn from the log, it is a true 2" x 4" (5,08cm x 10,16cm), but the drying process and planing of the board reduce it to the finished 1.5" x 3.5" size (89x38).
Question 4 years ago on Step 7
Could I get this plan in standard units of measure?
6 years ago
I think I will get better at building from schematics with experience. I think I can get this done but will create a pieces and cutting list to work from until I get used to working with schematics only. Thanks for you help and a great design.
7 years ago on Introduction
How many 2X4's did you use?
Reply 7 years ago on Introduction
About 30 meters in total
Reply 6 years ago
Wow that's a lot!
Reply 7 years ago on Introduction
thank you!
6 years ago
I paid for a 2 year membership so I could build this bench/table. This is by far the best looking design I've seen. After downloading the instructions, however, I am confused as to what I need to cut to build this project. Is there an individual pieces and cutting list that goes with this that I'm not seeing? Also I could use assembly instructions. I think I have adequate skills to build this project but perhaps my skill level is not high enough to interpret the instructions. I paid $5 each for two other designs and although I don't like their designs, their instructions are easy to follow. I will see if some carpenter friends of mine can help me but would appreciate any suggestions you might have. Great looking design - Thanks
Reply 6 years ago
All the measurements are in the pictures.
I think it's best to print them and number all the pieces .
Then cut the individual pieces .
Also all the measurements for assembly are in the pictures.
Good luck.
6 years ago
I really like this design. I can't figure out how to purchase the plan. Is there a way I can purchase the plan and receive it via e-mail? I can't find any help on this web site but there are a lot of things I would like to get plans for building.
6 years ago on Introduction
Nice idea!!
6 years ago
Sorry, what do you mean with 2x4's
Reply 6 years ago on Introduction
7 years ago on Introduction
Very nice!! I will show the wife on the weekend. She had to go back to work but I am still on vacation. Your bench would look great around my new fire pit.
Reply 7 years ago on Introduction
I like your new firepit, too! What's it made of?
Reply 7 years ago on Introduction
I am very glad you like it, we do too. Thank You.
The pit itself is a crusher cone from a gravel company. It's about 3/4 inch steel and very heavy, about 500 lbs. The stones are made from a concrete mold. Quickcrete has a number of different ones. The biggest challenge was the 30'C+ temperatures we worked in to make the stones. There is of course a base of gravel below, to ensure a stable future.
7 years ago on Introduction
Love convertible stuff - and this one's so neat in design and clean lines. Great job.
7 years ago on Introduction
Great design
Good next project
7 years ago on Introduction
Super! Thanks!