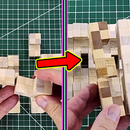
Introduction: Make and Solve a 12 Piece Burr Puzzle
I finally did it. I've come up with a new way to build these burr puzzles. If you're wondering what a burr puzzle is, "A burr puzzle is an interlocking puzzle consisting of notched sticks, combined to make one three-dimensional, usually symmetrical unit," (according to Wikipedia.)
For my 3-piece and 6-piece burr puzzles, I used 1 inch square wooden dowels that I measured and cut into shape. But for this 12-piece burr puzzle, I'm going to be using these 1/2 inch square blocks. If you want to build one with a different size of blocks, you'll be able to easily follow this Instructable for any size of blocks.
For some of the images, I'll be using some Minecraft screenshots because that'll help make it easier to describe the process that I'm about to show you.
If you would like to see a video version of this Instructable, you can see that here: https://youtu.be/G1GLyaIsyAs
Supplies
Step 1: Plan the Layout
The first thing that you wanna do is to stack up the blocks into the shapes of the puzzle pieces. The 3-piece burr puzzle that I made had 2 different shaped pieces, and the 6-piece burr puzzle had 4 different shaped pieces. But this 12-piece burr puzzle that I'm building now has only 1 shape for all of the 12 pieces. And with the blocks laid out into the shape, it's easy to count how many blocks are needed for each piece.
Now let's glue these blocks together. It will help to refer to the Minecraft screenshots to see the pattern that you need to glue the blocks together for each of the next few step.
Step 2: Glue Into Pairs
You want to glue the blocks into pairs. I recommend using clamps to hold the blocks until the glue sets.
Step 3: Glue Into Squares
Next, glue the pairs of blocks into squares of blocks.
Step 4: Make 2 Cubes
Now use 4 of the squares to make cubes so that you end up with 2 cubes. You'll also have 3 squares of blocks remaining.
Step 5: Glue a Square to Each Cube
Glue one square to each cube, to make the shape that's shown in the picture.
Step 6: Gluing the Middle Together
When gluing these last segments together, keep in mind that this connection is the weakest point of these puzzle pieces. If you have a clamp that's big enough to clamp the whole piece, I recommend using it. If you don't have a big enough clamp, I have another Instructable where I'll show you how to reinforce this section to be much stronger. That Instructable will also help if you're having issues of it breaking here.
Here is the Instructable to reinforce the puzzle pieces: (Coming soon!)
Step 7: Making Adjustments
Now that you have all 12 of the puzzle pieces glued together, there are some adjustments that you'll need to make. Each piece has 3 gaps that need to be wide enough for the other puzzles pieces to easily slide through. One way to help this is to sand the sides of the pieces. Sometimes it'll fit through one gap, but not another. In this case, you can use a file or a rasp to slightly widen the gap. When you do this, it's important to make sure the alignment of the gaps and the center segment match up for all 12 pieces.
Step 8: Assembling/Solving the Puzzle
Now let's show you how to assemble the puzzle. The first time you assemble the pieces, you may need to adjust their fit a bit more. Since it's easier to show this process in a video instead of pictures, I show the solution to the puzzle towards the end of this video: https://youtu.be/eXusCdSyTCo
Here's another video I made that has only the puzzle solution. The pace of this video is slow enough so that it's easy to follow without needing to pause the video much: https://youtu.be/2aJbryt2Uoo
When you have all of the puzzle pieces placed and it's time to slide the sections back together, do it slow and gently because you may need to wiggle some of the pieces around a bit as they catch onto each other.
Step 9: Adding Wood Oil
This step is optional. It won't add to the function of the puzzle. But in my opinion, it makes all of the puzzle pieces look much better. Just get your choice of wood oil and apply it to the pieces.
Step 10: And That's It!
I was inspired to build these puzzle pieces out of blocks by playing Minecraft. I have a YouTube channel where I'm making how-to videos for building in Minecraft. If you want to see what I'm doing over there, you can click the video link below. Thank you for checking out my Instructable!
Minecraft Video: https://youtu.be/AZtO9HYjjCs


