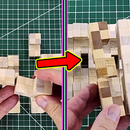
Introduction: Make and Solve a 6 Piece Burr Puzzle
Previously I made an Instructable about a 3 piece burr puzzle, and I mentioned that I was making a 6 piece burr puzzle. While that 3 piece burr puzzle is kind of boring, the 6 piece burr puzzle is a bit more, well, puzzling. I say this because there's not just one design for a 6 piece burr puzzle. Depending on what restrictions you have for the design of the pieces, you can have between 25 different pieces available to choose from, to several hundred different pieces. Even with just the standard 25 piece designs, you can use them to assemble 6 of those pieces into over 300 different configurations.
The puzzle I'm making in this Instructable will use 4 different piece designs. I chose this one to do because there's a sequence to how the pieces are cut, so it should be easier to make than some of the others. If you have a table saw, that would be the preferred tool to use for this. I don't have one, so I'll be cutting all of the pieces by hand.
All of my measurements for the pieces and the cuts will be in relation to the width of the dowel. This should help you make your own puzzle with this Instructable using any side that you want.
If you would like to see a video version of this Instructable, you can see that here:
Supplies
Step 1: Cut the Lengths
To begin, you'll need 6 pieces cut from your square dowel. They need to be cut at the length of 3 times the width. For example, since my dowel is 1 inch wide, I cut mine at 3 inches long. You can make them longer if you want, or even slightly shorter. But the width to length ratio of 1:3 will give it a more uniform look.
Step 2: Piece 1
The first piece is the easiest piece to make, because it's basic. I doesn't have any notches cut out. You just take one of the pieces you just cut and set it in the done pile.
For the other pieces, there will be 3 notch patterns. For the next 3 steps, you need to mark the pattern for that piece onto all of the remaining pieces. The patterns build upon each other for each subsequent piece.
Step 3: Piece 2 - Marking the First Notch
For this step, you'll make this notch pattern on 5 of the pieces, but only place one piece in the done pile. My description of this step may be confusing, so look at my included pictures to see the marks I made
Mark a line around the middle of the piece. From that line, mark 1/2 width on either side. You can see in the picture that these marks add up to the full width of a single piece. Extend these 2 half width mark lines around 3 of the side. Connect these lines in the middle on 2 opposite sides of the piece. I shaded out the section that needs to be removed, you can see that in the pictures.
Mark this section on 5 pieces. Set one in the done pile, we will mark the other 4 some more.
Step 4: Piece 3 - Marking the Second Notch
In the first picture for this step, you can see on this next piece that there a second similar notch, but with the piece rotated and the notch shifted to the side. From the bottom, measure from the center line, the width of one piece. Extend this mark around 3 of the sides, like before. Then connect this line to the center line on opposite sides of the piece, just like before. After shading in the section to remove, you can see in the pictures how the updated pattern looks.
Add this pattern to all 4 of these remaining pieces. You need 1 piece like this so put 1 in the done pile.
Step 5: Pieces 4, 5, 6 - Marking the Third/Final Notch
For the final pattern modification, just repeat the change from the previous step, but mirrored to the other side of the middle line. Do this with all 3 of the remaining pieces. After shading in the section to remove, you can see in the pictures how the updated pattern looks.
This is the last pattern change that you need to make and the pieces are all marked and ready to be cut. Except for the 1 piece that's not getting cut. Don't cut that one.
Step 6: Cut Half Way Through the Blocks
Now that you have the sections to remove marked off, it's time to start cutting the pieces. This is easy to do, just cut along the inside edges of your marks. I used a hand saw to do this, but if you have a table saw, that would be much easier to use for this. (Always be safe with your saws!) Do not cut all of the way through the wood blocks, only cut half way through. I used my marks to let me know when I cut through it far enough. Again, check the pictures in this step if my description is confusing.
Step 7: Finish Cutting Out the Extra Section
To finish cutting out the sections, you can use a chisel or a utility knife with a strong blade. Just cut along the final mark lines. Again, a table saw would be preferred for this, if you have one.
Step 8: File and Test Fit
If you didn't cut the grooves out perfectly, you'll need to file it to it's final size. To know when you have it sized correctly, you can use the blocks themselves to test fit. All of the notches that are a single width need to be able to fit the width of a block. The notches that are extra wide need to be able to fit the width of 2 blocks side by side.
Step 9: Now for the Puzzle Solution!
This step is all about the pictures. The pictures show the steps for the puzzle solution. Just a quick note... the 1 piece that doesn't have any notches will be the last piece to use. It just gets pushed in through the opening that's left
Step 10: And That's It!
Now you can build one of these burr puzzles, and you have the solution.


