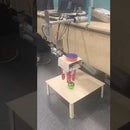
Introduction: 3-DOF Gripper Manually Controlled by Joystick
In my previous tutorial I made the gripper and programmed it with arduino code. In this tutorial I will use the same gripper and will mount it on the 3-DOF system so that we can mov ite in 3-D plane and grasp different objects, Its a lengthy process so I will not go into every detail but I will try to cover the major things. Since I have done most of the things in the previous three tutorials so you can check them in case of any query.
Tutorial 1 (Making of Soft Muscle)
Tutorial 2 (Making of Gripper Made of Soft Muscles)
Tutorial 3 (Making of Gripper Made of Soft Muscles With Arduino Code)
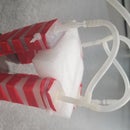
Step 1: Gripper :
From second last tutorial
Step 2: Linear Motors :
We need three linear motors since our gripper will move in 3D plane.
Note: Motor is just for reference you can buy motors of different sizes.
Step 3: Base for Gripper
it may look fancy and complicate but the picture is only as a reference all you need is a simple 15cm X 15cm wooden sheet. Place two holes at the middle of it so that you can attach it with the motor and place four more holes at the four ends of it like shown in figure, these holes are to fix the silicone connector in them. One end of the connector will be attached with the gripper and other end with the pipes.
Note: Instead of wooden sheet you can also 3D model the base, like I did.
Step 4: Attach the Gripper With the Base
Now Attach the gripper with the base through silicone connector. and attach the other end of the connector with the pipes, the one we used in the previous tutorial. Attach the base with one of the linear motor trough those tow holes placed at the center of the wooden sheet, keep the orientation in mind(Motor in X-direction and Gripper in Z-direction).
Note: Ignore the wooden part above the base, that's not a part of this tutorial or even project.
Step 5: From 1-D to 2-D
Since our gripper is attached with only one motor yet so our system so far can move in single plane, in order to move it in 2-D plane we need to attach another motor with it, the way it is shown in figure. You simply need an L-shape connectors to attach these two motors.
The final output of this is already shown in last figure.
Step 6: From 2-D to 3-D
Now finally attach the third motor (in my case bigger motor) with the second motor and convert your 2-DOF system into 3-DOF system, as shown in figure.
Step 7: Valves to Control Air Flow in Gripper.
Either take two valves or five valves(my case), if you don't want to control the each muscle then use the former one and if you want to control all the four muscles of the gripper separately then use the later one.
- Two valves: One for intake and other for release of air.
- Five valves: Four for intake and fifth for release of air.
Connect the valves with the gripper and the motor driver, as i have explained in the previous tutorial, the one extra thing from the previous tutorial is the inclusion of release valve, because we don't want the air to get trapped in the gripper forever so we will release the air whenever we want through the release valve(Keep the one end of the release valve open to atmosphere) as shown in figure.
Step 8: Relays to Drive Motors:
One can say that we are using motor drivers to run the valves but not the motors, why is that? Yes sure one can do that but in my case the motor drivers were of low power and it was difficult for them to drive the motors with high current, plus due to the switching the large spikes of current damaged my number of drivers so to over come that problem with limited period of time(I already had some relays ) instead of waiting for the large power drivers I used the relays. The are desirable because of high insulation although we lose the control of motor speed(in our case that is not a big issue).
I am not going to explain the connection of the relays but six relays are enough to control the three motors and to slow down the speed of motor I used the high power resistors.
Note: If you have no idea about relays then you better see some tutorials related to its working.
Step 9: Joystick
Since we are controlling it manually so for manual control we used the 2-D two joystick.
- Left Joystick
- Along X-axis to control the left-right motion of second motor.
Along Y-axis to control the forward-backward motion of third motor (the bigger one in my case).
- Right Joystick
Along X-axis to control the intake and release of air from the valves.
Along Y-axis to control the up-down motion of first motor
Attach the joystick with the arduino analog pins.
Note: See the tutorial on how to connect the joystick with the arduino.
Step 10: Bird Eye View
From this angle one can see that how we have connected the pump (in our case blue one), valves, joystick and relays with the arduino.
Step 11: Separate Power Supply
In order to make sure the safety of the system. we connected two different power supplies (12V each) with the system. One for the valves, pumps, joysticks and arduino and other one for three motors as shown in the figure.
Step 12: Arduino Code
//********************************************************** Variables **********************************
int release_valve_pin = 2,muscle1_valve_pin = 3,
muscle2_valve_pin = 5,
muscle3_valve_pin = 6, muscle4_valve_pin = 7; int pump_pin = 4; int motor1_pin1 = 34, motor1_pin2 = 35, motor2_pin1 = 30, motor2_pin2 = 31, motor3_pin1 = 32, motor3_pin2 = 33; </p><p>int x1_pin = A15, y1_pin = A14, x2_pin = A13, y2_pin = A12, en_JS1 = 50, en_JS2 = 51; //********************************************************** Functions ********************************** void close_valves() { analogWrite(release_valve_pin, 0); analogWrite(muscle1_valve_pin, 0); analogWrite(muscle2_valve_pin, 0); analogWrite(muscle3_valve_pin, 0); analogWrite(muscle4_valve_pin, 0); } void open_valves() { analogWrite(release_valve_pin, 255); analogWrite(muscle1_valve_pin, 255); analogWrite(muscle2_valve_pin, 255); analogWrite(muscle3_valve_pin, 255); analogWrite(muscle4_valve_pin, 255); } void grip() { analogWrite(pump_pin, 255);</p><p> analogWrite(release_valve_pin, 0); analogWrite(muscle1_valve_pin, 255); analogWrite(muscle2_valve_pin, 255); analogWrite(muscle3_valve_pin, 255); analogWrite(muscle4_valve_pin, 255); } void hold_grip() { analogWrite(pump_pin, 0); close_valves(); } void release_grip() { open_valves(); } void motor1_forward() { digitalWrite(motor1_pin1, 1); digitalWrite(motor1_pin2, 0); } void motor1_back() { digitalWrite(motor1_pin1, 0); digitalWrite(motor1_pin2, 1); } void motor1_stop() { digitalWrite(motor1_pin1, 1); digitalWrite(motor1_pin2, 1); } void motor2_forward() { digitalWrite(motor2_pin1, 1); digitalWrite(motor2_pin2, 0); } void motor2_back() { digitalWrite(motor2_pin1, 0); digitalWrite(motor2_pin2, 1); } void motor2_stop() { digitalWrite(motor2_pin1, 1); digitalWrite(motor2_pin2, 1); } void motor3_forward() { digitalWrite(motor3_pin1, 1); digitalWrite(motor3_pin2, 0); } void motor3_back() { digitalWrite(motor3_pin1, 0); digitalWrite(motor3_pin2, 1); } void motor3_stop() { digitalWrite(motor3_pin1, 1); digitalWrite(motor3_pin2, 1); } void en_JS(){ digitalWrite(50,LOW); //JS1 digitalWrite(51,LOW); //JS2 digitalWrite(53,HIGH); // Power (VCC) } //****************************************************Remaining Code ************************************ int i=0; void setup() { Serial.begin(9600); pinMode(23,OUTPUT); digitalWrite(23,0); pinMode(motor1_pin1, OUTPUT); pinMode(motor1_pin2, OUTPUT); pinMode(motor2_pin1, OUTPUT); pinMode(motor2_pin2, OUTPUT); pinMode(motor3_pin1, OUTPUT); pinMode(motor3_pin2, OUTPUT); motor1_stop(); motor2_stop(); motor3_stop(); close_valves(); en_JS(); //Enabling Joysticks for( int i=36; i<=45; i++){ pinMode(i,OUTPUT); digitalWrite(i,HIGH); } } void loop() { if(analogRead(y1_pin)<400) { motor1_forward(); motor2_stop(); motor3_stop(); hold_grip(); Serial.println("1"); } else if(analogRead(y1_pin)>700) { motor1_back(); motor2_stop(); motor3_stop(); hold_grip(); Serial.println("2"); } else if(analogRead(x1_pin)>700) { motor2_back(); motor1_stop(); motor3_stop(); hold_grip(); Serial.println("3"); } else if(analogRead(x1_pin)<400) { motor2_forward(); motor1_stop(); motor3_stop(); hold_grip(); Serial.println("4"); } else if(analogRead(y2_pin)>700) { motor3_back(); motor1_stop(); motor2_stop(); hold_grip(); Serial.println("5"); } else if(analogRead(y2_pin)<400) { motor3_forward(); motor1_stop(); motor2_stop(); hold_grip(); Serial.println("6"); } else if(analogRead(x2_pin)<400) { grip(); motor1_stop(); motor2_stop(); motor3_stop(); Serial.println("7"); } else if(analogRead(x2_pin)>700) { release_grip(); motor1_stop(); motor2_stop(); motor3_stop(); Serial.println("8"); } else { motor1_stop(); motor2_stop(); motor3_stop(); hold_grip(); Serial.println("9"); } i++; }
Step 13: Code Explanation
Arduino code is very simple and self explanatory, but in case you find any difficulty you can ask the question in the comment section.


