

Introduction: All-In-One Camping Kit

We designed this package for adventurers who crave convenience without sacrificing quality, and this kit is your ticket to hassle-free outdoor excursions. It is packed with essentials meticulously curated for any camping trip, from sturdy shelter to reliable cooking gear, it ensures you're prepared for whatever nature throws your way. Whether you're a seasoned outdoor enthusiast or a novice camper, our comprehensive kit promises to streamline your experience, leaving you free to soak in the beauty of the great outdoors without worrying about the logistics. Say goodbye to the stress of packing and say hello to Wildlife Cuisine Companion.
Supplies

These are supplies to make the prototype as our product is intended to be made by companies and is made from steel and wood.
- 3D printer(MakerBot Replicator Z18)
- Filament
- Any slicer(preferably MakerBot)
- Files for the spring


Step 1: Putting the Files Into MakerBot

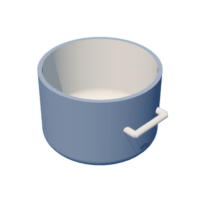
Insert the files Component 3, Component 4, Component 5, and Utensils into your slicer(preferably MakerBot) from the supplies section above. Once you can insert all the files you will see that each of the components are on different build plates. To fix this, you want to reduce the size of each component by 50%. Once you have done that, you can copy-paste the utensils, the pot, the cup, and the bowl to one build plate centering the pot and keeping the others to the sides. Save the file and title it appropriately and do the same for the Component 1 and Component 2.
Step 2: Exporting the Files to the Printer
Once you have finished putting the files into the MakerBot Software, you click on add printer, then add an unconnected printer, and then replicator Z18. Once you have done that, get a USB and export the files onto the USB. You want to then insert the USB into the printer(s) and find the file you want to print and hit print. If you have two Replicator Z18's then you can print both files at once, but if you have one you can wait for the first to finish and then print the second.
Step 3: Final Print

Once you have finished printing the files, take off the supports very carefully without breaking anything and voila there you have your very own prototype of the Wildlife Cuisine Companion.

This is an entry in the
Engineering in the Kitchen - Autodesk Design & Make - Student Contest


