Introduction: Alternative Christmas Tree 2015
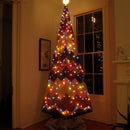
Continuing our family tradition here is the alternative Christmas tree for 2015. This year, as all years, everyone in the family comes up with the designs, We sort through them until we come to some conclusion of who had the best idea. Then we all work on that one design to make it even better. Also, with some minor exceptions, we try to free source the main parts of the tree. This year we had, or found, everything, except the lights (every set we pulled out was bad).
This years tree is somewhat like a mobile. We have talked about doing a project like this in the past. The disk you see are counter balanced by the disk at the other end of the rod they are hung from. We found a balancing point in the center (or not center depending on the weight of each disk).
Step 1: Supplies
The impetus for this years tree was a collection of embroidery hoops that my wife a ended up with a number of years ago. She had planed on using them for an art piece.
The supplies & tools are;
-a long dead branch or small tree. (we found this on a short search in the woods)
-Christmas tree stand
-Embroidery hoops
-Fabric, or Butcher paper, & Wax paper.
-Razor knife
-Sawzall, bow saw, or other such saw to cut tree to length.
-Cordless, or corded drill
-Screw gun (or drill from above) to drive screws into tree
-Screws
-Pliers (I prefer Linemans Pliers)
-Bailing wire (found in the concrete/cinderblock area of your home building store. Usually next to the rebar)
-rags (to wipe down the bailing wire. Baling wire usually has an oil on it to keep it from rusting.)
Step 2: Assembling the Parts
First we put the paper into the embroidery hoops. We have large rolls of butcher paper & wax paper on hand so we decided on that. We also had considered using some form of shiny gold & silver fabric. We over sized the pieces, which allowed us to get tight smooth panels inside the hoops. once the paper was installed we cut the excess of with a razor knife. We did approximately 50/50 butcher/wax paper hoops
Secondly we made the “rods” to hang our disk on. We did this by taking multiple strands of the baling wire (different lengths for different sections of the tree), holding one end of the baling wire with the linesman pliers, and chucking the other end of the baling wire into a drill. **Please use caution, this could be dangerous!!** It is important for the one person who is holding the ends of the strands of bailing wire with the pliers to keep tension while the other person runs the drill. Run the drill slowly it does not take a lot of speed. As you run the drill you will notice the bailing wire twisting uniformly. We found we needed 3 to 4 runs of bailing wire in each twisted section to make it strong enough to hold our disk. One tire rods were made, we wiped them down with a rag, as they were pretty dirty (baling wire comes covered in oil to keep it from rusting).
You could easily make these rods out of a piece of dowel or other thicker pieces of wire. We just used what we had.
Step 3: Assembling the Tree
Once we had all the components made, wrapped our tree in lights.
Once the tree was lit, we experimented with our disk, and our rods, to determine lengths and weights. It was at this time that we realized some of the strands we have made with only two pieces of bailing wire were not going to be sufficient. We made some more Rods out of 3 & 4 strands of bailing wire.
This part takes patience. Moving the rods in and out left and right determining what gets a good balance and what looks good. In some areas we were able to rest the rods on little knobs from old branches. Other places we utilized screws. One note, the threads on the screws are at an angle, our rods would fall inside of those threads. So we had to adjust our screws, and angle them so that the rods would hang the direction we wanted.
This tree is fragile. In the sense that if someone bumped into it likely all these disk would fall. That could be alleviated by stapling the rods to the trees, or pinching them in with a couple of screws. But we kind of like the kinetic energy of them sort of floating there.
Note: To mount the disk on our rods we utilized ornament hooks. To hang the ornament hooks on the rods we took two pairs of pliers and grabbed the rods with each pair a few inches apart from each other. Then moving in opposite directions created a small gap between a few of the strands. Just enough to get the hook on. Unfortunately I never took any photos of that action.
Step 4: Finish
After we had the rods and disc hanging at Heights and distances that we all liked, we added the finishing touches.
Some fabric around the base. Some magnolia leaves we had cut from our tree the week before. And our funny little illuminated electric rotating star that we put on the top of our tree.
We hope that you enjoyed this years tree. & that it inspires you to create.
Thanks!


