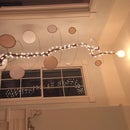
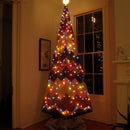
Introduction: Alternative Christmas Tree
Over the last number of years my family has made our tree instead of buying one. This year I decided to make an Instructable as we made it hope it inspirers you creativity!
Things you will need
-Branches
-Tree Stand
-Drill (cordless or corded) with bit for driving screws
-drill bits
-countersink
-2" & 3" drywall screws
-Christmas Lights
-Decorations
Things you will need
-Branches
-Tree Stand
-Drill (cordless or corded) with bit for driving screws
-drill bits
-countersink
-2" & 3" drywall screws
-Christmas Lights
-Decorations
Step 1: Collecting Parts for Your Tree
For the purpose of this Instructable I will stick to the methods used to assemble this tree, obviously one can modify to fit ones needs.
We when't on a family outing in the woods trying to find a good size branch(already dead) to use as the main trunk of the tree. This year we wanted a little bonsai feel, so we picked a "trunk" that had lots of bends. We also collected branches of various sizes to attach to the "trunk" branch. Note; I took this photo after we had started assembling, so the "trunk" branch is not in this photo.
We when't on a family outing in the woods trying to find a good size branch(already dead) to use as the main trunk of the tree. This year we wanted a little bonsai feel, so we picked a "trunk" that had lots of bends. We also collected branches of various sizes to attach to the "trunk" branch. Note; I took this photo after we had started assembling, so the "trunk" branch is not in this photo.
Step 2: Assembling Your Tree
We use a Christmas tree stand to hold the "trunk", but there are a number of ways one could make it stand up. it really helps to have at least two people for this part. Not so much for the extra hand as for the extra eyes.
After mounting the main "trunk" its time to add the branches. Heres where the extra eyes come in to play. Start with the larger ones one person moves the branch up and down and/or around the "trunk" until they get the ok from the extra eyes. Don't be afraid to switch branches if you can't make it work. You may need to make a cut at the end of the branch so it will be easy to attach, or you can pass it buy the back and screw it that way. I used a countersink bit so the wood would not split.
Repeat this process until you feel that there are enough branches for the look you are trying to achieve.
Step 3: Decorate
Decorate and enjoy!
Participated in the
Epilog Challenge
Participated in the
Joby Transform It! Challenge


