Introduction: Aluminium Sliding Carriage


In this Instructable, I will be showing you how to build the sliding carriage for different purposes (wood, metal, CNC, photography). My carriage will go onto the DIY circular saw table , and help me reduce time when cutting longer pieces, also with it will be much faster to cut different materials and also to help prevent holding your hand near the blade.
My inspiration came when I saw aluminium sliding carriage on my friends Circular Saw (Minimax ST3) and it was so easy to cut everything and to be in 0.1 mm precise; it was time to start sketching something that is going to be perfect for my setup. It was a long time since I built something, because I did not have enough free time. I hope that you will find some great info in this instructable so you can get different approaches on your setup right now.
From the upper pictures, you can see the iron frame that I will be using for setting the height of the carriage, I can tell you for sure right now that if I was to built this again I would probably create it doubled in wide than I did right now (more about that later).
Materials that you will need, are pretty simple:
-Iron Tubes 40 x 40 x 4mm (25$)
-2x Aluminium rods with support (35$)
-4x Open linear sliders with holes (25$)
-Aluminium plate (60$) or some sort of hardwood
Tools:
-Welding station
-Wrench
-Screwdriver
-Drill/Driver
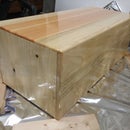
Step 1: Find Alluminium Plate Or...


When I started building my tool, I did not think about wood or some other materials, I wanted the aluminium, and after a two day search I found the piece that will work. It is EN - 5083 (AlMg4,5Mn); the guy who sells this plate did not know which DIN, EN or Chemical composition it is, neither did I. In my country, most common aluminium and the main differences between those two are as follows:
-AlMg3 - mostly used in heavy parts, shipping industry, transport industry, containers, chemical accessories (specs are: hard strength, chemical resistance (also to sea water)
-AlMg4,5Mn - mostly used in shipping industry and car industry (specs are: easy welding, high resistance to corrosion (also in the sea water conditions)
I brought my plate and asked my friend who works with aluminium which one is better, and got the answer that AlMg4,5Mn is better because it has better specifications when run through an CNC machine; also AlMg3 can get caught on the tool when drilling or flattening.
Aluminium in my country is pretty expensive, a one kg is around 6$, and the plate from picture is about 24 kg (I bought one bigger one and sliced it in half) - I got it for 100$ from the seller. If I were to build this again I am pretty sure that I would be using the hard wood, 5 or 8 cm thick, or glue for more thinner pieces. Wood workers are on every corner so you can find more people that can make you something pretty flat in less than 2 hours. I lost 7 days only to get on schedule and a few days to get aluminium’s top side straight. After measuring with an indicator it showed 1/100 mm across 800 x 240 mm plate, that is pretty flat for woodworking :)
Even 1/10 mm is great because you can tighten the clamp and get the smooth surface you need.
Step 2: Buying the Rest of Stuff


This step is a really simple one, I went and bought iron tubes for a frame as well as adjustable legs. Total cost for the frame was 25$, thickness of the iron tubes is 40 x 40 x 4 mm, and the legs I found at my friends who had them laying around in the garage.
We cut them in rough just for easier transportation, and later we brought on the circular saw, and cut it perfectly at 90°.
Step 3: Welding the Frame...


I am familiar only with stick welding, but I am behind the camera right know. Right here is my dad’s friend who came to visit us and while we were talking he offered to give me a hand with welding, so we started working.
I like to be around with people that are doing jobs for more than 30 years, every time I learn something new, the best part is that I can ask what to do next if I do not know. This was a pretty simple frame, 4 legs and 4 shorter pieces to make it more rigid, and on the top of that is a railing for sliding carriage.
Step 4: Aluminum Rails/rods With Support


On the pictures, you can see a 20 mm diameter rods, they are aluminium but coated to prevent scratching; the tolerance is H6. After cutting it in half I got two rods of 100 cm. The major problem "again" was to find the guy who can drill the rods, and support them to fit perfect in line. After more than 40 calls and recommendations I was lucky to find one guy who wanted to drill it. After two weeks, I got my rods and they are perfect, also the price was perfect too, I paid the guy 60$ for 10 holes (5 on each rod), the rail with support also costed 60$ (a total of 120$).
I was not looking online long enough to see that you can buy the rod with predrilled holes and support in the same package, for less money, and they ship the same day, but on the end of the day, I was happy that everything started coming together.
Step 5: Open Linear Sliders - SBR20UU


I ordered from the Croatian store 4x SBR20UU, but you can also find it on eBay, Ali-express or any other web store that you use. If you do not apply pressure from top side, they are pretty noisy, but when you put something heavier you get the perfect silent slide. I did not find anything bad with these slider, however you can read across the internet different opinions from different people. I am satisfied with sliders especially with their price and also - look at that shine on the aluminium plate.
Step 6: Last Testing Before Mount...


Now it was time to create some plywood boards to test the sliders and rails. After that one needs to find the place for the carriage with rods, then tighten them with clamps and drill the holes in the iron tubes - remember to find the screws with lower head, so that your sliders do not catch the head of the screw. Because this is an open linear slider, it is smart to create some way of protecting the rods and sliders from dust; if you look after them they will last much longer.
Step 7: Mistake in Building...


Like with everything, when you start to align everything you find problems :)
My problem was that I did not calculate the height of the legs, but instead of cutting everything, I glued the plywood on the height that I needed and placed on the bottom of the circular saw table.
Step 8: Conlcusion


On the upper images, you can see the final stage of how it looks, also you have my video from when I was building the cherry coffee table where I used this sliding table. The fence part is the tube 40 x 40 x 4 mm, I used the fence as a reference and aligned it to get 90° square and after everything I am pretty satisfied. For me the only thing that is left to do is to create a hardwood fence with an adjustable stop (something like this) and also to drill holes on the aluminium plate for the 45°, and 90° with an option to adjust them.
If I am building this again I would probably use the hardwood for everything, even for the frame. It is easier to work with wood then with aluminium or iron, the best part is that you do not need any special tools, you can create and edit them in a second. I think that my biggest mistake was in the frame, that is only 20 cm wide, and I needed to put two clamps, one for each side, and clamp it to the circular saw table.
If you are building something like this, please share to see your work. If you see some mistakes in writing or need any other step just let me know in the comments section.