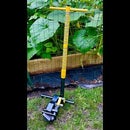
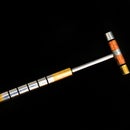
Introduction: Angle Grinder Tube / Pipe Sander Polishing Attachment Tool
There's natural talent, built up skill, but each one of us is often limited as to what we can make depending on the tools you have. This is an excellent tool to sand pipe or tubing to eliminate welded seams to make it look as though it was a solid piece of material. Generally, straight tubing doesn't conform to what we want to build, or we need to join two ends together to make extra length - necessitating a tool such as this. Or, you're a wood worker, and need to sand something cylindrical easily. Or perhaps you're stripping paint, or doing other surface prep to metal prior to welding.
Sanding is a wonderful tool and, much to each of us fabricators who have to actually do it, is horrible. It takes forever, and is BORING. So make it as quickly as possible with this tool.
The faster the speed of the sanding, the smoother the finish. A 50 grit belt on this tool can achieve a finish similar to 120 grit hand sanding simply by sanding it with a great amount of speed. Bonus! You can remove material quickly and achieve a decent finish without gouges in one step! Also, if you're attempting a brushed type of finish, it's very difficult to do by hand and keeping the direction of the brush marks all going the same direction.
It's remarkably difficult to produce good results on round objects with an angle grinder with a sanding disc or flap wheel. A belt that's flexible and can contour to the shape of the object to be sanded is ideal.
You can buy one, but it's generally for stainless steel fabricators who do it for a living, and an employer who buys them tools. They're very expensive since no hobbyist models exist for sale. Making one will save you money. Big time.
I'm in the middle of building my exoskeleton, tube chassis car. I'm modifying an existing vehicle, and creating my own frame for it. Lots of parts need to be fabricated for this build.
You can see my DIY control arms, before and after - without this tool, I never would have been able to make them professional looking. I plan on using it a whole lot to finish my build.
Supplies
- Approximately 3 feet of steel or aluminum square tubing. 3/4 to 1-1/2" recommended (I used 1-1/4" square steel tubing).
- An angle grinder with a solid metal guard. We will be attaching tubing to it, so if welding, the material above must match the material of the guard.
- 3 skateboard wheels with bearings. If you or your kids don't have one collecting dust, Salvation Army / Goodwill has these usually for less than 20 bucks. Or, make your own out of your own material.
- Lots of M8 or 5/16" hardware. Every one that's made will be made out of different tubing, and wheels, so lengths of each will vary.
- An 8mm or 5/16" drill bit, and a drill
- A tap to install threads into your angle grinder's arbor. I used an M8 x 1.25mm. You will require the tap drill size to match the tap you use. The larger the tap you use, the larger and more material must be removed from the arbor, so keep that in mind. It only needs to secure a wheel to the arbor, so it doesn't need to be herculean.
- A spring - one that resists elongation
- A 1" x 42" sanding belt. You can substitute any length you desire. I chose this size because it's common, and the longer it is, the more durable it will be.
Step 1: Design
- You'll need to obtain materials, and from that, you'll design your own.
- Obtain all parts needed. You may not have them all yet, but you certainly need some to start.
- Choose whether you'll weld it together, or do a no-weld option by simply using hardware to attach everything together. I chose welding for everything except where it needed to rotate.
- Partially design the three main components, and how each will connect to each other
- Grinder - How will the drive wheel attach to the arbor of the grinder?
- Main / Fixed arm. Decide how the arm will attach to the guard of the grinder.
- Rotating arm. Decide how it will attach to the main arm.
- Image shows my actual dimensions after it was built. The yellow circles are the centers of the skateboard wheels.
Step 2: Tap Your Drill's Arbor. Then Install Skateboard Wheel.
- Figure out the size and thread of the tap you will use. Choose the appropriate drill bit. There are loads of resources online to denote the proper minor diameter of the hole for your tap. Consult that if you don't know.
- Generally, the arbor will have a little divot in the center, denoting the center. If yours lacks this, you'll need to find the center, and punch the center so that your drill bit does not wander.
- Start with a small drill bit, maybe 1/16", and drill a pilot hole into your arbor. You will probably want 1/2" of good threads for a bolt to thread into the arbor, so you'll want to drill the hole at least 3/4" deep.
- Drill the arbor with the correct size tap drill.
- Use your angle grinder's first plate onto the arbor for the skateboard wheel to rest on.
- Remove the bearings from that wheel, and drill out any excess in the middle of the wheel with a diameter of drill that matches the diameter of your arbor.
- Choose an appropriate length bolt that matches your tap. The appropriate length will be the height of your wheel, plus the depth of usable threads, plus the thickness of a fender washer, and then subtract a little. The length needs to be able to affix the wheel to the arbor without bottoming at the bottom of the hole you tapped into the arbor.
- Attach the wheel - use the back, then install the wheel, then place a fender washer on top of the wheel, and then thread in the bolt. Tighten the bolt.
Step 3: Attach Main Arm to Grinder Guard.
Whether you weld this arm onto the guard, or use fasteners doesn't really matter. Do what's easier for you.
- Welding: Thin metals, such as a guard can be tricky to weld without burning holes. I tig welded the arm onto the guard. Tig welding is easier on thin metals. If using MIG or Arc welding, be careful. In all cases, prep the material well by removing any paint, and cleaning the surface with a wire wheel or disc sander attachment.
- No - Weld: If using hardware, temporarily clamp the arm onto the guard, mark holes to be drilled, and attach the two together that way.
- Attach the grinder to the guard / arm attachment.
In both cases: BE ABSOLUTELY SURE THAT THE ARM DOES NOT INTERFERE WITH THE BODY OF THE GRINDER ITSELF, PREVENTING YOU FROM INSTALLING THE ARM/GUARD ONTO THE GRINDER.
Step 4: Mock Up
With the main arm attached to the grinder, we want to mock up the parts with the belt to determine arm lengths, second arm pivot point, and wheel locations.
- Cut your 3 feet of square tubing in half. If it's all attached to the grinder, you may need to remove it prior to cutting. Then reinstall after.
- Place your sanding belt onto the drive wheel of the grinder.
- Place one skateboard wheel onto the main arm. Place another onto the pivot arm. Then wrap the belt around those to form a triangle with the belt. A flat surface for all of this will be helpful.
- Temporarily clamp the pivot arm to the main arm.
- Move things around, figure out the best locations for all these pieces. Then mark spots to drill for skateboard wheel bolts in each arm, and pivot point location between both the arms. Refer to my actual attachment's measurements in the photos for an example.
- The locations of everything should make it such that the belt will be VERY tight. It's best designed such that it's nearly impossible to install the belt without rotating the pivot arm, which shortens the overall circumference.
- Belts stretch a bit after use, especially new belts. Plan to allow for stretch in your design. A slot for one of the wheels would be a good idea for added peace of mind - sliding it in and out of that slot will increase/decrease belt tension.
Step 5: Drill Hole Locations for Skateboard Wheels. Assemble Skateboard Wheels. Install Wheels.
- Drill 8mm or 5/16" holes into the locations you marked for the center of each wheel on the arms. I drilled mine through only one side.
- Assemble skateboard wheels
- Choose an appropriate length bolt. Make sure that your wheels have bearings with an 8mm diameter on the inside. If not, you'll have to use a different diameter bolt that matches the inner diameter of the bearings. Skateboard trucks have a standard axle diameter of 8mm.
- Put a washer on first, this will cover the bearing on top.
- Put wheel through the bolt - these wheels will need the bearings left alone.
- Install another washer to cover the bottom bearing.
- Install a nut that matches your 8mm bolt's threads. Tighten that nut, capturing the wheel. We want it to spin well with little to no play.
- There should be ample bolt left over to install this bolt onto your arms. Make sure to have enough bolt left for washers / spacers to elevate the wheel for proper belt alignment.
- Install the bolt into the arm. Tighten the bolt onto the arms by using a nut inside the tubing.
Step 6: Attach Pivot Arm to Main Arm
However you designed your arms to attach, this is the step.
Possible types of attachments:
- You create a cradle such as I did with my design. I attached the cradle to the main arm, and drilled the hole to attach the pivot arm into the cradle itself.
- You add flat stock onto two sides of the non-wheel end of the pivot arm. Since you used the same size material for both, the space between the flat stock pieces will the the same as the main arm. You can weld these on, or secure them with fasteners onto the pivot arm.
- Make sure the arm freely pivots, and doesn't bind on the main arm.
- Drill 8mm hole through the pivot arm and main arm. This is where the pivot arm will rotate. You will want to recheck the location by repeating the mock up step to ensure proper belt tension prior to drilling.
- Using M8 hardware, run a bolt long enough to go through the main arm and pivot arm. Use a nut on the other side. I used a nylon lock nut so that the nut would not fall off. You don't want to tighten the bolt so tight that the pivot arm can't rotate.
Step 7: Determine Stops for the Pivot Arm.
Run bolts through the pivot arm. We need to stop the pivot arm from going beyond where it should in both the directions it can rotate. I welded on a nut, then installed a bolt for one direction, which is adjustable by turning the bolt in or out. This hits the main arm and prevents it from rotating further. The cradle prevents it from going the other way on my design. However you want to achieve this, is entirely up to you. This is the fun part of making things, design!
The reason why these are necessary is that as the pivot arm rotates, the belt will get looser. At some point, the belt can fall off. We want to have some travel, but not beyond that.
You'll want to install the belt for this process to determine how stops should limit travel.
Step 8: Add Spring
- Drill a hole in the main arm below the pivot point (grinder side) for one spring attachment point. Put it far enough away so that it has some leverage. Attach the spring with a bolt and a nylon lock nut. Do not tighten the nut all the way. The spring needs to be able to clear the body of the pivot arm.
- Stretch the spring and put it onto the pivot arm. Mark a location where the spring has enough power to pull on the pivot arm, but not so far away that it'll be impossible to install a bolt with a spring through it. Drill a hole in this location.
- Put a bolt through the other end of the spring, stretch the spring, and insert the bolt through the pivot arm. Put a nut on the other side.
Step 9: Cut Off Excess
Trim excess tubing off the main arm and pivot arms. They don't need to be any longer than where the wheels end - it'll just add weight, something for the attachment to interfere with the surfaces to be ground, and probably look silly.
Step 10: Align Skateboard Wheels
You'll need to align the two wheels with bearings in them. The drive wheel is at a fixed height. The other two can be raised or lowered by adding/reducing washers between the arms and wheels. Spin the belt, see where it naturally goes. We want the belt to run in the middle of all the wheels. If the belt is running low on a wheel, remove some washers. If it's running high, add washers.
Step 11: Add a Handle.
Depending on whether you're right or left handed, and what feels comfortable to you, you'll want to orient the handle that way.
My handle is just two pieces of 1" round tubing, 45° angles cut on either end, welded together, and welded to the main arm. I'm sure it'd be easy to create a handle without welding too. If you've made it this far, you're more than capable!
Step 12: You're Done! Tips on Using It!
- If grinding down welds, I find it best to use a flap wheel with very abrasive grit first (36 grit). Get it down to almost flush. Don't worry about the low spots in case of welding undercut or impurities - it's more important to have a sturdy weld than to remove a ton of material chasing down low spots. You can add more metal by welding more on. Or if you're painting the thing you're grinding, use a bit of Bondo glazing to fill them in prior to sanding.
- Start out with a more abrasive belt, 50 grit for example.
- Move to an intermediate grit, 80 grit for example.
- Finish with 120 grit or higher for a shiny finish.
- Keep belt as perpendicular to the face of what you're sanding. Avoiding doing so will pull the belt off, or even worse, eventually tear the belt, causing it to rip altogether. Belts last quite a while if you keep it perpendicular.
- Keep broken belts around for tight corners or tight spots that you can't get with the attachment. Use them by hand on either side, going up and down like rubbing a ribbon on something.
- The middle of the belt is the part where it curves the most, so try to grind using the belt in the middle of any two wheels.

Participated in the
Metal Contest


