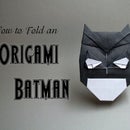
Introduction: Batman V Superman: Origami Batarang
Updated as of October 2017- Just posted a how to video on folding this origami! hope it helps! Have a certain superhero you need to take out, but just have paper lying around? I can show you how to fold them into deadly weapons that will make your enemies cower in fear. Just make sure to spray on kryptonite dust for those from the planet krypton. The new movie “Batman v Superman: Dawn of Justice” was what inspired me to create it. This instructable will show you how to take a square piece of paper and fold it into Batman’s newest Batarang design. I recommend you use paper with only one color on both sides, because my design won’t look right if you use say black on one side and white on the other. Hope you like it! Skill level: Intermediate
Step 1:
Start with a square piece of lightweight to medium thickness paper. Fold and unfold horizontally. Flip over and rotate 45°.
Step 2:
Fold and unfold diagonally, but keep the top flap folded down.
Step 3:
1. Valley fold and unfold the corner in the middle.
2. Valley fold the corner up to your previous crease.
Step 4:
Now fold the point back down. Take the crease you just made and valley fold up flush with the very top edge of your paper.
Step 5:
Flip over.
Step 6:
Now valley fold this corner up to match the other side. Flip back over and rotate 180°.
Step 7:
Valley fold and unfold both sides of the paper flush with the top.
Step 8:
Valley fold the paper up, making a crease about in between the triangular folds you just made and an old crease. Refer to the photo because this fold is crucial to making the head of the bat the right height.
Step 9:
Squash fold on both sides.
Step 10:
Like this. Now fold the point down. Then take the bottom portion of the model and gently curl a little bit of the paper up, giving it a more curved shape. Flip over.
Step 11:
Crimp fold both wings. If done right, this will form the claws of the bat on top and also the perception of points on the bottom of the wings. Refer to the next photo to get the folds just right.
Step 12:
Mountain fold a small portion of each wing.
Step 13:
Now curl a small portion of the head back to create the illusion of ears.
Step 14:
Finished! I also have another great batarang Instructable I made that you can check out here- How to Fold an Origami Batarang from the Dark Knight


